
Propagation
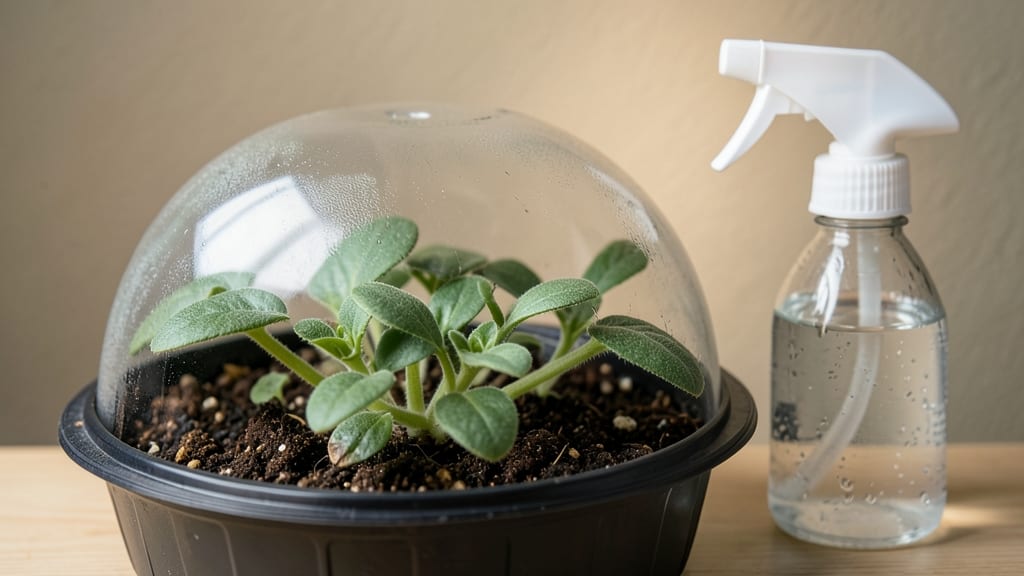
Germinating flower seeds indoors can turn a chilly windowsill into a nursery where tiny sprouts race toward the light—sometimes in just days. 🌱 The secret isn’t magic; it’s controlling warmth and moisture like a greenhouse without the glass.
I’ve watched delicate petunia seedlings break through soil in five days by keeping them cozy under a heat mat, while stubborn snapdragons needed a damp paper towel trick to finally cooperate.
You’ll need just a few basics: seed-starting mix (not garden soil), small containers with drainage, a spray bottle for gentle watering, and a way to add warmth—a heat mat, warm spot on the fridge, or even a DIY setup with a grow light.
The trickiest part is balancing moisture: too little and seeds dry out; too much and they rot before sprouting. Most flowers need soil to stay damp but never soggy, like a wrung-out sponge.
Once those first green hooks appear, you’ll feel like a seed-starting scientist—because you are. Tiny seedlings need bright light (not direct sun) to stay sturdy, and thinning them properly prevents overcrowding.
By week three, you’ll be pinching off leggy stems and hardening off seedlings for the garden, watching your indoor nursery transform into a thriving outdoor display.
This method works for annuals, perennials, and even finicky flowers like impatiens, but some seeds (like delphinium) need cold stratification first. Start with easy winners like zinnias or marigolds to build confidence before tackling pickier varieties.
The payoff? A head start on the season and flowers that bloom weeks earlier than store-bought plants.
📚 In This Guide
- What you need
- Instructions
- Tips and common mistakes
- Wrapping up and next steps
What you need
- ● Flower seeds: Choose fast-sprouting varieties (e.g., marigolds, zinnias, or snapdragons). Start with 5–10 seeds per container for better success rates.
- ● Seed-starting trays or small pots: 3–4 inch pots or biodegradable seedling trays (1–2 trays for 5–10 seeds).
- ● Seed-starting mix: Lightweight, sterile potting soil (avoid garden soil—it’s too dense!). Use 1–2 cups per tray.
- ● Spray bottle: For gentle watering (8–16 oz capacity with a fine mist nozzle).
- ● Plastic wrap or humidity dome: To retain moisture (clear wrap works in a pinch!).
- ● Grow lights or sunny windowsill: 12–16 hours of light daily. A LED grow light (10–20W) is ideal if natural light is limited.
- ○ Heat mat (optional but helpful): 70–85°F range speeds up germination (place under trays).
- ○ Thermometer/hygrometer (optional): To monitor temperature (65–80°F) and humidity (70–90%).
- ● 🌡️ Pre-soak seeds (if hard-coated) in warm water for 4–12 hours before planting.
- ● ✨ Use paper towels for quick germination tests—place seeds between damp towels in a sealed bag!
- ● 🔄 Label seeds with toothpicks and tape to track varieties.
Step-by-Step instructions for germinating flower seeds indoors
Here’s how to coax those stubborn seeds to life—fast and without fuss.
🌱 Step 1: Prep Seeds and Containers for Speed
Start by soaking your flower seeds in lukewarm water for 12 hours to soften the outer coating. This trick cuts germination time in half—especially for tough shells like snapdragons or sweet peas. While they soak, fill your 2-3 inch deep containers with sterile seed-starting mix (never garden soil—it’s too dense and may harbor fungi). Moisten the mix until it’s damp like a wrung-out sponge, but not dripping.
Tap the container gently on the counter to settle the soil. You want it firm enough to hold seeds in place but loose enough for roots to push through. I like to make a tiny indentation with my finger—just deep enough to cradle the seed without burying it too deep. Here’s the thing: most seeds need light to germinate, so planting too deep delays sprouting.
💧 Step 2: Plant and Create a Mini Greenhouse
Place 1-2 seeds per cell (if using a seed tray) or 1 seed per pot (if using individual containers). Press them lightly into the soil—just enough to make contact. Cover them with a thin layer of additional mix, no more than ¼ inch deep. This protects them from drying out while still allowing light to reach.
Now for the magic: cover the container with a clear plastic dome or plastic wrap to trap warmth and humidity. Seeds need 75-85°F soil temperatures to germinate quickly. If your home runs cooler, pop the whole tray onto a seedling heat mat (set to 70-75°F). You’ll see condensation form on the cover—that’s perfect. Check daily for moisture; mist the soil lightly if it feels dry to the touch.
☀️ Step 3: Wait and Watch for Sprouts
Patience is key here, but not for long. Most flower seeds sprout within 5-14 days, depending on the variety. Keep the covered container in bright, indirect light—no direct sun yet, or the soil will dry out too fast. A south-facing windowsill works, but if your light is weak, supplement with a grow light placed 4 inches above the tray.
Here’s what to watch for: the first sign of life is a tiny white root pushing through the soil, followed by a tiny green shoot. Once you see 50% of seeds sprouted, remove the cover immediately—trapped humidity now risks damping-off, a fungal disease that collapses seedlings overnight. You’ll know it’s time when the soil surface looks slightly damp but not glistening.
🌿 Step 4: Thin and Transition to Light
When seedlings have 2-3 true leaves (not just the first tiny cotyledons), it’s time to thin. Use scissors to snip the weaker seedling at soil level—pulling risks disturbing the roots of the stronger one. If you’re using a tray, transplant the stronger seedling to its own 2-3 inch pot filled with fresh seed-starting mix. Water gently to settle the soil around the roots.
Now, move seedlings to direct light—either a south-facing window or under a grow light for 14-16 hours daily. You’ll see them stretch toward the light; if they grow leggy (thin and pale), the light is too far away. Adjust the grow light so it’s 2-3 inches above the tallest seedling. Strong seedlings have thick stems and deep green leaves spaced closely together.
Tips & tricks for perfect indoor flower seed germination
Here's what I learned after watching dozens of seeds fail to sprout—and how to avoid those same mistakes.
Soaking Secret: That 12-hour soak in Step 1 works best when you use lukewarm water—not hot, not cold. I've ruined batches by using boiling water (it kills seeds) or ice water (it shocks them). The water should feel like a warm bath, around 90°F. For stubborn seeds like sweet peas, you can even add a drop of dish soap to help break down the seed coat—just rinse thoroughly before planting.
Container Depth Matters: The 2-3 inch deep containers mentioned in Step 1 aren't just about space—they're about root development. Shallow containers force roots to grow sideways, which weakens seedlings. If you're using recycled containers, make sure they're at least 2 inches deep. For extra insurance, use containers with drainage holes to prevent waterlogging, which can rot roots before they even start growing.
Humidity Hack: When you create that mini greenhouse in Step 2, condensation on the cover is your best friend—but only up to a point. If you see water droplets forming on the soil surface, it's too humid. The soil should feel like a wrung-out sponge, not a dripping sponge. I've seen damping-off fungus wipe out entire trays when humidity got too high. A quick fix: lift the cover for 10 minutes daily to let excess moisture escape.
Light Transition: The move to direct light in Step 4 is where many seedlings go wrong. If you rush this step, you'll get leggy, weak plants that flop over. Start with bright indirect light for the first 3-4 days after removing the cover, then gradually increase direct exposure. I use a timer for my grow lights—14-16 hours daily—but if you're using natural light, rotate your seedlings every few days so they don't lean toward one side.
Pro Tips for Germinating Flower Seeds Indoors
- Here's what I learned after watching dozens of seeds fail to sprout—and how to avoid those same mistakes.
- Soaking Secret: That 12-hour soak in Step 1 works best when you use lukewarm water—not hot, not cold. I've ruined bat...
- Container Depth Matters: The 2-3 inch deep containers mentioned in Step 1 aren't just about space—they're about root ...
Frequently asked questions
Got questions about germinating flower seeds indoors?
You’re not alone! Here are some of the most common concerns—and their solutions—to help you grow confidently.
How long does it take for flower seeds to sprout indoors?
Germination time varies by plant type, but most flower seeds sprout within 7–21 days under ideal conditions (warmth, humidity, and consistent moisture). Delicate seeds like snapdragons may appear in 5–7 days, while tomatoes or peppers can take 10–14 days. Patience is key—some seeds need light to trigger germination, so adjust your setup if needed.
Why aren’t my seeds sprouting? Troubleshooting tips
If your seeds refuse to sprout, check these common culprits:
- Temperature issues: Too cold? Move to a warmer spot (70–85°F is ideal). Too hot? Use a seedling heat mat.
- Moisture problems: Overwatering drowns seeds; underwatering dries them out. Keep soil evenly moist (not soggy).
- Poor seed viability: Old or low-quality seeds may fail. Test a few in a damp paper towel first.
- Light needs: Some seeds (like lettuce) need light to germinate—cover trays with plastic wrap if darkness is the issue.
Still stuck? Try a fresh batch or research your specific seed’s quirks!
Do I need a heat mat for indoor seed germination?
Not always! While a seedling heat mat speeds up germination (especially for slow starters like petunias), many seeds thrive without one. Use it if:
- Your home runs cooler than 65°F.
- You’re growing tropical flowers (e.g., hibiscus, orchids).
- You’re impatient (it cuts germination time by 30–50%).
For budget-friendly warmth, place trays on top of a refrigerator or under a grow light.
What’s the best alternative to a humidity dome?
Humidity domes keep seeds cozy, but you can DIY alternatives:
- Plastic wrap: Cover trays loosely with plastic, poking small holes for airflow. Replace when condensation forms.
- Ziploc bags: Place seeds in a bag with a damp paper towel, then seal (leave a tiny gap). Check daily for mold.
- Misting bottle: Lightly mist soil 2x/day and group trays together to trap moisture.
- Peat moss or sphagnum: Top soil with ½ inch of moistened moss to retain humidity.
Pro tip: Avoid overdoing it—too much humidity breeds fungus. Aim for 80–90% humidity and ventilate daily.
Can I reuse trays or soil from last year’s seeds?
Reusing trays is fine if they’re clean (scrub with soap and water), but soil is a no-go. Old soil harbors:
- Dormant fungi/bacteria that can kill new seeds.
- Depleted nutrients, slowing early growth.
- Pests or diseases from last season.
Use sterile potting mix (or repurpose soil from sterilized garden beds). For trays, sanitize with a 10% bleach solution (rinse well) or baking soda.
Wrapping up and next steps
Germinating flower seeds indoors is a rewarding journey that brings life and beauty right to your windowsill! With the right warmth, humidity, and patience, you’ll soon watch tiny sprouts break through the soil—proof that you’re nurturing the future of your garden. 🌱✨
Now that you’re armed with tips and tricks, take the next step: start your seeds today! Whether you’re a beginner or a seasoned gardener, every sprout is a victory.
Grab your supplies, follow the steps, and soon you’ll be transplanting thriving seedlings outdoors—or sharing your green thumb success with fellow plant lovers.