Flowers
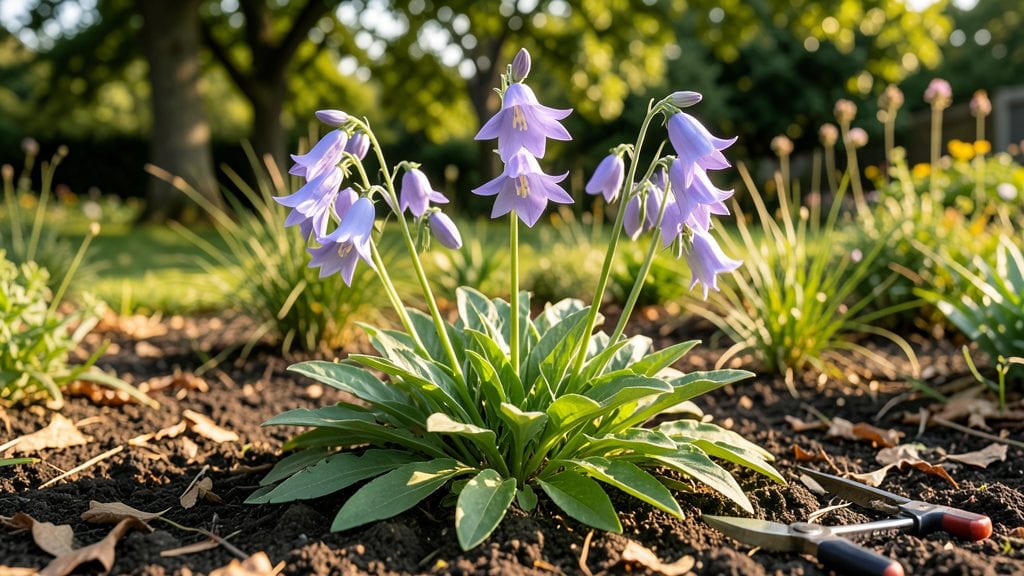
Growing Campanula purple flower in your shade garden is like adding delicate starbursts of color that thrive where others fail. 💜 I’ve watched these hardy beauties bounce back from winter frost, their bell-shaped blooms popping against ferns and hostas year after year.
The secret? They love cool roots and bright but indirect light—perfect for spots where sun-loving plants wilt.
Start with well-draining soil and a spot that gets morning sun and afternoon shade. Most varieties, like Campanula persicifolia or Campanula portenschlagiana, need moderate moisture but hate soggy roots—think Swiss chard’s ideal conditions.
Plant in early spring or fall, and you’ll see those signature purple blooms by late spring, lasting through summer with minimal fuss.
To keep them lush and flowering, deadhead spent blooms and trim leggy stems in early summer. A light feeding with balanced fertilizer in spring encourages vibrant blooms, while mulch protects roots from temperature swings. The result? A frost-resistant cascade of color that outshines anything in your shade garden.
Works in containers too—just use well-draining potting mix and a pot with drainage holes. Perfect for gardeners who want low-maintenance beauty without the sun requirements of most flowers. Let’s get those starbursts growing!
📚 In This Guide
- What you need
- Instructions
- Tips and common mistakes
- Wrapping up and next steps
What you need
- ● Campanula seeds or seedlings: Choose Campanula persicifolia (Peach-leaved Bellflower) or Campanula glomerata (Clustered Bellflower) for vibrant purple blooms.
- ● Quantity: 10–20 seeds (or 3–5 seedlings) per 10 sq ft of garden space.
- ● Well-draining potting mix: 1–2 bags (10–20 lbs each) of peat-free organic soil blend (e.g., Miracle-Gro Potting Mix or FoxFarm Ocean Forest).
- ● Garden soil (if planting outdoors): Amend with 2–3 inches of compost per sq ft for nutrient-rich, moisture-retentive soil.
- ○ Containers (optional for starting seeds): Seed trays (72-cell) or 4-inch pots (5–10 units).
- ● Drainage holes required to prevent root rot.
- ● Hand trowel or transplanting spade (for digging and planting).
- ● Watering can or hose with a gentle spray nozzle (avoid over-saturating soil).
- ● Garden gloves (to protect hands from soil and thorns).
- ○ Mulch (optional but recommended): 2–3 inches of shredded bark or pine straw to retain moisture and suppress weeds.
- ○ Fertilizer (optional): Balanced 10-10-10 or 5-10-10 granular fertilizer (1 tbsp per sq ft) after planting.
- ● Fish emulsion (for organic gardens, dilute to 1:10 ratio).
- ● Sunlight: Partial to full shade (2–4 hours of morning sun max). Avoid harsh afternoon rays.
- ● Hardiness zone: 3–9 (frost-resistant—perfect for cool climates!).
- ● Watering schedule: Keep soil consistently moist (not soggy) until established.
- ● Spacing: Seeds: 6–12 inches apart.
- ● Seedlings: 12–18 inches apart (allow room for bushy growth).
Step-by-Step guide for planting and cultivating campanula
Here’s how to grow these frost-hardy beauties with minimal fuss—just follow these clear steps.
🌱 Step 1: Choose the Perfect Spot and Prepare the Soil
Campanula thrives in partial to full shade, so scout your yard for a location with 4-6 hours of dappled sunlight daily. Avoid harsh afternoon sun, which can scorch delicate blooms. I like to plant mine near trees or along north-facing foundations where roots cast gentle shade.
Loosen the soil to a depth of 12 inches with a garden fork, breaking up any compacted layers. Campanula prefers well-draining, slightly acidic soil (pH 6.0-7.0). If your soil is heavy clay, mix in 2-3 inches of compost and a handful of perlite to improve aeration. A simple soil test kit ensures you’re in the right range—amend if needed with sulfur for acidity or lime for alkalinity.
🌿 Step 2: Plant with Care and Proper Spacing
Dig holes twice as wide as the root ball but only as deep as the container’s base. Gently remove plants from their pots and tease apart any tangled roots—this encourages outward growth rather than circling. Place each campanula in its hole, ensuring the top of the root ball sits even with the soil line (burying too deep can cause rot).
Space plants 12-18 inches apart for dwarf varieties and 24 inches apart for taller types like Campanula persicifolia. Group them in odd-numbered clusters (3, 5, or 7) for a natural, full look. Press soil lightly around the roots and water deeply to settle everything in place. Mulch with 2 inches of shredded bark to retain moisture and suppress weeds—just keep it 2 inches away from stems to prevent rot.
☀️ Step 3: Water and Maintain for Stunning Blooms
Water newly planted campanula deeply twice weekly for the first month, ensuring moisture reaches 6 inches down. After establishment, reduce to once weekly (more in extreme heat or drought). You’ll know it’s time to water when the top 1-2 inches of soil feel dry—stick your finger in to check. Avoid overhead watering once blooms appear; instead, water at the base to keep foliage dry and prevent fungal issues like powdery mildew.
Fertilize lightly in early spring with a balanced, slow-release fertilizer (10-10-10) at half strength. Campanula is low-maintenance but responds well to a monthly feeding of compost tea during the growing season. Deadhead spent blooms by snipping stems just above the next set of leaves—this encourages a second flush of flowers and keeps plants tidy. Prune leggy stems in early spring to promote bushier growth.
⏰ Step 4: Overwinter and Protect for Next Year
Campanula’s frost resistance is legendary, but a little winter prep ensures even more vigor. Once temperatures drop below 20°F, cover plants with 4-6 inches of mulch (like straw or leaves) to insulate roots. In zones 5 and colder, mound soil around the base of the plant to add extra protection. In early spring, remove mulch and trim back any dead foliage—new growth will emerge quickly once soil warms to 45°F.
Here’s the thing—campanula self-seeds readily, so you’ll likely find volunteer plants popping up in spring. If you want to control spread, snip seed heads before they release. For established plants, divide clumps every 3-4 years in early spring by digging up the root ball, separating sections with a sharp knife, and replanting. This rejuvenates growth and prevents overcrowding.
Tips & tricks for perfect campanula purple flower cultivation
These little details make all the difference when nurturing campanula's vibrant purple blooms—trust me, I've learned the hard way.
Soil Preparation Secret: The 12-inch deep soil loosening in Step 1 isn't just about breaking up compaction—it's about creating a perfect air-water balance. I've found that adding a handful of perlite to that 2-3 inches of compost mix creates tiny air pockets that prevent waterlogging, which campanula absolutely hates. Think of it as giving your plants a spa treatment for their roots.
Planting Depth Matters: That "even with the soil line" rule in Step 2 is critical—burying too deep suffocates the crown, while planting too shallow exposes roots to drying winds. Here's my trick: Use a pencil to mark the soil line on the pot before removing the plant, then match that exact level in the hole. This consistency pays off with stronger plants.
Watering Wisdom: The twice-weekly deep watering in Step 3 works wonders, but timing is everything. I water mine in the early morning so foliage dries completely by evening, preventing fungal issues. And that 6-inch moisture depth check? Use a long screwdriver to probe—if it comes out dry, water again. Campanula's roots need that consistent moisture without becoming soggy.
Winter Protection Hack: When temperatures drop below 20°F, I don't just pile on mulch—I create a mini greenhouse effect. After adding that 4-6 inches of mulch, I loosely cover plants with frost cloth secured with bricks. This doubles protection without smothering the plants. In spring, I remove the cloth when soil warms to 45°F—that's when you'll see the magic of new growth emerging.
Pro Tips for Campanula Purple Flower
- These little details make all the difference when nurturing campanula's vibrant purple blooms—trust me, I've learned ...
- Soil Preparation Secret: The 12-inch deep soil loosening in Step 1 isn't just about breaking up compaction—it's about...
- Planting Depth Matters: That "even with the soil line" rule in Step 2 is critical—burying too deep suffocates the cro...
Frequently asked questions
Got questions about growing Campanula purple flowers? You’re not alone! Here are some of the most common queries—plus quick, practical answers to help your shade garden thrive.
How do I keep my Campanula purple flowers blooming all season?
Prune spent blooms regularly to encourage continuous flowering. After the first flush of flowers fades, trim back 1/3 of the plant to promote bushier growth. Purple campanulas thrive in partial shade, so avoid moving them to full sun—it can stress the plant and reduce blooms. Pro tip: Deadhead before seed pods form to redirect energy into more flowers!
Are purple Campanula truly frost-resistant? What’s the coldest they can handle?
Yes! These frost-resistant beauties can survive temperatures down to -20°F (-29°C), making them perfect for USDA Zones 3-9. Young plants may need winter mulch in extreme cold (like Zone 3), but established ones bounce back like resiliant little warriors. Watch for: Frost heave (mulch helps prevent this) and late-spring freezes (cover tender new growth if needed).
What’s the best companion plant for purple Campanula in shade gardens?
Pair them with hostas, ferns, or astilbes for a lush, layered look. They also play well with heuchera (coral bells) or bleeding heart for color contrast. Avoid planting near aggressive spreaders like mint or creeping Charlie—they’ll outcompete your campanulas. Bonus: Their trailing habit makes them ideal for hanging baskets or spilling over rock walls!
Why are my Campanula leaves turning yellow? Is it a disease or something else?
Yellow leaves usually signal overwatering or poor drainage—these plants hate soggy roots! Check if the soil stays moist but not waterlogged. Other culprits:
- Nutrient deficiency (feed with balanced fertilizer in early spring).
- Fungal issues (like powdery mildew) if leaves have white spots—improve airflow and avoid overhead watering.
- Transplant shock if recently moved (give it 2-3 weeks to recover).
Can I grow purple Campanula in containers? What’s the best pot size?
Use a container at least 12 inches deep and wide (they have taproots). Drainage holes are a must—these plants hate wet feet. Mix potting soil with perlite or sand for airflow. For trailing varieties, hang the pot to showcase their cascading blooms. Watering tip: Let the top inch of soil dry out between waterings to prevent root rot.
Wrapping up and next steps
Growing campanula purple flowers is a rewarding journey that brings vibrant color and resilience to your shade garden! 🌸 Their frost-hardy nature and low-maintenance care make them perfect for gardeners of all levels.
Whether you're a seasoned pro or just starting, these stunning blooms will add a touch of elegance to your outdoor space.
Ready to transform your garden? Start by choosing the right variety and follow the steps outlined in this guide. Grab your gloves, pick a sunny spot (even in partial shade!), and let nature do the rest—soon, you’ll be enjoying a breathtaking display of purple starbursts! 🌿