Vegetables
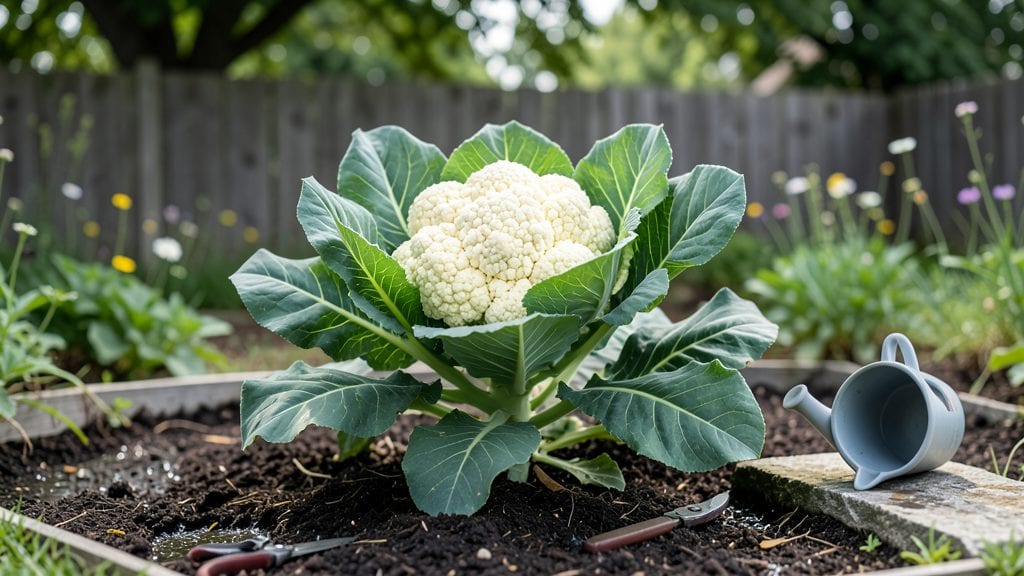
What about cauliflower in cool climates is easier than you think—and the payoff is worth every effort. 🌱 I’ve grown this finicky veggie for years, and once you nail the soil, spacing, and timing, you’ll harvest heads that rival the grocery store. store (but taste 10x better).
The secret starts with rich, well-draining soil packed with compost—cauliflower hates soggy roots. Plant seeds indoors 6-8 weeks before your last frost, then transplant seedlings 18-24 inches apart in full sun. Keep soil consistently moist (not soggy) and watch for pests like cabbage worms, which love young plants.
You’ll know it’s working when those tight, pale heads form—harvest before they loosen (usually 70-90 days after transplanting). Purple varieties add color, while Romanesco creates edible fractals. Even my first attempt yielded three solid heads—proof this isn’t just for experts.
Cool climates actually favor cauliflower—it thrives in 50-75°F temps. For late-season crops, try quick-maturing varieties like ‘Snowball’ or ‘Purple of Sicily.’ Start small, and soon you’ll be swapping store-bought for homegrown.
📚 In This Guide
- What you need
- Instructions
- Tips and common mistakes
- Wrapping up and next steps
What you need
- ● Cauliflower Seeds: Choose cool-climate varieties like ‘Snowball Y Improved’ or ‘Purple of Sicily’ (1–2 oz packet covers ~100 plants).
- ● Seed Starting Mix: 10–15 lbs of sterile, seed-starting blend (or DIY: 60% peat moss, 30% perlite, 10% compost).
- ● Containers or Trays: Seedling trays: 72-cell or 1020-style (2–3 trays for 50+ seedlings).
- ● Grow bags or pots: 4–6" deep, 4–6" diameter (1 plant per pot).
- ● Growing Medium: Well-draining soil mix (e.g., 60% potting soil + 40% compost).
- ● Fertilizer: Seedling stage: Balanced 10-10-10 (1 tbsp per gallon of water).
- ● Vegetative stage: High-nitrogen (21-7-7) or compost tea.
- ● Tools: Hand trowel or transplanting knife.
- ● Watering can with fine rose (or spray bottle for seedlings).
- ● Garden twine or stakes (for tall varieties).
- ● Row covers or frost cloth (for early/late planting).
- ● Shade cloth (30–50%) to prevent bolting in hot spells. 🌞
- ● pH test kit (ideal soil pH: 6.0–7.0 for cauliflower).
- ● Organic mulch (straw or grass clippings) to retain moisture.
- ● Grow lights (if starting indoors before last frost).
Step-by-Step guide for growing cauliflower in cool climates
Here's how to coax these finicky brassicas into thriving heads—even when summer stays cool.
🌱 Step 1: Start Seeds Indoors at the Right Time
Plant seeds 6-8 weeks before your last frost date in a shallow tray filled with sterile seed-starting mix. Press seeds ¼ inch deep—they need darkness to germinate, so don’t cover them with extra soil. I use a seedling heat mat to keep soil at 70-75°F, which speeds germination to 5-10 days.
Once sprouts appear, move them to a bright spot with 12-14 hours of light daily. Without enough light, seedlings stretch toward the window and become weak. You’ll know they’re getting enough when the stems stay short and leaves are dark green—not pale or elongated.
💧 Step 2: Harden Off and Transplant After Frost
Two weeks before transplanting, start hardening off seedlings by placing them outside in a sheltered spot for 1-2 hours daily. Gradually increase their outdoor time over 7-10 days until they can handle full sun. Cauliflower hates temperature swings, so avoid transplanting if nighttime temps drop below 50°F.
Set plants 18-24 inches apart in well-draining soil rich in organic matter. I always mix in 2-3 inches of compost at planting time—cauliflower is heavy-feeder and needs steady nutrients. Water deeply after transplanting to settle the roots, but avoid soggy soil.
☀️ Step 3: Maintain Cool Temperatures and Consistent Moisture
Cauliflower thrives in 60-70°F days and 50-60°F nights. If summer heat arrives early, provide afternoon shade with a row cover or shade cloth to prevent bolting. You’ll know it’s too hot when leaves yellow or the curd (head) starts to split prematurely.
Keep soil evenly moist—never let it dry out completely. I water deeply every 2-3 days until top 2 inches of soil feel dry. Mulch with 2-3 inches of straw to retain moisture and suppress weeds. Fertilize lightly every 3-4 weeks with a balanced organic fertilizer to support head formation.
✂️ Step 4: Tie Down Heads and Harvest at Peak Maturity
When the head reaches 3-4 inches in diameter, gently tie the outer leaves together with twine to blanch the curd and protect it from sunburn. This step is critical—untied heads turn yellow and tough. I use soft cloth strips instead of twine to avoid damaging the stems.
Harvest when the head is firm and compact, before the buds in the center start to open. Cut the entire head off with a sharp knife, leaving a few leaves attached to the plant. If you miss the window, the head will quickly become bitter and inedible. Store harvested cauliflower in the fridge for up to 5 days or freeze for longer storage.
Tips & tricks for perfect cauliflower growth in cool climates
These game-changing strategies will help you coax those perfect cauliflower heads even when summer stays stubbornly cool.
Seedling Heat Secret: That 70-75°F soil temperature range in Step 1 isn't just a suggestion—it's the sweet spot for germination. I've learned the hard way that colder soil (below 65°F) can delay sprouting by up to 2 weeks. If you don't have a heat mat, try placing your seed tray on top of your fridge (not inside) or nestle it between two light bulbs in a cardboard box. The gentle warmth makes all the difference.
Lighting Upgrade: The 12-14 hours of light in Step 1 is non-negotiable for strong seedlings. If your natural light falls short, supplement with a grow light placed 2-3 inches above the seedlings. I use a simple LED grow bulb on a timer—it's transformed my seedling success rate from hit-or-miss to consistently sturdy plants. Watch for those dark green leaves as your signal that they're getting enough light.
Transplant Timing: The 7-10 day hardening off period in Step 2 is your safety net against temperature shock. I've seen cauliflower seedlings wilt dramatically when transplanted too quickly into cool weather. Start with just 1-2 hours in sheltered spots like porches or under tree canopies, then gradually increase exposure. Check nighttime temps—if they dip below 50°F, wait another week. Your plants will thank you with stronger root systems.
Head Protection Strategy: When those heads reach 3-4 inches in Step 4, tying the leaves isn't just decorative—it's essential for preventing sunburn. I've found that soft cloth strips work better than twine because they're gentler on the stems. Make sure to tie loosely enough that you can still see the head developing underneath. This simple step keeps your cauliflower snow-white and tender rather than yellowed and tough.
Pro Tips for What About Cauliflower
- These game-changing strategies will help you coax those perfect cauliflower heads even when summer stays stubbornly c...
- Seedling Heat Secret: That 70-75°F soil temperature range in Step 1 isn't just a suggestion—it's the sweet spot for g...
- Lighting Upgrade: The 12-14 hours of light in Step 1 is non-negotiable for strong seedlings. If your natural light fa...
Frequently asked questions
Got questions about growing cauliflower in cool climates? You’re not alone! Here are some of the most common queries—and their answers—to help you cultivate a thriving crop.
Can I grow cauliflower in my backyard if I don’t have a greenhouse?
Cauliflower thrives in cool weather and can be grown in open gardens, containers, or even raised beds. Just ensure it gets at least 6 hours of sunlight daily and protect it from strong winds. For extra cold protection, use row covers or plant in spring/fall when temps are mild (50–75°F).
How long does it take for cauliflower to go from seed to harvest?
Patience is key! From seed to harvest, cauliflower typically takes 70–100 days, depending on the variety. Early varieties (like ‘Snowball’) mature faster (60–70 days), while larger heads (like ‘Purple of Sicily’) may take closer to 100 days. Start seeds indoors 4–6 weeks before your last frost for a head start.
What should I do if my cauliflower heads are turning yellow or splitting?
Yellowing or splitting heads usually mean overmaturity or nutrient stress. Harvest promptly if heads are firm but starting to loosen. To prevent splitting, ensure consistent watering (1–1.5 inches per week) and side-dress with compost or a balanced fertilizer (10-10-10) when plants are 6 inches tall. Avoid over-fertilizing with nitrogen—it promotes leaves over heads!
Is cauliflower frost-tolerant? Can I plant it in early spring?
Yes! Cauliflower is surprisingly frost-hardy—young plants can tolerate light frosts down to 25°F, while mature heads handle temps as low as 20°F for short periods. For early spring planting, start seeds indoors 8–10 weeks before your last frost or sow directly in cool soil (40–50°F). Just protect seedlings with row covers if frost threatens.
What’s the best alternative if cauliflower doesn’t grow well in my climate?
If cauliflower struggles in your area, try these cool-weather alternatives:
- Broccoli: Similar care, slightly more heat-tolerant.
- Brussels sprouts: Loves cool weather and produces for weeks.
- Kale: Cold-hardy, nutrient-packed, and harvestable all season.
- Cabbage: Versatile for eating, fermenting, or sauerkraut.
Wrapping up and next steps
Growing cauliflower in cool climates is totally doable—just give it the right timing, soil, and care! 🌱 With patience and a few simple tricks, you’ll soon be harvesting those luscious curds for everything from roasted bites to creamy soups. Ready to try? Start by picking a variety suited to your zone, then plant your seeds or seedlings this fall for a spring harvest (or vice versa).
Now that you’re armed with tips, go ahead and get your hands dirty! Grab those gloves, prep your garden bed, and watch your cauliflower thrive. Need more confidence? Experiment with a small batch first—or share your progress with fellow gardeners for extra motivation. Happy growing!