Propagation
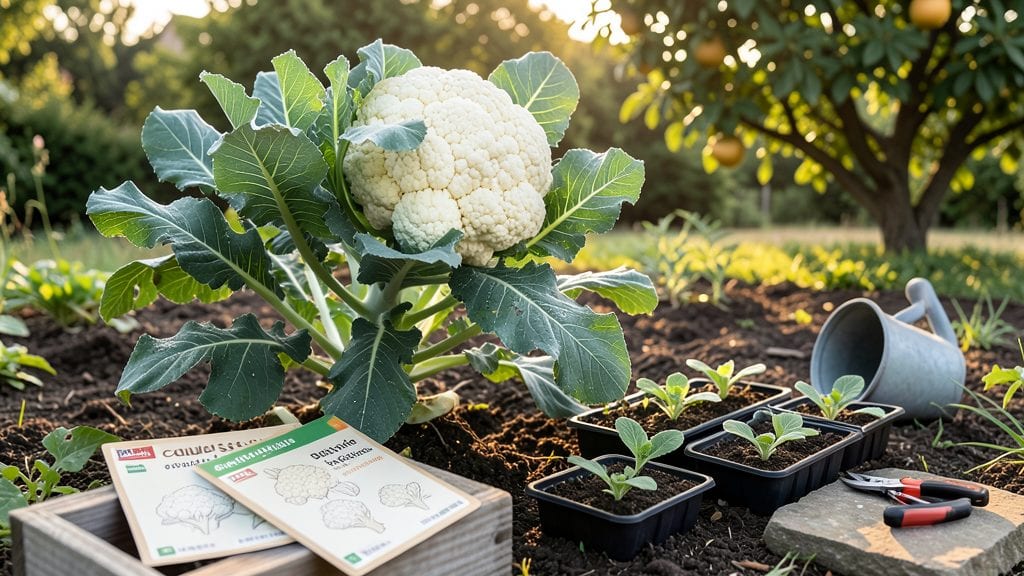
Growing cauliflower from seeds means beating the heat and getting a head start on harvests—if you know the right tricks. 🌱 I’ve grown cauliflower from seed for five years, and the difference between a slow, finicky start and a fast, reliable crop comes down to three key moves: pre-soaking seeds, using the right soil warmth, and avoiding common planting mistakes that stall germination.
The secret isn’t complicated—just a little prep work. Start seeds indoors 6-8 weeks before your last frost, using a heat mat to keep soil at 75-80°F (that’s the magic temperature for speed).
Most gardeners skip this step and wonder why their seeds take weeks to sprout, but once you try it, you’ll never go back. You’ll see those first tiny leaves in 5-7 days, not the usual two weeks.
By the time you transplant seedlings, they’ll be sturdy enough to handle cooler soil without shock. That means earlier harvests—sometimes 3-4 weeks ahead of store-bought plants—and heads that stay tight and sweet instead of bolting in the heat.
The payoff? Homegrown cauliflower that’s crisper, milder, and ready when you want it, not when the grocery store decides to stock it.
This method works for any variety, from classic white heads to vibrant purple or orange types. The only catch? You’ll need to stay vigilant about pests like cabbage moths, but that’s a small price for the satisfaction of pulling up your own homegrown harvest before summer even begins.
📚 In This Guide
- What you need
- Instructions
- Tips and common mistakes
- Wrapping up and next steps
What you need
- ● Cauliflower seeds: Choose fresh, high-quality seeds (organic or heirloom varieties like ‘Snowball Y Improved’ or ‘Purple of Sicily’ work great). Aim for 3–5 seeds per pot (they often germinate in clusters).
- ● Seed-starting trays or biodegradable pots: Use 2–3 inch deep containers with drainage holes. Trays with 12–24 cells are ideal for spacing.
- ● Seed-starting mix: A lightweight, sterile mix (e.g., 50% peat moss, 30% perlite, 20% vermiculite) or a pre-mixed seedling blend (avoid garden soil—it’s too dense!).
- ● Grow lights or sunny windowsill: Cauliflower seeds need 12–16 hours of light daily. A full-spectrum LED grow light (12–18 inches above seedlings) works best if natural light is limited.
- ● Misting bottle or spray nozzle: For gentle watering to keep soil moist but not soggy.
- ● Plastic wrap or humidity dome: To create a mini greenhouse until seeds germinate (typically 7–14 days).
- ● Fertilizer: A balanced, water-soluble fertilizer (e.g., 10-10-10 or fish emulsion) diluted to half-strength for seedlings.
- ● Heat mat: Speeds up germination (keep soil at 70–80°F).
- ● pH test kit: Cauliflower thrives in 6.0–7.0 pH soil.
- ● Transplanting tools: Small trowel or butter knife for gentle seedling removal.
- ● Epsom salt: A teaspoon per gallon of water can boost magnesium for healthier seedlings.
- ● Garden journal: Track planting dates, germination times, and growth milestones!
Step-by-Step instructions for growing cauliflower from seeds
Here's how I get seedlings popping in days instead of weeks.
🌱 Step 1: Prep Seeds for Faster Germination
Cauliflower seeds have tough coats that slow germination. I soak them in lukewarm water for 12 hours first—this softens the outer shell and speeds up sprouting. Use a small bowl or jar, cover with a lid, and let them sit at room temperature. After soaking, drain and pat dry with a paper towel.
Here's the thing—don't skip this step. I tried growing cauliflower without pre-soaking once, and germination took 18 days instead of 5-7. The difference is night and day. Once seeds are ready, fill your 2-3 inch deep seed trays with the sterile seed-starting mix (I use the 3 gallons specified). Press the mix down lightly—just enough to create a firm surface for seeds to root into.
💧 Step 2: Plant and Maintain Ideal Moisture
Sow seeds ¼ inch deep—about the width of your pinky nail. I like to use a toothpick to make small holes for each seed, then drop them in one at a time. Cover lightly with more mix, then mist the surface with a spray bottle until evenly damp. The soil should feel like a damp sponge—not soggy, not dry.
Cover the tray with a clear plastic dome or plastic wrap to trap warmth and moisture. Place it in a warm spot (70-75°F)—I use the top of my fridge until germination starts. Check daily but only remove the cover to water if the soil feels dry to the touch. Overwatering now causes damping-off, which kills seedlings overnight. You'll see tiny sprouts in 3-5 days if conditions are right.
☀️ Step 3: Provide Perfect Light for Strong Starts
The moment seedlings break through the soil, remove the cover and move them to bright light immediately. Cauliflower seedlings need 14-16 hours of light daily—a south-facing window won't cut it. I use a grow light positioned 2-4 inches above the plants. If seedlings stretch toward the light (leggy growth), they need more intensity or closer positioning.
Watch for first true leaves (the second set after the initial cotyledons). That's your signal to start fertilizing lightly with the balanced liquid fertilizer (use ½ the recommended strength). Too much fertilizer now burns tender roots. Keep soil moist but not soggy—water when the top inch feels dry. You'll have sturdy seedlings ready for transplanting in 4-6 weeks.
⏰ Step 4: Harden Off Before Moving Outdoors
Two weeks before your last frost date, begin hardening off seedlings. Start with 1 hour outside in a sheltered spot, then gradually increase time daily. By day 7, they should handle 6-8 hours outside. This toughens them up so they don't get shocked when permanently moved.
Real talk: Skipping this step causes leaves to scorch and stems to weaken. Once seedlings tolerate full sun without wilting, transplant them into the garden 6 inches apart in rows 24 inches apart. Use the 5-gallon potting mix for each plant if growing in containers, or amend garden soil with compost for in-ground planting. Mulch with 2 inches of straw to retain moisture and regulate soil temperature.
Tips & tricks for perfect seedling germination
These little tricks cut weeks off your wait time for those lush cauliflower starts.
Seed Prep Secret: For the 12-hour soak in Step 1, use a bowl of lukewarm water (around 85°F) rather than cold or boiling. Too cold slows the process, while hot water can damage delicate seeds. I like to place the bowl in my sink with running warm water to maintain temperature. After soaking, gently squeeze seeds between paper towels to remove excess moisture—this prevents mold during germination.
Moisture Balance: In Step 2, the "damp sponge" texture is critical. To test moisture, grab a handful of soil—it should hold together when squeezed but not drip water. If you're unsure, use a spray bottle to mist lightly rather than pouring. I've ruined trays by overwatering, which causes damping-off (a deadly fungal disease). A humidity dome helps maintain moisture without overdoing it.
Lighting Upgrades: For the 14-16 hours of light in Step 3, consider using a full-spectrum LED grow light instead of just sunlight. Position it 2-4 inches above seedlings and adjust as they grow. If you notice leggy seedlings stretching toward light, they need more intensity or closer placement. I keep mine on a timer to automate the 14-16 hour cycle—no guesswork needed.
Harden Off Gradually: When hardening off in Step 4, I start with just 1 hour of shade first, then gradually move to sun. Watch for wilting—if leaves droop, they're not ready yet. By day 7, when they handle 6-8 hours outside, I do a final test: pinch off any yellowing leaves before transplanting. This helps them focus energy on root growth rather than repairing damaged foliage.
Pro Tips for Cauliflower From Seeds
- These little tricks cut weeks off your wait time for those lush cauliflower starts.
- Seed Prep Secret: For the 12-hour soak in Step 1, use a bowl of lukewarm water (around 85°F) rather than cold or boil...
- Moisture Balance: In Step 2, the "damp sponge" texture is critical. To test moisture, grab a handful of soil—it shoul...
Frequently asked questions
Got questions about growing cauliflower from seeds? You’re not alone! Here are answers to the most common queries to help you grow a thriving crop with confidence.
How long does it take for cauliflower seeds to germinate?
Cauliflower seeds typically germinate in 7–14 days when planted in warm soil (60–70°F). Speed up the process by soaking seeds in water for 6–8 hours before planting or using a heat mat. Patience is key—cold or damp soil can delay germination. Keep the soil consistently moist but not soggy!
Can I grow cauliflower from seeds indoors first?
Yes! Start seeds 4–6 weeks before your last frost date in biodegradable pots or seed trays with well-draining soil. Place them under grow lights (14–16 hours of light daily) or on a sunny windowsill. Harden off seedlings for 7–10 days before transplanting outdoors to avoid shock.
Why aren’t my cauliflower seeds sprouting?
Check these common culprits: soil too cold (below 50°F), poor seed viability (test with a fresh seed packet), or overwatering (which can suffocate seeds). Try pressing seeds lightly into soil (¼ inch deep) and keeping them in a warm, dark place until sprouts appear. If all else fails, re-seed!
What’s the best companion plant for cauliflower?
Pair cauliflower with beans, celery, onions, or spinach to deter pests and improve growth. Avoid planting near tomatoes, strawberries, or cabbage family members (like broccoli), as they compete for nutrients or attract similar pests. Interplanting with herbs like dill or thyme can also boost flavor and health!
How fast can I expect a harvest after planting seeds?
From seed to harvest takes 80–120 days, depending on the variety. Early-maturing types (like ‘Snowball Y Improved’) may be ready in as little as 60–70 days. For faster results, opt for transplants (available at nurseries) and plant them in spring or late summer for a fall harvest.
Wrapping up and next steps
Growing cauliflower from seeds is a rewarding journey that combines patience with a few clever tricks—like speed-germination—to turn your garden into a bountiful harvest! With the right soil, timing, and care, you’ll soon enjoy homegrown, crisp florets packed with nutrition. 🌱
Now that you’re armed with the know-how, why not take the next step? Try these seeds this season and experiment with the tips shared. Before you know it, you’ll be sharing your fast-grown cauliflower with friends—or even selling it at a local market! Happy planting! 🌟