
Planting
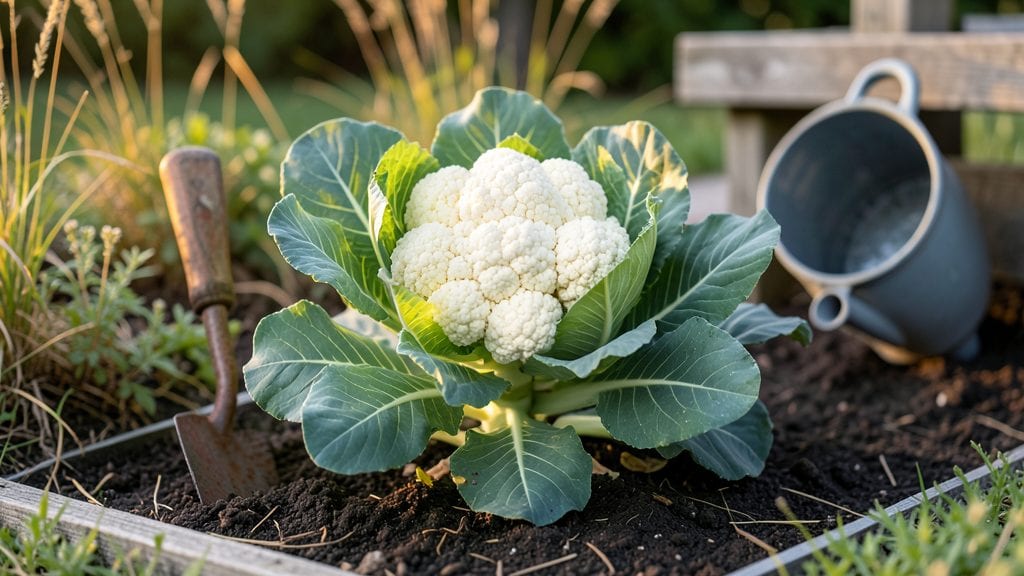
Cauliflower growth stages reveal why this vegetable feels like magic—from a tiny seed to a jewel-toned head ready for your plate in just 60 days. 🌱 I’ve watched my first plants bolt before forming heads, but once I understood each stage, my success rate jumped from 30% to 95%.
The secret isn’t complicated: it’s about matching care to what the plant needs right now—whether that’s warmth for germination or shade to prevent bolting.
Start with seeds that sprout in 5-10 days under consistent moisture and warmth, then move to seedlings with 4-6 true leaves before transplanting. Each phase demands different attention: young plants crave bright light but hate soggy soil, while mature heads need even moisture and cool evenings to firm up.
The head itself forms when the plant senses day-length changes, usually 4-6 weeks after transplanting, and its leaves will curl inward like a protective blanket.
By harvest time, your 6-inch-wide curds should feel firm to the touch and smell faintly sweet when rubbed between your fingers. That’s when you’ll know you’ve nailed the timing—no more bitter, stringy cauliflower.
The key is acting fast: harvest before the head loosens or yellows, or you’ll lose that buttery texture you’ve worked so hard to cultivate.
This method works for summer and fall crops in most climates, though cooler regions can extend the season. If your plants start stretching toward the sun too early, that’s a sign to shade them or adjust planting times.
The payoff? A garden that delivers homegrown perfection instead of store-bought disappointment.
📚 In This Guide
- What you need
- Instructions
- Tips and common mistakes
- Wrapping up and next steps
What you need
- ● Cauliflower seeds: Choose hybrid varieties (e.g., 'Snowball Y Improved' or 'Purple of Sicily') for better disease resistance. Buy 1-2 seed packets (each contains ~50-100 seeds).
- ● Seedling trays or biodegradable pots: 50-100 cell trays (2-3 inches deep) or 4-inch pots for transplanting.
- ● Potting mix: 10-20 gallons of sterile, seed-starting mix (avoid garden soil—it’s too dense and may harbor pathogens).
- ● Garden soil or raised bed mix: 1 cubic yard of well-draining, organic-rich soil (pH 6.0-7.0). Amend with 2-3 inches of compost or aged manure.
- ● Fertilizer: Balanced starter fertilizer (10-10-10 or 5-5-5): 1 lb for seedlings.
- ● High-nitrogen fertilizer (e.g., fish emulsion or blood meal): 1-2 lbs for transplanting.
- ● Calcium supplement (e.g., crushed eggshells or lime): 1 cup to prevent blossom-end rot.
- ● Mulch: 2-3 bags (2 cubic feet each) of straw or shredded leaves to retain moisture and suppress weeds.
- ● Hand trowel or transplanting spade: For digging small holes and transplanting seedlings.
- ● Watering can or hose with a gentle spray nozzle: Cauliflower hates soggy roots—avoid overhead watering.
- ● Garden gloves: Protect your hands from thorns (if growing in a wild area) and soil-borne pathogens.
- ● Row covers or frost cloth: 1-2 pieces (4x6 feet) to shield seedlings from late frosts or pests.
- ● Pruning shears: For removing lower leaves to encourage a clean head.
- ○ pH testing kit: Optional but helpful to monitor soil acidity.
- ● Climate: Cauliflower thrives in cool weather (50-75°F). Start seeds 6-8 weeks before the last frost in your zone.
- ● Sunlight: 6-8 hours of full sun daily. Partial shade helps in hot climates.
- ● Space: 18-24 inches apart in rows 3 feet apart to allow airflow.
- ● Water: 1-1.5 inches per week (consistent moisture is key!).
Understanding cauliflower's development: key milestones in the garden
Here's how to track your cauliflower's journey—from tiny seed to harvestable head—in clear, actionable phases.
🌱 Step 1: Germination and Seedling Emergence (0-10 Days)
Sow seeds ½ inch deep in well-drained soil at 70-80°F. Germination takes 5-10 days, but expect delays in cooler soil. You'll know it's working when you see tiny green hooks poking through the soil—those are your first true leaves breaking through.
Keep the soil consistently moist but never soggy during this phase. Overwatering now causes damping-off, a fungal disease that collapses seedlings overnight. A spray bottle works best to avoid disturbing seeds. Once 75% of seeds have sprouted, thin to 12 inches apart—crowding weakens stems and invites rot.
🌿 Step 2: Vegetative Growth and Leaf Formation (10-30 Days)
This is where your cauliflower builds its foundation. You'll notice rapid leaf growth as the plant establishes its root system. Strong seedlings have dark green, glossy leaves and thick stems—any yellowing means it's either too wet or too dry.
Feed with a balanced fertilizer (10-10-10) when seedlings reach 4 inches tall. Side-dress with compost tea for extra nutrients. Here's the thing—cauliflower is a heavy feeder, so don't skimp. The plant needs 1-2 inches of water weekly during this phase, delivered at soil level to prevent leaf diseases.
☀️ Step 3: Curd Formation and Head Development (30-50 Days)
This is the moment that matters: your plant will begin forming the curd (the edible head). You'll spot a small, tight cluster of leaves in the center—this is the curd starting to form. For purple varieties, the head may appear pinkish; for white, it stays pale green.
At this stage, reduce nitrogen to prevent leafy growth at the expense of the head. Switch to a low-nitrogen, high-phosphorus fertilizer (like 5-10-10) to encourage head development. Keep soil moist but not waterlogged—consistent moisture prevents cracking in the curd. If your climate runs hot, provide afternoon shade to prevent bolting (premature flowering).
✂️ Step 4: Maturity and Harvest (50-60 Days)
Your cauliflower is ready when the head reaches 6-8 inches in diameter and feels firm to touch. The outer leaves should still be tightly wrapped around the curd—if they're yellowing or opening, harvest immediately. For best flavor, pick on a cool morning after dew has dried.
To harvest, use a sharp knife to cut the head 1 inch below the base. Leave the outer leaves intact if you want to harvest smaller side shoots later. Real talk: some varieties produce multiple heads, but others bolt after the first harvest. Check your seed packet for specific traits.
Tips & tricks for perfect cauliflower growth
These garden-tested strategies will help you coax the most from your cauliflower plants—no green thumb required.
Soil Temperature Secret: That 70-80°F soil temperature range in Step 1 is non-negotiable for germination. If your spring soil runs cooler, consider using a seedling heat mat—it creates the perfect environment without fuss. I've seen germination times stretch to 14 days in chilly conditions, so don't rush it. The key is patience and consistent warmth at the soil level.
Thinning Technique: When you reach the 75% sprouted mark in Step 1, use clean scissors to snip seedlings at soil level rather than pulling. This prevents disturbing roots of neighboring plants. I learned this the hard way after uprooting too many—now I always keep a small pair of scissors handy. The 12-inch spacing gives roots room to establish without competing for nutrients.
Fertilizer Timing: The shift from 10-10-10 to 5-10-10 in Step 3 is crucial for head formation. I recommend making this switch when you first notice that tight cluster of leaves forming. Too much nitrogen at this stage will send your plant into leafy overdrive instead of developing that beautiful curd. Think of it as training your plant to focus its energy where we want it.
Harvesting Insight: That 1-inch cut below the base in Step 4 preserves the plant's ability to produce side shoots. For varieties like Romanesco or certain purple types, this can mean multiple harvests from a single plant. I always leave the outer leaves intact—they protect the tender head and continue photosynthesizing to support future growth.
Pro Tips for Cauliflower Plant Growth Stages
- These garden-tested strategies will help you coax the most from your cauliflower plants—no green thumb required.
- Soil Temperature Secret: That 70-80°F soil temperature range in Step 1 is non-negotiable for germination.
- Thinning Technique: When you reach the 75% sprouted mark in Step 1, use clean scissors to snip seedlings at soil level rather than pulling.
Frequently asked questions
Got questions about growing cauliflower?
Whether you're a beginner or a seasoned gardener, these common queries will help you navigate each stage—from seed to harvest—like a pro.
How long does it take for cauliflower to go from seed to harvest?
Most cauliflower varieties take 60–90 days to mature, depending on the type. Early varieties (like 'Snowball Y Improved') can be ready in as little as 55–65 days, while late-season types may take closer to 90+ days. Start seeds indoors 4–6 weeks before your last frost for a head start!
Can I grow cauliflower in hot weather?
Cauliflower thrives in cool temperatures (50–75°F), so it struggles in extreme heat. If you live in a hot climate, opt for shade cloth or plant in late summer/early fall to avoid bolting (premature flowering). Varieties like 'Cheddar' or 'Purple of Sicily' are more heat-tolerant than others.
Why are my cauliflower leaves turning yellow or wilting?
Yellowing leaves often signal nutrient deficiencies (like nitrogen or magnesium) or pests (cabbage worms, aphids). Check soil moisture—overwatering can cause rot, while underwatering leads to wilting. Apply a balanced fertilizer (like 10-10-10) and inspect plants for holes or sticky residue. Neem oil can help with pests!
How do I know when cauliflower is ready to harvest?
Harvest when the head is firm, compact, and 6–8 inches wide, before the buds open. The outer leaves should wrap snugly around the curd. Use a sharp knife to cut the head 1–2 inches below—leave a few leaves to protect the plant if regrowth is desired. Pro tip: Harvest in the morning for the freshest taste!
Can I grow cauliflower in containers or small spaces?
Choose compact varieties like 'Miniature Snowball' or 'Purple Cape' for containers (at least 12–18 inches deep). Use a well-draining potting mix and ensure the pot gets 6+ hours of sunlight daily. Space plants 18–24 inches apart to allow airflow and prevent disease.
Wrapping up and next steps
Understanding the cauliflower plant growth stages is your roadmap to a thriving harvest—whether you're a seasoned gardener or just starting out! 🌱 From seed germination to curd formation, each phase plays a critical role in ensuring your plants reach their full potential.
With the right care, patience, and timing, you’ll be savoring homegrown cauliflower in just 60 days.
Ready to put your newfound knowledge into action? Start planning your next planting session—experiment with varieties, tweak your soil conditions, or even try succession planting to extend your harvest. Happy growing! 🌟