Flowers
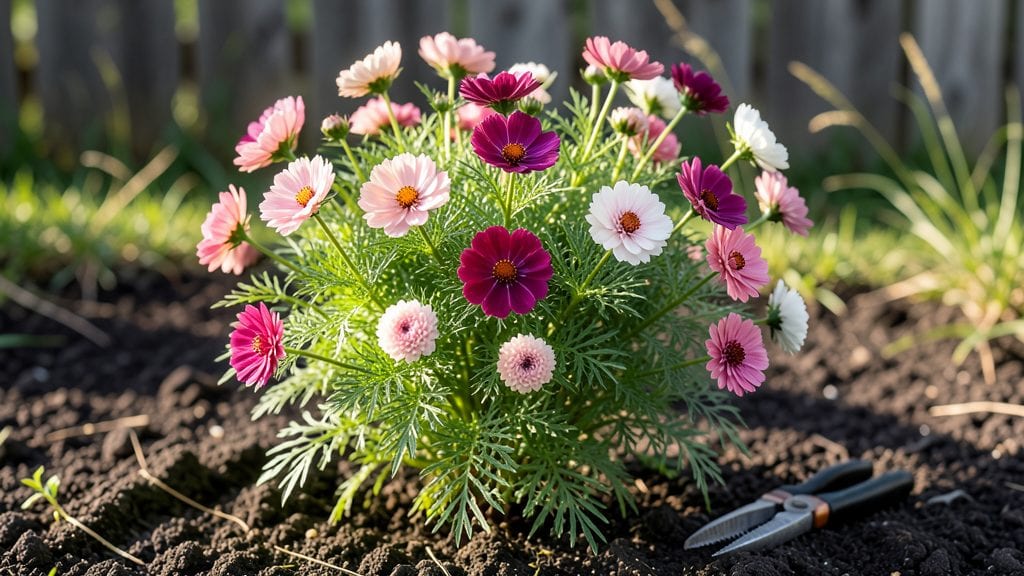
There’s nothing quite like watching the cupcake cosmos flower burst into pastel clouds of pink, white, and lavender—especially when they bloom in just 10 days from seed. 🌸 I’ve grown them in my Pacific Northwest garden for three seasons now, and they’ve become my go-to for instant color, pollinator traffic, and zero fuss.
These little powerhouses thrive where other flowers flounder, turning even the driest corners into cheerful displays.
The secret to their success? They’re drought-tolerant, heat-loving, and happy in poor soil—perfect for the PNW’s unpredictable summers. Direct-sow them after your last frost, and they’ll self-seed like crazy, giving you more blooms next year with no effort.
Their 2- to 3-foot height makes them ideal for borders, containers, or cutting gardens, while their fuzzy centers attract bees and butterflies by the dozen. Plus, they’re non-toxic, so pets and kids can play among them.
By mid-summer, you’ll have a nonstop parade of blooms—just snip spent flowers to encourage more, and watch them keep going until frost. They pair beautifully with sunflowers, zinnias, or even herbs like thyme, creating a cottage-garden vibe that’s both pretty and practical.
And here’s the best part: they’re edible (petals add a mild floral note to salads), though you’ll likely spend more time admiring them than eating them.
Whether you’re a beginner or a seasoned gardener, cupcake cosmos deliver instant gratification—fast growth, long bloom time, and minimal care. Let’s get those seeds in the ground and turn your garden into a pollinator paradise.
📚 In This Guide
- What you need
- Instructions
- Tips and common mistakes
- Wrapping up and next steps
What you need
- ● Seeds: 1 packet of Cupcake Cosmos (Cosmos bipinnatus) seeds (approx. 50-100 seeds per packet). Look for organic or heirloom varieties for best results!
- ● Potting Mix: 1 bag (12-18 qt) of high-quality, well-draining seed-starting mix or organic potting soil (avoid garden soil—it’s too dense!).
- ● Containers: 1-2 biodegradable seedling pots (2-3" diameter) or
- ● A seed tray with individual cells (for sowing multiple seeds at once).
- ○ Grow Lights (Optional but Helpful): 1-2 full-spectrum LED grow lights (12-15" above seedlings) if starting indoors before last frost.
- ● Planting Tools: 1 small hand trowel (for transplanting seedlings).
- ● 1 spray bottle (for gentle watering of seeds).
- ● Outdoor Supplies (Post-Transplant): 1 garden hose with adjustable nozzle or 1 watering can (for deep watering).
- ● 1 mulch (straw or shredded leaves) to retain moisture and suppress weeds.
- ○ Pruning Shears (Optional): Small bypass pruners for deadheading spent blooms (encourages more flowers!).
- ● Location: A spot with full sun (6+ hours/day)—Cosmos thrives in the PNW’s bright but often cloudy summers!
- ● Timing: Indoor Start (4-6 weeks before last frost): Ideal for a head start.
- ● Direct Sow (After last frost): Cosmos seeds germinate quickly (5-10 days) in warm soil.
- ● Soil Prep: Amend garden beds with compost (1-2 inches mixed in) for nutrient-rich soil.
- ● 1 bee-friendly companion plant (like borage or marigolds) to attract even more pollinators!
- ● 1 decorative pot or trellis (if growing in containers or training vines).
- ● 1 camera—these flowers are stunning in bloom! 📸
Step-by-Step instructions for growing cupcake cosmos from seed
Here's how I get these cheerful pollinator magnets blooming in just 6-8 weeks—no fuss, no waiting.
🌱 Step 1: Start Seeds Indoors for a Head Start
Fill small seed-starting trays with the seed-starting mix and moisten it until damp but not soggy. Press the mix down gently so it's firm enough to hold seeds in place. Cosmos seeds are tiny, so I use a toothpick to create tiny holes about ¼ inch deep—just enough to cradle one seed per spot.
Drop 1-2 seeds into each hole (they germinate easily) and cover lightly with more mix. Here's the thing—cosmos seeds don't need light to germinate, so you can plant them just under the surface. Mist the soil gently with water until it's evenly moist. Place the tray in a warm spot (around 70°F) where they'll stay consistently moist.
💧 Step 2: Wait for Sprouts and Thin Carefully
Germination happens fast—you'll see tiny sprouts in just 3-7 days. Once they emerge, move the tray to a bright spot with 6+ hours of indirect light daily. If your seedlings start stretching toward the light (they'll look leggy and pale), they need more brightness. I keep mine under a grow light for the first two weeks until they're sturdy enough for natural light.
When the seedlings have 2-3 true leaves (the first pair are just cotyledons), it's time to thin. Use small scissors to snip the weaker seedling at soil level, leaving the strongest one in each cell. Don't pull—you'll disturb the roots of the plant you're keeping. Water gently after thinning so the remaining plants settle into their space.
☀️ Step 3: Harden Off and Transplant Outdoors
After 4-6 weeks indoors, your cupcake cosmos seedlings will be ready for the garden. Start hardening them off by placing the trays outside in a sheltered spot for 1-2 hours the first day. Gradually increase their outdoor time over 7-10 days, moving them to sunnier locations each time. They'll let you know they're ready when they stop wilting and look perky after a full day outside.
Choose a spot in your garden with full sun to partial shade—cosmos thrive in both. Dig holes slightly larger than the root balls of your seedlings and space them 12-18 inches apart. Gently remove each seedling from its container, tease the roots if they're circling, and place it in the hole. Fill in with soil and water deeply to help them settle in.
🌿 Step 4: Maintain for Continuous Blooms
Once transplanted, cupcake cosmos are low-maintenance. Water them deeply once a week, allowing the top 1-2 inches of soil to dry out between waterings. They're drought-tolerant once established, so don't overwater—this prevents leggy growth and encourages strong stems. A light mulch around the base helps retain moisture and keeps weeds at bay.
Deadhead spent blooms by pinching them off just above a set of leaves. This encourages more flowers to form and keeps your plants looking tidy. You'll see a fresh flush of blooms within 2-3 weeks of deadheading. These flowers are a magnet for pollinators, so you'll soon have bees, butterflies, and hummingbirds visiting your garden.
Tips & tricks for growing cupcake cosmos from seed
These little tricks will help you skip the common pitfalls and get those cheerful blooms thriving in record time.
Seed-Planting Precision: When creating those ¼-inch-deep holes for your seeds in Step 1, use a toothpick to make the holes just wide enough to cradle one seed. The key is to keep them shallow—cosmos seeds don't need light to germinate, but they'll rot if buried too deep. I find using a fine-tip marker to trace the hole location helps me stay consistent across all seeds.
Lighting Strategy for Seedlings: In Step 2, when your seedlings start stretching toward the light (that's your sign they need more brightness), don't just move them to a sunny windowsill. I've found that placing them under a grow light for the first two weeks gives them the consistent energy they need to develop strong stems. If you don't have a grow light, rotate the tray daily so all sides get even exposure.
Thinning Technique: The moment you see 2-3 true leaves in Step 2, it's time to thin—but here's what nobody tells you: use small scissors instead of pulling. This prevents disturbing the roots of your kept seedlings. I like to snip at soil level and immediately water the remaining plants. This gives them a little drink to help them recover from the shock of losing their neighbors.
Harden-Off Hack: When you're ready to transplant after 4-6 weeks indoors, start the hardening-off process in Step 3 by placing your trays in a sheltered spot that gets morning sun and afternoon shade. This gradual transition prevents the shock of full sun exposure. I've seen seedlings wilt dramatically when moved straight to full sun—this method saves them every time.
Pro Tips for Cupcake Cosmos Flower
- These little tricks will help you skip the common pitfalls and get those cheerful blooms thriving in record time.
- Seed-Planting Precision: When creating those ¼-inch-deep holes for your seeds in Step 1, use a toothpick to make the ...
- Lighting Strategy for Seedlings: In Step 2, when your seedlings start stretching toward the light (that's your sign t...
Frequently asked questions
Got questions about growing your own cupcake cosmos flower? You’re not alone! Here are some of the most common queries—plus quick answers to help you cultivate a thriving pollinator paradise in your Pacific Northwest garden.
How long does it take for cupcake cosmos seeds to germinate?
These seeds are fast—expect germination in just 5–10 days when planted in warm soil (60–70°F). For a head start, soak seeds overnight before sowing. If your PNW spring is chilly, use a seedling heat mat or wait until after the last frost for direct outdoor planting. Patience pays off with blooms in 6–8 weeks!
When is the best time to plant cupcake cosmos in the Pacific Northwest?
Sow seeds directly in the garden after the last frost (typically April–May in most PNW regions). For a longer bloom season, stagger plantings every 2–3 weeks until early summer. They’re annuals, so no need to worry about overwintering—just enjoy their effortless growth!
Are cupcake cosmos flowers really that great for pollinators?
These butterfly and bee magnets produce nearly non-stop blooms from summer to frost, offering high nectar rewards. Their pink, white, and red hues attract a variety of pollinators, including hummingbirds. Pair them with other PNW-friendly perennials like lavender or coneflowers for a pollinator buffet.
How do I keep cupcake cosmos thriving in rainy PNW weather?
These flowers are drought-tolerant once established, but heavy rain can cause seed rot or fungal issues. Improve drainage by amending soil with compost or perlite before planting. Space plants 12–18 inches apart for airflow, and avoid overhead watering. If mildew appears, snip affected leaves and improve circulation.
Can I grow cupcake cosmos in containers or small gardens?
Yes! They thrive in containers, window boxes, or small spaces as long as the pot is at least 12 inches deep and has drainage holes. Use a lightweight potting mix and fertilize lightly with a balanced 10-10-10 formula every 4–6 weeks. Deadhead spent blooms to encourage continuous flowering—even in tight quarters!
What can I plant alongside cupcake cosmos for a low-maintenance border?
Pair them with self-seeding annuals like larkspur, zinnias, or bachelor’s buttons for a no-fuss pollinator garden. For height contrast, add tall grasses (e.g., switchgrass) or sunflowers. Avoid heavy feeders like petunias, which compete for nutrients. Let cosmos self-sow for next year’s effortless blooms!
Wrapping up and next steps
The Cupcake Cosmos Flower isn’t just a stunning addition to your Pacific Northwest garden—it’s a pollinator powerhouse that thrives with minimal fuss! 🌸 With its fast germination, vibrant blooms, and low-maintenance charm, this flower is your ticket to a buzzing, beautiful outdoor space.
Whether you're a seasoned gardener or a curious beginner, its resilience and versatility make it the perfect choice for transforming your garden into a thriving ecosystem.
Ready to plant the seeds of success? Grab your supplies, pick a sunny spot, and let the Cupcake Cosmos work its magic. Watch your garden bloom with color—and life! 🌱✨