
Flowers
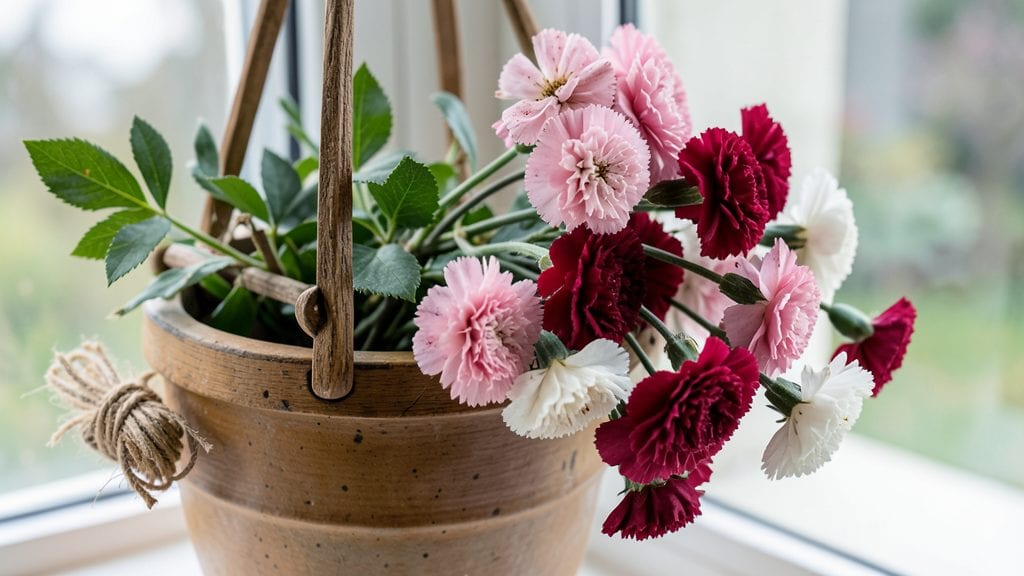
Dried carnation flowers preserve that perfect summer bloom long after the season ends. ✨ I’ve turned faded garden beds into timeless decor by drying carnations—whether in rustic wreaths, fragrant potpourri, or elegant centerpieces. The key is capturing their delicate petals at peak freshness before they wilt.
You’ll need just a few simple supplies: fresh carnation blooms, paper towels, rubber bands, and a dry, dark space. No fancy equipment required—just patience and a steady hand. The process takes about 2-3 weeks, but the results last for years, adding charm to any room.
Imagine wreaths that smell like a country garden or potpourri that releases sweet fragrance with every breath. These preserved blooms bring color and nostalgia to winter tablescapes, holiday garlands, or even framed botanical art. The possibilities are endless once you master the technique.
Perfect for gardeners who love seasonal decor, crafters seeking natural textures, or anyone who wants to extend their garden’s beauty indoors. Let’s bring those dried carnations to life in your home!
📚 In This Guide
- What you need
- Instructions
- Tips and common mistakes
- Wrapping up and next steps
What you need
- ● Fresh carnation flowers: Choose vibrant, fully bloomed flowers (about 10-15 stems for a small batch or 30+ stems for larger arrangements). Opt for dark pink, red, or white varieties—they dry beautifully!
- ● Newspaper or acid-free paper: Enough sheets to layer 3-4 inches thick (about 10-15 sheets for a standard batch). Note: Avoid glossy or colored paper—it can stain!
- ○ Drying agent (optional but recommended): Silica gel: 1-2 cups (for fast, even drying in 3-5 days), or
- ● Dried rice or uncooked beans: 2-3 cups (budget-friendly, takes 2-3 weeks).
- ● Scissors or floral shears: Sharp enough to trim stems cleanly without crushing petals.
- ● Small bowls or containers: 2-3 shallow containers (for rinsing or organizing petals post-drying).
- ● Clean workspace: A flat surface (like a table) covered with a protective sheet (newspaper or parchment paper).
- ● Twine or rubber bands: For bundling stems during drying (2-3 pieces).
- ○ Glove (optional): A pair of nitrile gloves if handling silica gel or rice to avoid residue.
- ● Patience!: Drying times vary—plan for 3 days to 3 weeks depending on your method.
- ● 🌡️ Temperature matters: Aim for a cool, dry space (60–70°F). Humidity is the enemy—avoid basements or bathrooms!
- ● ✨ Preserve color: Spray dried flowers with clear hairspray or a light coat of Mod Podge to lock in vibrancy.
- ● 🎯 Storage hack: Keep dried carnations in airtight containers with silica packets to prevent moisture.
Step-by-step guide to drying carnations for long-lasting garden decor
Preserving carnations is simpler than you think—just follow these careful steps for blooms that stay vibrant for years.
🌱 Step 1: Select and Prepare Fresh Carnations
Pick fully bloomed carnations with dry stems and no wilting. Cut stems at a 45-degree angle just before drying to maximize water uptake. Remove any lower leaves that might touch water during the process—this prevents bacterial growth and keeps stems clean.
Here's the thing—don't use flowers sprayed with preservatives or wilted blooms. The best carnations for drying are those harvested at peak freshness, typically when 70-80% of petals are fully open. You'll know they're ready when the centers are tight but the outer petals show rich color.
💧 Step 2: Choose Your Drying Method
Air drying works best for carnations. Bundle 4-5 stems together (your servings) and wrap the stems tightly with twine or floral tape, leaving the blooms free. Suspend them upside down in a dry, dark, well-ventilated area like a closet or pantry where humidity stays below 50%.
For faster results, try the silica gel method if you have it—place individual blooms in a tray of silica gel for 3-5 days until completely dry. This preserves color better but requires monitoring to avoid over-drying. Either way, drying takes 2-4 weeks depending on your climate.
☀️ Step 3: Monitor and Test for Dryness
Check blooms every 3-5 days by gently pressing a petal. When it crumbles slightly but doesn't break apart, they're ready. Remove any stems that dry unevenly—they'll snap easily when fully dehydrated. You'll see petals lose 90% of their moisture and feel papery to the touch.
This is the moment that matters: if you leave them too long, petals may turn brittle and lose color. Store dried carnations in airtight containers with silica gel packets to maintain freshness. Properly dried blooms keep their shape and color for years when stored correctly.
✂️ Step 4: Preserve and Display Your Dried Carnations
Once completely dry, trim stems to 3-4 inches and arrange in vases with fresh water for an instant dried floral display. For long-term storage, place individual blooms in small organza bags with a bay leaf to deter pests. The bay leaf adds a subtle fragrance that keeps moths away.
Don't skip this: handle dried carnations gently—they're fragile after dehydration. Use them in wreaths, potpourri, or framed arrangements for everlasting garden decor. With proper care, your preserved blooms will stay beautiful for decades, making them perfect for heirloom displays.
Tips & tricks for perfectly preserved carnations
Preserving carnations beautifully requires attention to detail—here's what I've learned after drying dozens of batches over the years.
Selection is Everything: The 70-80% bloom rule is non-negotiable. Carnations at this stage contain just enough moisture to dry properly without becoming brittle. I always test petal firmness by gently pressing—if it springs back immediately, it's not ready. Wait until you see slight give when pressed, but the center remains tight. This is when they'll retain their shape best during drying.
Bundle Size Matters: Those 4-5 stems per bundle aren't arbitrary—they create the perfect airflow balance. Too few stems means uneven drying, while too many creates humidity pockets that trap moisture. I use floral tape specifically because it's breathable yet secure, preventing stems from shifting during the 2-4 week process. This consistency is key to preventing mold.
Humidity Control: That 50% humidity threshold isn't just a suggestion—it's critical. I've ruined batches in humid climates by ignoring this. Use a hygrometer if possible, or place a small dish of silica gel near your drying area. For extra protection, consider using a dehumidifier in the room where you're drying, especially during summer months when humidity naturally rises.
Testing for Perfect Dryness: The crumble test is your best friend, but timing is everything. Check every 3-5 days by gently pressing a petal—it should crumble slightly but not disintegrate completely. At this stage, petals will feel papery to the touch and lose 90% of their moisture. If you wait too long, they'll become brittle and lose that lush color. I've learned this the hard way after discovering over-dried batches that crumbled at the slightest touch.
Pro Tips for Dried Carnation Flowers
- Preserving carnations beautifully requires attention to detail—here's what I've learned after drying dozens of batches over the years.
- Selection is Everything: The 70-80% bloom rule is non-negotiable.
- Bundle Size Matters: Those 4-5 stems per bundle aren't arbitrary—they create the perfect airflow balance.
Frequently asked questions
Got questions about dried carnation flowers? You’re not alone! Here are some of the most common queries—plus straightforward answers to help you work with these timeless blooms like a pro.
How long do dried carnation flowers last?
With proper care, dried carnation flowers can last years! Store them in a cool, dry place (like a sealed glass jar or airtight container) away from direct sunlight. Avoid humidity—their delicate petals can degrade if exposed to moisture. For extra longevity, add a silica gel packet to your storage container.
How do I revive dried carnations that look wilted?
Dried carnations won’t "revive" like fresh flowers, but you can soften them temporarily. Place the blooms in a shallow dish of warm water for 10–15 minutes, then gently pat them dry with a paper towel. For arrangements, use floral tape or wire to reshape petals. Pro tip: Avoid soaking—excess water can cause petals to darken or fall off.
Can I dye dried carnation flowers for colored arrangements?
Use acidic dye (like fabric dye or food coloring + vinegar) for vibrant results. Simmer the dye in water, then submerge the dried carnations for 1–2 hours. For pastels, reduce dye concentration. Rinse with cold water and let dry flat. Warning: Test on a small batch first—some dyes may alter texture or fade over time.
What’s the best way to preserve dried carnations long-term?
For museum-quality preservation, follow these steps:
- Clean: Remove stems and debris with sharp scissors.
- Dry: Lay flat between paper towels for 24 hours (prevents mildew).
- Store: Place in an archival-quality box with silica gel packets. Label with the date!
Freezing isn’t recommended—it can cause petals to crisp. Instead, opt for room-temperature storage in a dark, climate-controlled space.
Are dried carnations safe for kids or pets?
Generally yes! Dried carnations are non-toxic and hypoallergenic (unlike fresh flowers). However, avoid ingesting large quantities—they can cause mild stomach upset. For pets, monitor curious chewers: while not poisonous, dried petals might pose a choking hazard. Use them in arrangements with pet-safe materials like cotton or burlap.
What can I do with dried carnations if they’re too damaged for decor?
Don’t toss them! Repurpose with these creative ideas:
- Potpourri: Mix with essential oils (lavender, citrus) for a fragrant blend.
- Herbarium sheets: Press between heavy books for botanical art.
- Embroidery: Use as stencils for floral designs on fabric.
- Compost: Crumble into garden soil (petal-decomposed carnations add nutrients!).
Every bloom has a second life—get crafty!
Wrapping up and next steps
Dried carnation flowers are a simple yet magical way to bring timeless beauty into your home—whether as fragrant potpourri, elegant centerpieces, or rustic decor. With just a few tools and a little patience, you’ve got everything you need to preserve their charm for years. 🌸✨
Now that you’re equipped with the know-how, why not try your hand at it today? Start small with a single bouquet, experiment with different drying methods, and let your creativity bloom! Share your stunning results with fellow flower lovers—your preserved blooms might just inspire someone else’s next crafting adventure.