
Propagation
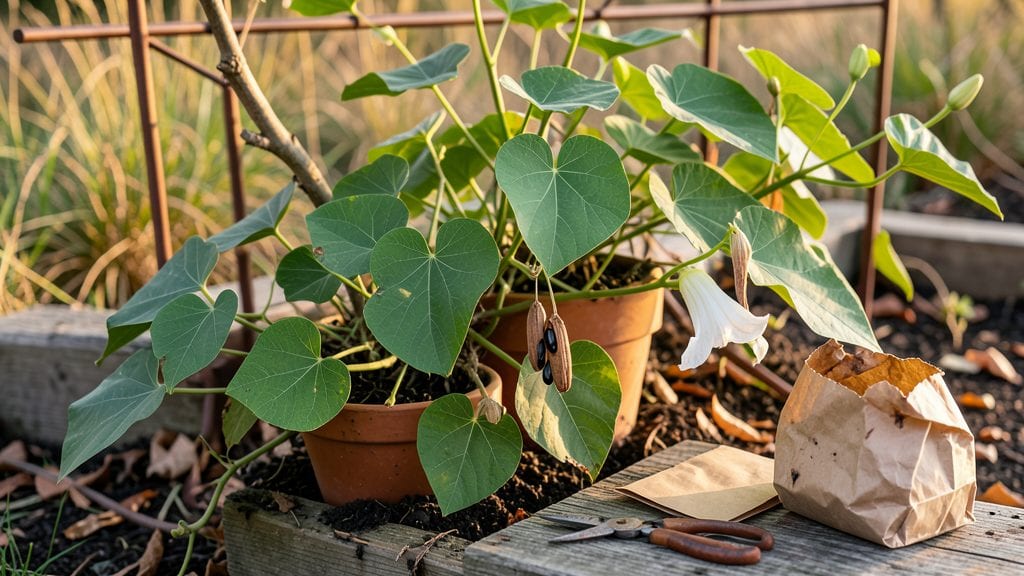
Saving moonflower seeds means next summer’s moonlit garden starts with this simple harvest. 🌙 The key is timing—wait until those papery seed pods turn brown and split open naturally, usually late August through September in most zones.
One wrong move and you’ll lose the seeds to birds or rain, but when done right, you’ll have a stash of fragrant blooms waiting for next year.
You’ll only need a few things: sharp scissors, a paper bag for drying, and a cool, dark spot for storage. The pods must dry completely before handling—wet seeds rot in storage, and that’s a heartbreaking waste after all your effort.
I’ve saved seeds from a single vine for three years running, and the plants come back stronger every time.
Once dry, the seeds are tiny but mighty—plant them in spring after the last frost, and you’ll see those familiar trumpet-shaped blooms by midsummer. The scent alone makes it worth the wait, plus you’ll save money and avoid nursery crowds.
Just watch for slugs during germination; they love fresh moonflower seedlings.
This method works for both annual and perennial moonflowers, though annuals produce more reliable seeds. Store them in an envelope with a moisture absorber like silica gel, and they’ll stay viable for 2-3 years. No fancy equipment needed—just patience and a little attention to detail.
📚 In This Guide
- What you need
- Instructions
- Tips and common mistakes
- Wrapping up and next steps
What you need
- ● Mature moonflower pods: 5–10 fully ripened, brown pods (harvest when they split open naturally or turn dry and papery).
- ● Paper towels or newspaper: 2–3 sheets for drying seeds.
- ● Small breathable container: A paper envelope, mesh bag, or small cardboard box (for initial seed storage).
- ● Permanent marker or label: To tag seeds with the harvest date and variety.
- ● Air-tight storage container: A resealable plastic bag with a silica gel packet or a glass jar with a tight lid (for long-term storage).
- ● Pruning shears or scissors: For harvesting pods cleanly.
- ○ Tweezers (optional): Helpful for picking out seeds from sticky pods.
- ● Desiccant packet: To absorb excess moisture in storage containers.
- ● Fine-mesh sieve: For sifting seeds from debris.
- ● Humidity monitor: If storing seeds in a basement or garage (ideal humidity: 30–50%).
- ● Seed catalog or notebook: To track germination rates and notes on each batch.
Step-by-Step guide for harvesting and saving moonflower seeds
Moonflowers are annuals that self-seed beautifully—here’s how to collect their seeds for next year’s garden.
🌱 Step 1: Identify and Wait for Seed Pods to Mature
Moonflowers (Ipomoea alba) produce large, papery seed pods after their white trumpet blooms fade. Wait until the pods turn brown and papery—this usually happens 4-6 weeks after flowering, depending on your climate. If you harvest too early, the seeds inside won’t be fully developed.
Check pods daily during the last week of bloom season. A mature pod feels lightweight when held and makes a slight rustling sound when shaken gently. If the pod still feels firm or green, leave it on the vine a few more days.
🌿 Step 2: Harvest the Seed Pods Gently
Use clean, sharp pruning shears to snip the entire seed pod from the vine, leaving a small stem attached. Avoid pulling or twisting, which can damage the plant or cause the pod to split prematurely. Place the harvested pods in a paper bag (not plastic) to allow airflow and prevent moisture buildup.
Work on a dry day when humidity is low. If rain is forecast, harvest immediately—moisture can cause the pods to rot or mold before you’ve extracted the seeds. Store the bag in a cool, dry place (like a garage or shed) until you’re ready to process the seeds.
✂️ Step 3: Extract Seeds from the Pods
Once the pods are fully dry (usually 1-2 weeks after harvest), open them carefully. Lay a pod on a clean surface and gently squeeze or rub between your fingers until it splits open. You’ll find flat, dark brown seeds inside, each about ½ inch long. Discard any empty or shriveled pods—they won’t produce viable seeds.
Spread the seeds on a tray lined with paper towels and let them dry for another 24 hours in a warm, dry spot. This extra step ensures any lingering moisture evaporates, preventing mold during storage. Once completely dry, transfer the seeds to a small envelope or airtight container labeled with the harvest date.
🪴 Step 4: Store Seeds Properly for Next Year
Place the sealed container in a cool, dark place (like a refrigerator or basement) where temperatures stay between 35-50°F. Moonflower seeds remain viable for 2-3 years under these conditions, though germination rates drop slightly after the first year. Avoid storing them in the freezer—moisture buildup can ruin the seeds.
Before replanting, test a few seeds by placing them in a moist paper towel and sealing the towel in a plastic bag. Check for sprouts in 7-10 days. If germination is slow, store the remaining seeds for another year—they’ll still work but may take longer to sprout.
⏰ Step 5: Plant Saved Seeds for Next Season
Sow moonflower seeds indoors 8-10 weeks before your last frost date or directly in the garden after all danger of frost has passed. Press seeds ½ inch deep into warm, moist soil and keep them consistently damp until germination, which typically occurs in 10-14 days at 70-75°F soil temperatures.
Moonflowers thrive in full sun and well-draining soil. Thin seedlings to 12-18 inches apart once they develop their first true leaves. With proper care, your saved seeds will produce the same stunning night-blooming vines as the parent plant.
Tips & tricks for perfect moonflower seed saving
Here's what I've learned after saving moonflower seeds for years—these little tricks make all the difference between viable seeds and wasted effort.
Timing Secret: In Step 1, when checking for mature pods, look for the subtle "rustling" sound when you shake them gently—this is your best indicator of readiness. I've found that pods in cooler climates often need the full 6 weeks, while warmer areas can be ready in just 4. Mark your calendar when the first blooms appear to track that 4-6 week window accurately.
Harvesting Wisdom: For Step 2, harvest on a dry morning after any overnight dew has evaporated. The pods need to be completely dry to prevent mold during storage. I keep a small mesh laundry bag handy to collect pods directly from the vine—it allows airflow while preventing seeds from spilling out during transport.
Seed Drying Technique: After extracting seeds in Step 3, don't skip the extra 24-hour drying period. I've seen mold develop overnight when seeds had even slight moisture. Place your drying tray near a fan on low setting to speed up the process while maintaining gentle airflow. This is especially important if your climate is naturally humid.
Storage Strategy: When storing seeds in Step 4, consider adding a small silica gel packet to your airtight container. While the cool, dark conditions are perfect, the silica helps absorb any trace moisture that might develop over time. I label my containers with both the harvest date and the year—this helps me track seed viability more accurately.
Pro Tips for Save Moonflower Seeds
- Here's what I've learned after saving moonflower seeds for years—these little tricks make all the difference between viable seeds and wasted effort.
- Timing Secret: In Step 1, when checking for mature pods, look for the subtle "rustling" sound when you shake them gently—this is your best indicator of readiness.
- Harvesting Wisdom: For Step 2, harvest on a dry morning after any overnight dew has evaporated.
Frequently asked questions
Got questions about saving moonflower seeds? Here are some common ones—and their answers—to help you succeed!
When is the best time to harvest moonflower seeds?
Harvest seeds when the moonflower pods turn brown and begin to split open naturally, usually late summer to early fall. Wait until the pods are fully dry but haven’t released seeds yet—this ensures viability. Avoid harvesting too early, as seeds won’t be mature enough to sprout!
How long can I store moonflower seeds before planting?
Moonflower seeds stay viable for 2–3 years if stored properly in a cool, dry place (like a sealed container in the fridge). For best results, plant them within a year. Label your seed packets with the harvest date to track freshness!
What if my moonflower pods don’t open naturally?
If pods stay closed, gently squeeze them or use a small knife to slit them open—just avoid damaging the seeds inside. Alternatively, place pods in a paper bag for a few days; the movement may encourage them to release seeds on their own. Patience is key!
Can I save moonflower seeds from hybrid varieties?
Hybrid moonflowers (like ‘Starlight’ or ‘Evening Sky’) may not always produce true-to-type seeds. For consistent results, save seeds from open-pollinated varieties or buy certified seeds. If you’re experimenting, note any variations in next year’s blooms!
Do I need to clean the seeds before storing them?
Yes! Remove seeds from pods and let them dry for 1–2 weeks in a warm, dry spot (like a sunny windowsill). Rub off any remaining pulp or debris with your fingers or a soft brush. Clean seeds store better and reduce mold risk.
Wrapping up and next steps
Saving moonflower seeds is a rewarding way to bring next year’s vibrant blooms to life with minimal effort! By following these simple steps—harvesting ripe pods, drying them properly, and storing seeds in a cool, dry place—you’ll ensure a fresh batch of Ipomoea alba for seasons to come. 🌙✨
Now that you’re equipped with the know-how, give it a try—your garden (and future moonlit evenings) will thank you! Ready to plant? Grab your saved seeds and start your next propagation adventure here.