
Propagation
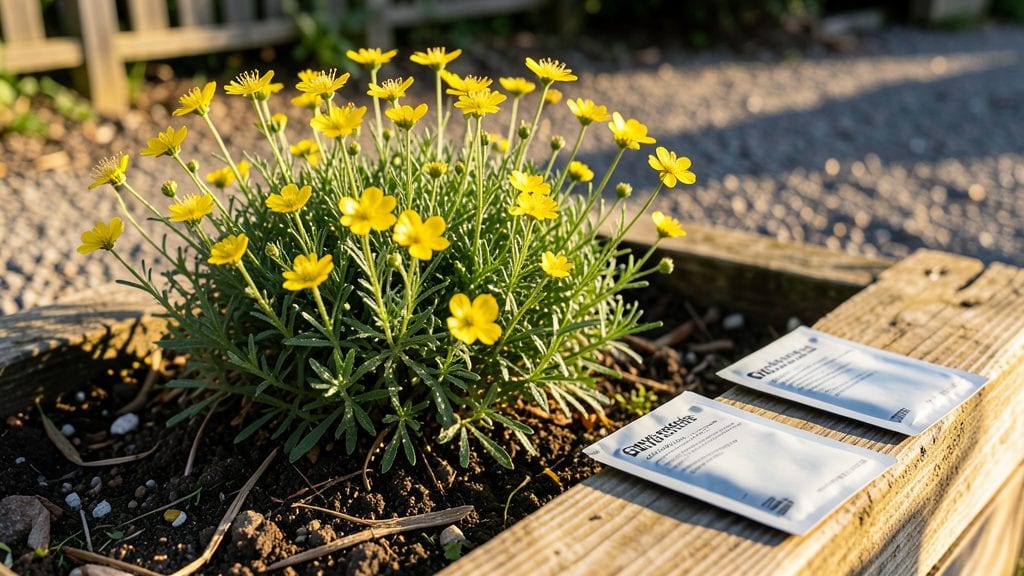
Growing western wallflower seeds in your Pacific Northwest garden means welcoming delicate starbursts of color even when frost still lingers in the air. 🌿 I’ve watched these hardy annuals burst through chilly soil to paint my spring garden with cheerful yellows and purples—long before most flowers dare to bloom.
The secret lies in their cold resistance and a few simple tricks that make them shockingly easy to grow, even for beginners who’ve killed more seedlings than they’d admit.
You’ll need just three things to get started: a sunny spot (they thrive in full sun but tolerate partial shade), well-draining soil (they hate soggy roots), and a light touch with water.
Scatter those tiny seeds directly outdoors after your last frost date or start them indoors 6-8 weeks before transplanting. The key to success is patience—these seeds germinate slowly, often taking 2-4 weeks to sprout, but once they do, they grow fast and fearless against cool weather.
What you’ll end up with is a cloud of fragrant, butterfly-magnet blooms that last from early spring through summer. The plants stay compact (about 12-18 inches tall), so they’re perfect for borders, rock gardens, or even container edges.
Plus, they self-seed reliably, meaning you’ll get free plants for years to come—just let a few seed pods dry on the stems before they scatter.
For experienced gardeners, try deadheading spent blooms to encourage more flowers or mix them with native pollinator plants for a thriving ecosystem. And if you’re in a wetter PNW climate, prioritize raised beds or slopes to prevent waterlogging.
Ready to add these cold-hardy stars to your garden? Let’s get those seeds in the ground.
📚 In This Guide
- What you need
- Instructions
- Tips and common mistakes
- Wrapping up and next steps
What you need
- ● Western Wallflower seeds: 10–20 seeds (check packet for exact count; they’re tiny but mighty!).
- ● Seed-starting mix: 1–2 quarts of sterile, well-draining potting soil (avoid garden soil—it’s too dense!).
- ● Seed trays or small pots: 2–4 (2–3" deep) with drainage holes—cell packs work great!
- ● Plastic wrap or humidity dome: To keep seeds cozy while germinating.
- ● Spray bottle: For gentle watering (no drowning seeds here!).
- ● Grow lights or sunny windowsill: A spot with 6–8 hours of light daily (south-facing is ideal).
- ○ Optional: Heat mat (70–75°F) to speed up germination (especially helpful in cooler PNW starts).
- ○ Optional: Fertilizer (balanced 10-10-10 or seaweed extract) once seedlings sprout true leaves.
- ○ Optional: Tweezers for delicate seed placement (they’re tiny!).
- ● Prerequisite: Patience! Germination takes 14–30 days—don’t rush it.
How to grow western wallflower seeds in cold climates
Here's how to coax these hardy blooms into your Pacific Northwest garden without fuss.
🌱 Step 1: Prepare Seed Trays for Direct Sowing
Fill shallow trays with 1 inch of moistened seed-starting mix—just enough to cover the bottom. Western wallflower seeds need no pre-treatment, so skip the soaking step. Press the soil surface lightly to create a firm, even seedbed. This prevents seeds from sinking too deep during germination.
Use a fine-mesh sieve to sprinkle seeds ¼ inch apart—they're tiny but pack a punch. A light misting keeps them in place without burying them. Here's the thing—these seeds germinate best when lightly covered or just pressed into the surface. Too much soil smothers them.
💧 Step 2: Provide Consistent Moisture and Cool Conditions
Keep the trays in a sheltered spot where temperatures stay between 50-60°F. A cold frame or unheated greenhouse works perfectly for Pacific Northwest winters. Water gently from the bottom—no top-watering until you see first true leaves appear.
Mist the soil surface daily with a spray bottle to maintain even moisture. Watch for condensation on the tray cover—if it's dripping, you're overdoing it. Western wallflowers hate soggy conditions, which lead to rot. Once seedlings emerge, reduce watering slightly but keep the soil consistently damp.
☀️ Step 3: Harden Off and Transplant Young Plants
After 4-6 weeks and seedlings reach 2 inches tall, start hardening them off. Place trays outside in partial shade for 2-3 hours daily, gradually increasing exposure. This toughens their stems before full garden planting.
Transplant when seedlings show 4-6 leaves and night temperatures stay above 40°F. Space them 12-18 inches apart in well-draining soil—these plants despise wet feet. A light mulch of ¼ inch compost helps retain moisture while preventing soil-borne diseases.
⏰ Step 4: Maintain Through First Season for Next Year's Blooms
Water established plants once weekly during dry spells, focusing on the base. Deadhead spent blooms in late summer to encourage a second flush of flowers. Western wallflowers self-seed prolifically, so you'll likely see volunteers popping up next spring.
Fertilize lightly in early spring with 5-10-10 at half-strength—too much nitrogen produces lush foliage but few flowers. These perennials thrive on neglect once established. Watch for aphids on new growth; a strong spray of water usually clears them without chemicals.
Tips & tricks for perfect western wallflower seed germination
These cold-hardy blooms reward patience—here's how to give them the best start in your Pacific Northwest garden.
Soil Surface Matters: When pressing those ¼-inch-apart seeds into the surface, aim for just enough contact to hold them in place without burying. I learned this the hard way after smothering my first batch with too much soil. Use a flat tool or even the back of a spoon to create a firm, even bed—this prevents seeds from sinking too deep during germination. A light misting afterward keeps them in place without washing them away.
Temperature Precision: Those 50-60°F conditions are non-negotiable for consistent germination. I've found that a cold frame with a thermometer becomes your best friend—especially during our unpredictable Pacific Northwest winters. If your space runs cooler, consider adding a small heating mat (set to low) beneath the trays. The key is maintaining that steady range without overheating, which can trigger rot before seeds even sprout.
Harden Off Gradually: The 2-3 hour daily increments in Step 3 are crucial for avoiding transplant shock. I start with just 1 hour on day one, then add 30 minutes each subsequent day. Watch for wilting—this tells me to reduce exposure. By the time you reach full sun, those seedlings will be tough enough to handle our coastal winds. Pro tip: Place trays on a slanted surface to mimic natural light angles and prevent leggy growth.
Compost Layering: That ¼ inch compost mulch isn't just decorative—it creates a microclimate that retains moisture while preventing soil-borne diseases. I like to sift it through a fine mesh to avoid clumps, then sprinkle it around (not over) the base of seedlings. This also introduces beneficial microbes that help young roots establish quickly in our acidic Pacific Northwest soils.
Pro Tips for Western Wallflower Seeds
- These cold-hardy blooms reward patience—here's how to give them the best start in your Pacific Northwest garden.
- Soil Surface Matters: When pressing those ¼-inch-apart seeds into the surface, aim for just enough contact to hold them in place without burying.
- Temperature Precision: Those 50-60°F conditions are non-negotiable for consistent germination.
Frequently asked questions
Got questions about growing western wallflower seeds? You’re not alone! Here are answers to the most common queries to help you cultivate these cold-hardy beauties with confidence.
When is the best time to plant western wallflower seeds?
For the Pacific Northwest’s mild, wet climate, sow seeds outdoors in early spring (March–April) or late summer (August–September) for fall blooms. Start indoors 6–8 weeks before the last frost if you prefer head starts. These seeds thrive in cool soil—no need to wait for warmth!
How much water do western wallflower seeds need?
Keep soil consistently moist but not soggy until germination (10–21 days). Once sprouted, water moderately—they’re drought-tolerant but bloom best with regular moisture. Pro tip: Use a spray bottle for tiny seeds to avoid washing them away!
Can I grow western wallflowers from store-bought seeds?
Yes! Most western wallflower seeds sold for gardens are open-pollinated, meaning they’ll grow true to type. Check labels for Erysimum menziesii or similar species. Avoid hybrid seeds (marked “F1”) if you want to save seeds for next year.
Will western wallflowers survive PNW winters?
These perennials are cold-hardy to USDA Zone 4, making them perfect for the PNW. Deadhead spent blooms in fall to encourage self-seeding—they’ll pop up year after year with minimal effort. Mulch lightly in harsh winters for extra protection.
Why aren’t my seeds germinating?
Try these fixes:
- Light exposure: These seeds need sunlight to germinate—don’t bury them deep (¼ inch max).
- Temperature: Ideal range is 60–70°F. Use a seedling heat mat if your soil is chilly.
- Freshness: Old seeds (over 1 year) may lose viability. Test viability by soaking a few in water—sinkers are good!
Wrapping up and next steps
Ready to transform your Pacific Northwest garden into a dreamy, cold-hardy paradise? Western wallflower seeds are your ticket to vibrant blooms that thrive where others falter! 🌸❄️ Their easy-care nature and stunning starburst flowers make them a must-have for any gardener—whether you're a seasoned pro or just starting out.
Now that you’re armed with the know-how, grab those seeds and start planting today! Watch your garden burst into life with minimal effort—because the best gardens grow from great ideas and bold action.