
Flowers
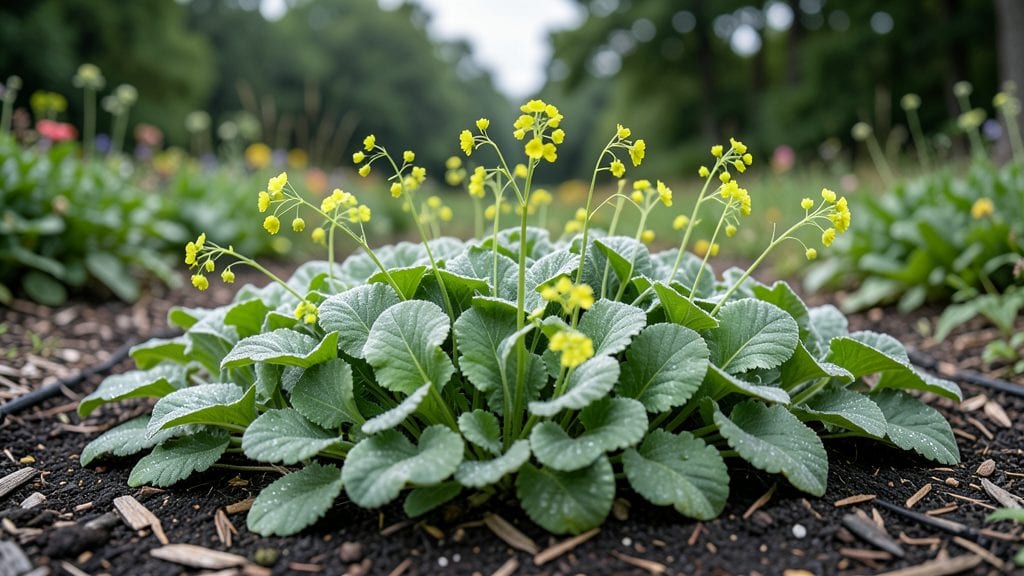
The Alchemilla mollis flower might look delicate, but its self-cleaning leaves and year-round pollinator appeal make it a garden workhorse. 🌿 I fell for this plant after watching bees and butterflies swarm its fuzzy blooms in early spring—long before other perennials even think about waking up.
Thriving in partial shade where most flowers give up, Lady's Mantle handles neglect like a pro. It asks for rich, well-draining soil and consistent moisture (but no soggy roots), and in return gives you silver-green foliage that stays lush through heat waves and frost.
The secret's in its adaptability—whether you've got rocky soil or clay, this plant makes it work.
By late summer, you'll have clusters of tiny chartreuse flowers that self-clean like magic—no deadheading needed. The real showstopper? How it keeps pollinators fed from March through November, turning your garden into a nonstop buffet for beneficial insects. Even my black thumb can't kill this one.
Perfect for borders, woodland gardens, or as a living mulch under trees. Once established, it spreads gently and needs minimal pruning—just a light tidy-up in early spring. Here's how to keep yours thriving all season long.
📚 In This Guide
- What you need
- Instructions
- Tips and common mistakes
- Wrapping up and next steps
What you need
- ● Alchemilla mollis plants: 1–3 nursery-grown plants (6–12 inches tall) or 3–5 bare-root divisions (for transplanting).
- ● Pro tip: Choose healthy plants with vibrant green foliage and no signs of pests!
- ● Well-draining potting soil: 5–10 gallons of peat-free potting mix (or garden soil amended with compost).
- ○ Optional: Add perlite or sand (1 part perlite to 4 parts soil) for improved drainage.
- ● Garden space or containers: For in-ground planting: Full sun to partial shade (4–6 hours of sunlight daily).
- ● For containers: 12–18 inch pots (1 plant per container) with drainage holes.
- ● Basic gardening tools: Trowel or hand shovel
- ○ Garden gloves (optional but recommended)
- ● Pruning shears (for trimming)
- ● Watering supplies: Watering can or hose with a gentle spray nozzle
- ● Pro tip: Water early in the morning to reduce fungal risks!
- ○ Fertilizer (optional): Balanced, slow-release fertilizer (10-10-10 or organic options like composted manure).
- ● Apply once in early spring (follow package instructions).
- ○ Mulch (optional): 2–3 inches of organic mulch (e.g., shredded bark or straw) to retain moisture.
- ● Companion plants: Pair with Achillea (yarrow) or Salvia to attract bees and butterflies.
- ● Wildflower seeds: Scatter nearby to create a pollinator corridor!
- ● Decorative stones or pebbles: For a polished look around containers.
How to cultivate Alchemilla mollis for stunning year-round interest
This hardy perennial thrives with minimal fuss—here's how to coax its velvety foliage and delicate flowers into full display.
🌱 Step 1: Select the Perfect Planting Site
Alchemilla mollis adores partial shade but tolerates full sun in cooler climates. Choose a spot with morning sunlight and afternoon shade—this prevents leaf scorch while encouraging lush growth. The plant's self-cleaning leaves repel dust and water droplets, so avoid low-lying areas where water pools after rain.
Test your soil's drainage by digging a 6-inch deep hole. If water pools after 30 minutes, amend with 2-3 inches of compost to improve aeration. The ideal soil pH ranges between 6.0 and 7.5, but mollis adapts well to slightly alkaline conditions too.
🪴 Step 2: Plant with Proper Spacing and Depth
Dig a hole twice as wide as the root ball but only as deep as the container's base. This prevents burying the crown, which can cause rot. Gently remove the plant from its container and loosen any circling roots with your fingers—this encourages outward growth instead of girdling.
Place the plant in the hole and backfill with native soil mixed with 1 cup of compost. Press firmly around the base to eliminate air pockets, then water deeply until moisture reaches 4-6 inches down. Space plants 18-24 inches apart—this gives their sprawling habit room to mature without overcrowding.
☀️ Step 3: Provide Consistent Moisture Without Overwatering
Water newly planted mollis twice weekly until established, then taper to once weekly once roots spread. The plant's fuzzy leaves repel water beautifully, but drought stress causes leaves to wilt and lose their velvety texture. Check soil moisture by inserting your finger 2 inches deep—water when dry.
Mulch with 2-3 inches of shredded bark to retain moisture and suppress weeds. Avoid organic mulches like straw, which can harbor pests. In winter, add an extra 1-2 inches of mulch to insulate roots from freeze-thaw cycles—this hardy plant survives down to -15°F with proper protection.
✂️ Step 4: Prune Strategically for Year-Round Appeal
Deadhead spent flower spikes in early summer to redirect energy into new growth. Use clean, sharp pruners to cut stems back to the nearest leaf node—this prevents disease while encouraging bushier foliage. Avoid heavy pruning in fall, as the plant's evergreen leaves provide winter interest.
In late winter or early spring, trim back any leggy stems by one-third to maintain a compact shape. This also stimulates fresh, vibrant growth for the coming season. Never prune into old wood—always cut just above a leaf bud to promote new shoots.
🌿 Step 5: Encourage Pollinators with Minimal Maintenance
Alchemilla mollis attracts bees, butterflies, and hoverflies year-round, but its magnetism peaks when plants are well-fed. Apply a balanced 10-10-10 fertilizer in early spring at half-strength to avoid burning tender roots. Water immediately after fertilizing to distribute nutrients evenly.
Division every 3-4 years rejuvenates older plants. In early spring, dig up the entire clump, separate into sections with 3-5 shoots each, and replant. This prevents overcrowding and ensures vibrant foliage. The plant's self-cleaning leaves mean you'll rarely need to clean them—just enjoy their velvety texture and delicate chartreuse flowers.
Tips & tricks for perfect Alchemilla mollis cultivation
Here's what I've learned after years of growing this stunning perennial—details that make all the difference between ordinary foliage and showstopping velvety leaves.
Soil Preparation Secret: In Step 1, when testing drainage, I've found that adding 1 cup of perlite to the 2-3 inches of compost creates even better aeration for those sprawling roots. The mollis thrives when soil feels like a fluffy cloud—never compacted. Also, if your soil tests below pH 6.0, a sprinkle of lime (about 1/4 cup per square foot) will help adjust the pH without overdoing it.
Planting Depth Matters: During Step 2, I can't stress enough how critical the depth is—never bury the crown! The top of the root ball should sit just 1/4 inch above soil level. I've seen many gardeners bury it too deep, which leads to rot. After planting, I always do a final check by measuring from the base of the plant to the soil line with my finger—it's a quick habit that saves plants.
Winter Protection Hack: When adding that extra 1-2 inches of mulch in winter (Step 3), I've discovered that using straw over shredded bark provides even better insulation against freeze-thaw cycles. The straw creates an air pocket that buffers temperature swings better than bark alone. Just make sure to remove it in early spring before new growth emerges.
Pruning Precision: In Step 4, when deadheading in early summer, I always carry a small pair of pruners with me while walking through the garden. The key is to remove spent flowers right when they start to fade—don't wait until they're completely brown. For the late winter pruning, I mark the one-third cut point with a piece of masking tape on the stem before cutting to ensure consistency across all stems.
Pro Tips for Alchemilla Mollis Flower
- Here's what I've learned after years of growing this stunning perennial—details that make all the difference between ordinary foliage and showstopping velvety leaves.
- Soil Preparation Secret: In Step 1, when testing drainage, I've found that adding 1 cup of perlite to the 2-3 inches of compost creates even better aeration for those sprawling roots.
- Planting Depth Matters: During Step 2, I can't stress enough how critical the depth is—never bury the crown!
Frequently asked questions
Got questions about Alchemilla mollis flowers? You’re not alone—this unique plant has a few quirks that gardeners love to discuss! Here are some of the most common queries, answered in a flash.
How do I keep Alchemilla mollis leaves from sticking together?
Those self-cleaning leaves are a feature, not a bug! The tiny hairs repel water, so leaves stay dry and dust-free. If they cling, it’s likely due to humidity—just shake them gently or mist lightly in dry spells. No pruning needed!
When is the best time to plant Alchemilla mollis?
Spring or early fall is ideal—soil temps should be cool (60–70°F). Avoid extreme heat or frost. For containers, plant anytime the roots aren’t frozen. Pro tip: Amend heavy clay soil with compost to prevent root rot!
Why aren’t pollinators visiting my Alchemilla mollis?
While not flashy, its fuzzy leaves and subtle flowers attract bees, hoverflies, and ladybugs. If visits are sparse, try planting near companion flowers like lavender or yarrow. Deadhead spent blooms in late summer to encourage reblooming.
Does Alchemilla mollis survive winter?
This hardy perennial thrives in USDA zones 4–8. In colder areas, mulch with straw or leaves for extra protection. Evergreen foliage adds winter interest—no need to cut back until spring!
What’s a good alternative if I want self-cleaning leaves but no flowers?
Try Lamium maculatum (‘Bee Balm’ or ‘White Nancy’) for similar foliage with no fuss. For pollinators, pair it with Heuchera (coral bells) or Sedum (stonecrop). Both are low-maintenance and drought-tolerant!
Wrapping up and next steps
Alchemilla mollis isn’t just a stunning addition to your garden—it’s a low-maintenance powerhouse that rewards you with self-cleaning leaves and year-round pollinator support. Whether you’re a seasoned gardener or a curious beginner, this hardy plant proves that beauty and ease can go hand in hand. 🌿✨
Ready to invite this pollinator magnet into your outdoor space? Start by gathering your supplies, choosing the perfect spot, and giving these simple steps a try. Your garden—and the bees—will thank you!