Flowers
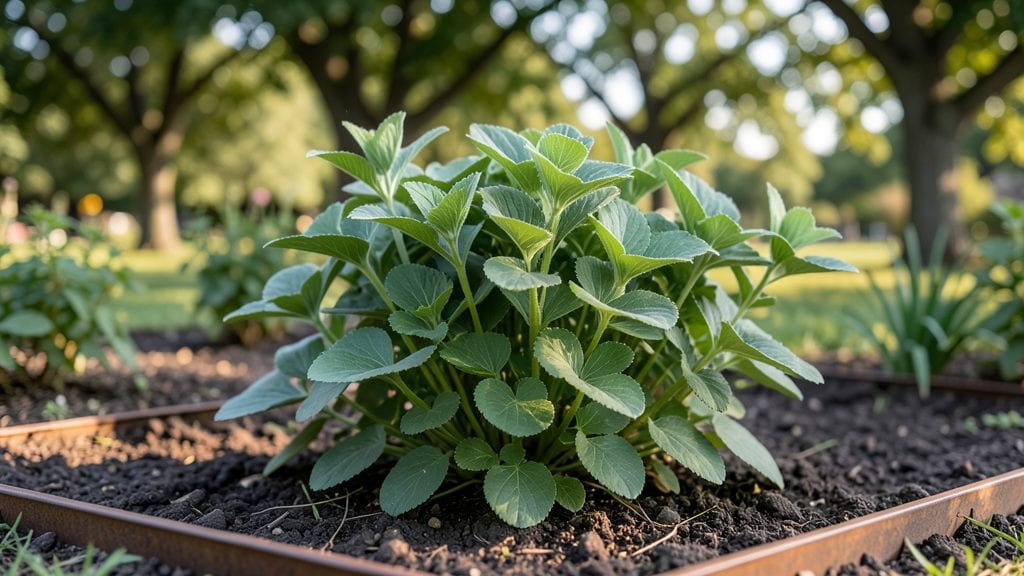
The balloon flower leaves you might overlook are actually the plant’s secret weapon—delicate, edible, and packed with flavor. 🌿 I used to toss them, thinking only the blooms mattered, until I discovered their crisp texture and mild, slightly bitter taste in salads.
These broad, heart-shaped leaves start out a vibrant green and develop a glossy finish when happy, signaling they’re ready for harvest.
Healthy foliage isn’t just about looks—it’s the foundation for those iconic blue-purple blooms you love. Keep the soil consistently moist (but not soggy) and feed lightly with balanced fertilizer every 4-6 weeks.
Yellowing leaves? That’s usually a sign of overwatering or nutrient deficiency. A quick trim of damaged leaves keeps the plant focused on growing strong new growth—and more edible leaves for your kitchen.
📚 In This Guide
- What you need
- Instructions
- Tips and common mistakes
- Wrapping up and next steps
What you need
- ● Balloon flower seeds (Platycodon grandiflorus) – Choose organic, non-GMO seeds for the best flavor and safety. Quantity: 10-20 seeds (or 2-3 seedlings if buying plants).
- ● Well-draining potting mix – A blend of 60% garden soil, 30% compost, and 10% perlite or sand to prevent root rot.
- ● Containers or garden bed – For containers: 6-8" pots (1 plant per container) with drainage holes. For gardens: Full sun to partial shade (4+ hours of sunlight daily).
- ● Organic fertilizer – Balanced 10-10-10 or compost tea for nutrient-rich soil.
- ● Watering can or hose with a gentle spray nozzle – Avoid overwatering to prevent fungal issues.
- ● Gloves – Protect your hands while handling soil or seeds.
- ● Trowel or small shovel – For transplanting seedlings.
- ● Pruning shears – To harvest leaves cleanly without damaging the plant.
- ● Mulch (straw or wood chips) – Helps retain moisture and suppress weeds.
- ● pH testing kit – Ideal soil pH for balloon flowers: 6.0–7.0.
- ○ Shade cloth (optional) – For hot climates to protect young plants from scorching.
Step-by-step guide to growing edible balloon flower leaves
Here's how to cultivate these striking, flavorful leaves from seed to harvest.
🌱 Step 1: Start Seeds Indoors for Strong Starts
Fill biodegradable seed pots with sterile seed-starting mix and moisten until damp but not soggy. Plant balloon flower seeds just beneath the surface—no deeper than ¼ inch—since they need light to germinate. I press each seed gently into the mix with my finger, then cover lightly with a fine spray of water.
Place the pots in a warm spot (65-75°F) under a grow light or in bright indirect light. Germination takes 10-14 days, so keep the soil consistently moist but never waterlogged. You'll know it's time when tiny green sprouts push through the soil—here's where patience pays off.
☀️ Step 2: Transplant Outdoors After Frost
Wait until after the last frost date and soil temperatures reach at least 55°F before moving seedlings outside. Harden them off by placing them in a sheltered spot for 3-4 hours daily, gradually increasing exposure over 7-10 days. This toughens their stems so they won’t wilt when planted.
Space plants 12-18 inches apart in well-draining soil with full sun to partial shade. Balloon flowers tolerate light shade but produce fewer leaves in deep shade. Water deeply after transplanting to help roots establish—you’ll see new growth within 2-3 weeks if conditions are right.
💧 Step 3: Maintain Moisture and Fertility
Water 1-2 inches deep weekly, adjusting for rain. Let the top 1 inch of soil dry out between waterings to prevent root rot. I mulch with 2-3 inches of organic mulch to retain moisture and suppress weeds—this keeps the soil consistently cool and damp, which balloon flowers love.
Fertilize lightly every 4-6 weeks with a balanced organic fertilizer (10-10-10). Too much nitrogen makes leaves soft and less flavorful, so I stick to half-strength applications. You’ll notice leaves stay vibrant and crisp when fertilized correctly.
✂️ Step 4: Harvest Leaves at Peak Flavor
Harvest leaves when they’re 4-6 inches tall and fully developed. Use clean scissors or fingers to pinch off individual leaves or small stems. I avoid cutting more than ⅓ of the plant at once to encourage regrowth—this ensures a steady supply all season.
Wash leaves gently in cool water and pat dry. Store in a sealed container in the fridge for up to 5 days or freeze for longer storage. The flavor intensifies when cooked lightly—here’s where the real magic happens in the kitchen.
Tips & tricks for perfect balloon flower leaf cultivation
Here's what nobody tells you about growing these delicate, flavorful leaves—tricks that'll make all the difference between a struggling patch and a thriving harvest.
Lighting Secret: Those 10-14 days of germination can feel like forever, but you can speed things up by using a heat mat set to 75°F under your seed pots. The warm soil mimics spring conditions and often triggers sprouts in just 7-10 days instead of waiting for the full window. Just keep that soil moist—never soggy—and you'll see those first green shoots sooner than you expect.
Transplanting Timing: The 3-4 hour daily hardening off period is your chance to prepare seedlings for the big move outside. I take mine out first thing in the morning when temperatures are coolest, which prevents shock. Watch for any wilting—if you see that, bring them back inside for another day. Once they're handling the 3-4 hours comfortably, you're ready to transplant after your last frost when soil hits that crucial 55°F mark.
Watering Wisdom: That 1-2 inch weekly watering guideline works great, but here's the thing: balloon flowers actually prefer their roots to stay consistently moist but never waterlogged. I check soil moisture by sticking my finger an inch down—if it's dry at that depth, it's time to water. The mulch layer you add helps tremendously by locking in that moisture and keeping roots cool, which prevents stress that can make leaves taste bitter.
Harvest Hack: When you're harvesting those 4-6 inch leaves, here's a pro move: always harvest in the morning after the dew has dried. The leaves will be crispest then, and you'll avoid any potential fungal issues from handling damp foliage. Plus, morning harvests mean you can get them into the kitchen fresh for your recipes—where their flavor really shines when cooked lightly.
Pro Tips for Balloon Flower Leaves
- Here's what nobody tells you about growing these delicate, flavorful leaves—tricks that'll make all the difference between a struggling patch and a thriving harvest.
- Lighting Secret: Those 10-14 days of germination can feel like forever, but you can speed things up by using a heat mat set to 75°F under your seed pots.
- Transplanting Timing: The 3-4 hour daily hardening off period is your chance to prepare seedlings for the big move outside.
Frequently asked questions
Got questions about growing, harvesting, or using balloon flower leaves?
You’re not alone! Here are some of the most common queries—plus straightforward answers to keep your garden (and kitchen) thriving.
Can I eat balloon flower leaves raw or do they need cooking?
Balloon flower leaves (Platycodon grandiflorus) are best lightly cooked to soften their slightly bitter, celery-like flavor. While raw leaves can be added to salads in small amounts, cooking (sautéing, stir-frying, or steaming) enhances their taste and texture. Pro tip: Blanch them for 30 seconds before using to mellow their intensity!
How long does it take for balloon flower leaves to grow large enough to harvest?
Balloon flower leaves typically reach harvestable size (4–6 inches long) in 6–8 weeks from planting, assuming ideal conditions (full sun to partial shade, well-drained soil). Young leaves grow quickly in spring and early summer—just avoid harvesting more than one-third of the plant at once to encourage regrowth.
Are there any parts of the balloon flower plant that are toxic or should I avoid?
While the leaves and flowers are edible, the roots and seeds contain mild toxins and should not be consumed. Additionally, avoid plants treated with pesticides—always harvest from organic or chemical-free gardens. If you’re unsure, stick to the leaves and blooms for safe culinary use.
What can I substitute if I can’t grow balloon flower leaves?
If balloon flower leaves aren’t available, try these flavor and texture substitutes:
- Celery leaves (milder, slightly bitter)
- Dandelion greens (earthy, slightly tangy)
- Endive or radicchio (bitter, peppery kick)
- Chard stems (slightly crunchy, mild)
Why are my balloon flower leaves turning yellow or wilted? Troubleshooting tips.
Yellowing or wilting leaves often signal overwatering, nutrient deficiency, or pests. Check these fixes:
- Watering: Ensure soil is moist but not soggy—balloon flowers hate "wet feet."
- Nutrients: Feed with a balanced fertilizer (10-10-10) every 4–6 weeks.
- Pests: Inspect for aphids or slugs; use neem oil or diatomaceous earth if needed.
- Sunlight: Too much direct sun can scorch leaves—provide afternoon shade in hot climates.
Wrapping up and next steps
Growing balloon flower leaves is a rewarding journey that blends beauty with culinary potential!
Whether you’re harvesting them for their unique flavor or simply admiring their vibrant blooms, these versatile plants offer something special for any gardener. Now’s your chance to turn your green thumb into a gourmet advantage—why not experiment with a fresh dish or share your harvest with friends?
Ready to take the next step? Plant a few seeds today and watch your garden (and kitchen) flourish! 🌱🍽️