
Container Gardens
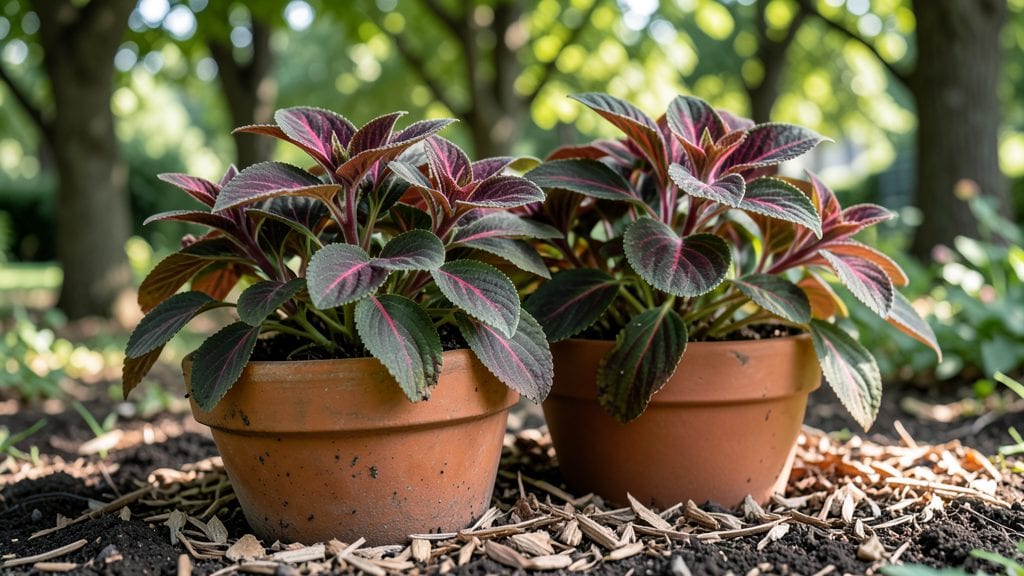
Buried flower pots in ground turn every inch of your yard into usable garden space—even if you only have a narrow sidewalk or patio. 🌿 I used to think small yards meant small gardens, until I started sinking pots into the soil to create hidden planters that look like part of the landscape.
The best part? You get all the drainage and root control of containers without sacrificing aesthetics.
This technique works with almost any pot—terracotta, plastic, or even repurposed containers—so long as it has drainage holes. Start with pots that match your garden’s style: rustic stone-look for cottage gardens, sleek black for modern spaces.
Fill them with lightweight potting mix (never garden soil) and plant shallow-rooted annuals or perennials like petunias, ferns, or ornamental grasses. The key is to bury them just enough so the rim sits flush with the ground, making them disappear into the scenery.
What you’ll end up with is a garden that looks intentional, not crowded. Plants thrive with perfect drainage, weeds struggle to invade, and you can create everything from a hidden herb spiral to a pollinator-friendly border without taking up extra square footage.
Plus, you can swap out pots and plants seasonally—think spring bulbs in early pots, then summer annuals when the weather warms.
The real magic happens when you layer them: bury a few pots along a fence line, tuck one behind a shrub, or create a stepped vertical effect with varying pot sizes.
It’s the secret to making small spaces feel lush and intentional. Ready to reclaim that wasted corner of your yard?
📚 In This Guide
- What you need
- Instructions
- Tips and common mistakes
- Wrapping up and next steps
What you need
- ● Flower pots: 3–10 pots (depending on space), 10–12 inches deep, with drainage holes. Terracotta or plastic work best.
- ● Potting soil: 1–2 bags (1–2 cubic feet per pot), lightweight and well-draining (e.g., miracle-gro potting mix).
- ● Drainage medium: Small gravel (½ inch) or perlite (1 cup per pot).
- ● Plants: 3–10 small plants (succulents, herbs, or flowers like petunias or ferns).
- ○ Stakes or trellis: (Optional) For climbing plants like ivy or morning glories.
- ● Watering can or hose: With a gentle spray nozzle for even moisture.
- ● Garden gloves: To protect your hands while handling soil and plants.
- ● Slow-release fertilizer: (e.g., Osmocote) for nutrient boosts.
- ● Mulch: (e.g., cocoa fiber) to retain moisture.
- ● Decorative accents: Paint, pebbles, or mosaic tiles for a polished look.
- ● Moisture meter: To check soil hydration levels.
Step-by-step instructions for creating in-ground vertical planters
Transform tight spaces into lush displays with these simple, space-saving techniques.
🪴 Step 1: Choose and Prepare Your Containers
Select sturdy, weather-resistant pots with drainage holes—terracotta, fiberglass, or plastic work best. I like to use 12-18 inch diameter pots for this project since they fit neatly into small garden beds while giving roots room to spread. Clean them thoroughly with soapy water to remove any residue that could harm plants.
For added stability, bury pots halfway up their sides in the ground. This creates a built-in support system while keeping the soil inside separate from the surrounding bed. If your pots don't have drainage holes, drill them yourself—roots need air and won't thrive in soggy conditions.
🌱 Step 2: Fill Pots with Quality Soil Mix
Use a lightweight potting mix blended with 20% perlite or vermiculite to improve drainage. Avoid garden soil—it compacts easily in containers and can suffocate roots. Fill each pot to within 1 inch of the rim, leaving space for watering and top dressing later.
I like to tap the sides of the pot gently after filling to settle the soil without compacting it. Press down lightly just enough to create a firm base for planting. This prevents the soil from shifting when you add plants or water later. For extra nutrients, mix in a slow-release fertilizer following package instructions.
☀️ Step 3: Plant and Arrange for Maximum Impact
Choose plants with compatible sun and water needs—group thirsty plants together and drought-tolerant ones separately. For 4 pots, I recommend a mix of trailing plants like petunias or lobelia for cascading effect, medium-height plants like salvias or geraniums, and a tall centerpiece like snapdragons or dusty miller.
Dig a hole slightly larger than the root ball, place the plant in, and fill the gap with soil. Press gently around the base to remove air pockets. Space plants 6-8 inches apart depending on their mature size. Water immediately after planting to help roots settle into their new home.
💧 Step 4: Water and Maintain Through the Season
Water deeply right after planting, then check the soil daily during hot weather. You'll know it's time to water when the top 1-2 inches of soil feel dry. In-ground pots dry out faster than traditional containers because they're partially exposed to air from all sides. Use a watering can with a narrow spout to direct water to the soil without disturbing plants.
Fertilize every 4-6 weeks with a balanced liquid fertilizer to keep plants thriving. I like to use a water-soluble formula mixed at half-strength to avoid burning roots. Mulch the surface with 1 inch of organic mulch to retain moisture and suppress weeds—just be sure to keep it 2 inches away from plant stems to prevent rot.
✂️ Step 5: Prune and Refresh for Continuous Bloom
Deadhead spent blooms regularly to encourage more flowers. Pinch back leggy growth to maintain a compact shape, especially for trailing plants. This keeps the display looking full and tidy while redirecting energy into new growth. I like to do this every 2-3 weeks during peak bloom season.
By mid-season, you might notice some plants outgrowing their space. If this happens, trim back overgrown foliage by one-third to rejuvenate the plant. This also creates room for new growth and can extend the blooming period. For trailing plants, gently weave them through nearby pots to create a lush, interconnected look.
Tips & tricks for perfect in-ground vertical planters
Here's what I've learned after transforming my own small backyard with these space-saving planters.
Container Stability: When burying your pots halfway, use a level to ensure they sit perfectly upright. Uneven pots can cause soil to shift and roots to grow at odd angles. I like to check this after planting—just run your hand along the top edge to feel for any wobbles before filling with soil. This simple step prevents future toppling, especially during windy weather.
Soil Settlement Secret: After filling pots with your potting mix and perlite blend, let it settle naturally for 24 hours before planting. This mimics how soil behaves in the ground and gives you a true baseline for watering needs. I've found that pre-settled soil holds moisture better and reduces the risk of overwatering during the first few weeks. Just give it a gentle tap around the sides to encourage even settling.
Plant Placement Pro Tip: For that professional cascading look, arrange trailing plants on the outer edges of your pots. I like to weave them through nearby pots to create a continuous, interconnected display. Start with the tallest plants in the center and work outward—this creates natural height variation and prevents smaller plants from getting shaded out. The 6-8 inch spacing mentioned in Step 3 gives roots room to establish without competing for nutrients.
Watering Wisdom: In-ground pots dry out faster than you might expect because they're exposed on all sides. I've learned to set a reminder for early morning watering during heatwaves—this gives plants time to absorb moisture before the sun intensifies. Use your finger to check that top 1-2 inches of soil; if it feels dry just below the surface, it's time to water. A drip irrigation system can automate this and deliver water right to the roots.
Pro Tips for Flower Pots In Ground
- Here's what I've learned after transforming my own small backyard with these space-saving planters.
- Container Stability: When burying your pots halfway, use a level to ensure they sit perfectly upright.
- Soil Settlement Secret: After filling pots with your potting mix and perlite blend, let it settle naturally for 24 hours before planting.
Frequently asked questions
Why bury flower pots in the ground?
Burying pots in the ground mimics natural growing conditions by providing better insulation, moisture retention, and root stability. This method also saves space, reduces watering needs, and protects delicate pots from harsh weather. Plus, it’s a game-changer for small yards or urban gardens!
When is the best time to plant pots in the ground?
For most plants, spring (after the last frost) or early fall is ideal. Avoid planting in extreme heat or cold—roots need time to establish before stress. If you’re in a mild climate, you can plant year-round, but always check your plant’s specific needs (e.g., tropical plants may prefer warmer soil).
Can I reuse the same pots in the ground every year?
Yes, but with a few tweaks! Clean pots thoroughly to remove old soil and debris, and refresh the drainage holes if clogged. For long-term use, consider adding a layer of landscape fabric at the bottom to prevent soil buildup. If pots crack or degrade, it’s time to upgrade—your plants will thank you!
What if my buried pots get too hot or cold?
Overheating or freezing can stress plants. To regulate temperature, bury pots halfway (leaving the top rim above ground) or use lightweight materials like terracotta or fiberglass. In cold climates, add a layer of mulch around the base. For heat-sensitive plants, choose shaded spots or use reflective mulch to keep roots cool.
Are there alternatives to burying pots?
Try pocket planters (fabric pockets sewn into vertical panels), hanging planters, or raised beds with built-in containers. For a no-dig option, use self-watering planters or stackable containers on a trellis. Each method saves space while offering unique styling—pick what fits your garden’s vibe!
What do I do if my plants wilt after burying the pots?
Wilting often signals overwatering, poor drainage, or root shock. First, check the soil moisture—burying pots can trap excess water. If needed, lift the pot slightly to improve airflow or add perlite to the soil mix. For root shock, trim any damaged roots and give the plant a week to adjust before watering again.
Wrapping up and next steps
Transforming your small yard with flower pots in ground isn’t just clever—it’s a game-changer for maximizing space and beauty! Whether you’re a seasoned gardener or just starting out, these vertical solutions prove that big impact doesn’t require big square footage.
The key is choosing the right containers, plants, and placement to create a thriving, low-maintenance oasis.
Ready to greenify your space? Start small—pick one corner or wall, gather your supplies, and let your creativity bloom! 🌱 With a little planning, you’ll soon enjoy a lush, vibrant garden that turns heads (and maybe even inspires your neighbors). Happy planting!