
Flowers
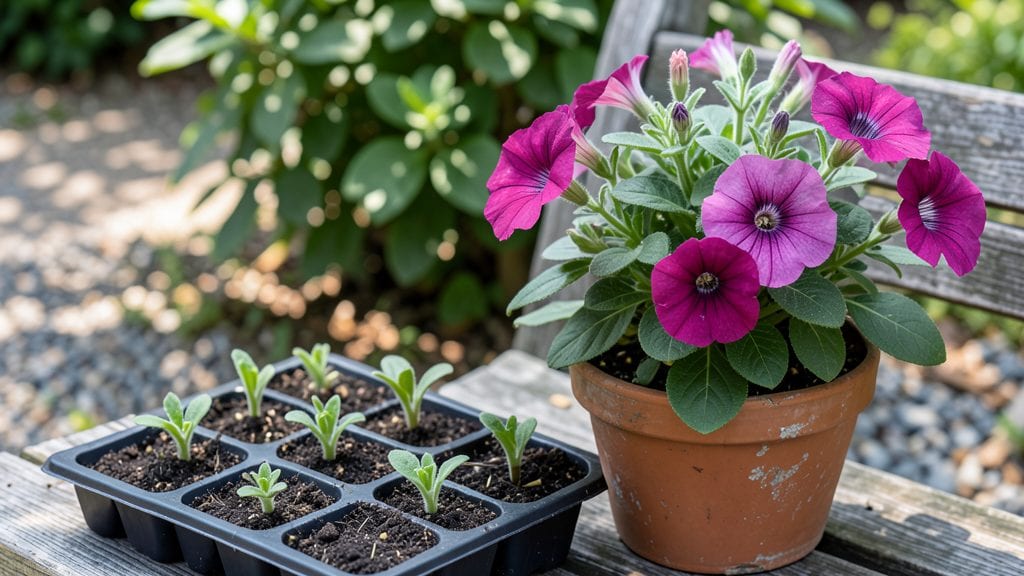
A flower potting station transforms even a tiny corner into a thriving green workspace—no more hauling tools across the yard or struggling with cluttered workspaces. 🌿 I built mine last spring after my patio became a tangled mess of pots, soil bags, and stray trowels, and now I actually enjoy the process instead of dreading it.
The magic lies in organization: a sturdy table or wall-mounted shelf holds everything you need—pots, soil, gloves, and pruners—within arm’s reach. A rolling cart works for patios, while a corner bench with built-in storage solves indoor space problems.
The key is keeping tools visible but tidy, so you’re not digging through bins when inspiration strikes.
What you’ll end up with is a spot that feels like a mini greenhouse, where every plant gets the care it deserves. Freshly potted annuals burst with color, perennials get their roots checked before replanting, and even winter seedlings thrive under grow lights.
The best part? No more lost gloves or forgotten tools—everything has a home.
Works for balconies, sunrooms, or garage workshops—just match your setup to your space. Whether you’re propagating cuttings or prepping for spring planting, this station keeps your gardening momentum going year-round.
📚 In This Guide
- What you need
- Instructions
- Tips and common mistakes
- Wrapping up and next steps
What you need
- ● Potting station base: 1x sturdy wooden pallet (40" x 48") or a repurposed shelf unit (adjustable height preferred)
- ● OR 1x pre-built potting station kit (e.g., IKEA KALLAX or similar modular shelving)
- ● Pots & containers: 3–6x hanging pots (6–8" diameter) for trailing plants like petunias or string of pearls
- ● 3–5x self-watering planters (10–12" diameter) for herbs or succulents
- ● 2–3x shallow trays (12" x 18") for seed starting or cutting propagation
- ● Essential tools: 1x hand trowel (5–6" long) for soil handling
- ● 1x pruning shears (bypass type for clean cuts)
- ● 1x spray bottle (8 oz) for misting seedlings
- ○ 1x moisture meter (optional but helpful for succulents)
- ● Soil & amendments: 1x 5-gallon bag of well-draining potting mix (e.g., Miracle-Gro Potting Mix)
- ● 1x bag of perlite or vermiculite (for aeration, 1–2 cups per pot)
- ● 1x slow-release fertilizer (e.g., Osmocote, 1 tbsp per pot)
- ● LED grow lights (full-spectrum, 12–15W) for low-light spaces
- ● Drip irrigation kit (for automated watering)
- ● Rolling cart with wheels (if mobility is a priority)
- ● Chalkboard or label holders for plant care reminders
- ● Decorative elements like moss or pebbles for aesthetic appeal
Step-by-Step guide to building a functional flower potting station
Transform any corner into a year-round greenery command center with this efficient setup.
🪴 Step 1: Select and Prepare Your Base Surface
Choose a sturdy, flat surface like a wooden workbench, folding table, or even a repurposed kitchen island. I prefer surfaces at least 24 inches wide to accommodate multiple pots and tools without crowding. Clear the space completely and sweep away debris—dirt or sawdust can contaminate fresh potting mixes.
For extra functionality, attach a pegboard to one side using heavy-duty brackets. This creates instant tool storage while keeping everything within arm's reach. Drill holes for hooks and shelves, then organize your supplies by frequency of use—most-used items (like trowels) go at eye level, while seasonal tools (like frost cloth) can hang higher.
💧 Step 2: Organize Your Watering and Drainage System
Place a large watering can with a rose attachment at the station's corner—this prevents spills while giving you precise control. I like to add a small water tray beneath the work surface to catch overflow. The tray should be at least 12x18 inches to handle multiple pots at once.
For drainage, position a 5-gallon bucket with a spigot at the lowest point of your setup. This catches excess water from rinsing pots or cleaning tools. I've found that placing a fine mesh screen over the bucket opening prevents soil particles from clogging the drain while still allowing water to flow freely.
☀️ Step 3: Create a Modular Planting Area
Arrange 4-6 adjustable-height plant stands in a semi-circle around your central workspace. These should accommodate pots ranging from 4-inch nursery containers to 12-inch mature plants. The key here is flexibility—your station should support everything from seed starting to transplanting.
I like to add a rolling cart with wheels for mobility. Load it with sterilized potting trays and seedling flats so you can easily move them between the station and greenhouse or garden beds. The cart also serves as temporary storage for finished pots before they go into the landscape.
✂️ Step 4: Install Lighting and Climate Control
Hang a full-spectrum LED grow light on an adjustable arm above the workspace. Position it 18-24 inches above the surface for seedling propagation. The light should cover your entire work area so you can move plants under it as needed. For larger setups, consider a dimmable smart bulb that mimics natural daylight cycles.
Add a small oscillating fan to create gentle airflow around seedlings. This prevents fungal diseases while strengthening stems through natural wind exposure. Place it so it circulates air without directly blowing on delicate plants—you should feel a light breeze at plant height, not a strong gust.
🌱 Step 5: Add Finishing Touches for Year-Round Use
Install a retractable hose with a soft spray nozzle mounted to the wall or table leg. This gives you instant access to water without lugging cans around. I've found that positioning the hose at waist height makes it easy to rinse tools or fill containers without bending.
For seasonal versatility, add a fold-down shelf that can hold frost blankets in winter or shade cloth in summer. Keep a small tool caddy with pruners, gloves, and a magnifying glass within reach. The goal is to have everything you need for every stage of plant development—from seed to bloom—without leaving your station.
Tips & tricks for perfect flower potting station setup
The secret to a truly functional potting station lies in the details that save you time and frustration down the road. Here's what I've learned after setting up multiple stations over the years.
Surface Stability Matters: In Step 1, when selecting your base surface, I can't stress enough how critical stability is. A wobbly workbench will make potting tasks frustrating and potentially dangerous. If your surface isn't perfectly level, use adjustable leveling feet or shims under the legs. For outdoor stations, consider adding non-slip mats to prevent shifting during watering. The 24-inch width mentioned is perfect for most gardeners, but if you work with larger containers, extend to 36 inches for better maneuverability.
Drainage System Upgrade: The 5-gallon bucket setup in Step 2 is brilliant, but here's my pro move: Add a secondary bucket with a fine mesh bag inside to collect soil particles from rinsing pots. This prevents clogging and makes cleaning easier. I also recommend adding a water level indicator to your watering can—it helps maintain consistent moisture levels when repotting different plant sizes.
Lighting Optimization: When positioning your full-spectrum LED grow light in Step 4, remember that seedlings need 12-16 hours of light daily for optimal growth. I use a smart plug timer to automate this—set it to turn on at 6 AM and off at 8 PM. For the 18-24 inch height recommendation, start at the lower end for young seedlings and raise it as they grow to prevent legginess. The light should be close enough that you can't see shadows when holding your hand beneath it.
Tool Organization Hack: In Step 1, when attaching your pegboard, I recommend adding small hooks with labels for frequently used items. Create zones: one for hand tools (trowels, pruners), another for cleaning supplies (brushes, spray bottles), and a third for seasonal items (frost cloth, shade mesh). This keeps your station clutter-free and makes everything instantly accessible. I also keep a small tray on the work surface for frequently used items like gloves and measuring cups.
Pro Tips for Flower Potting Station
- The secret to a truly functional potting station lies in the details that save you time and frustration down the road.
- Surface Stability Matters: In Step 1, when selecting your base surface, I can't stress enough how critical stability is.
- Drainage System Upgrade: The 5-gallon bucket setup in Step 2 is brilliant, but here's my pro move: Add a secondary bucket with a fine mesh bag inside to collect soil particles from rinsing pots.
Frequently asked questions
Got questions about setting up and maintaining your flower potting station? You’re not alone! Here are answers to the most common queries to help you grow with confidence.
What’s the best location for a flower potting station?
Place your station in a spot with 4–6 hours of sunlight daily—near a south- or west-facing window or balcony. If indoors, supplement with grow lights (12–16 hours/day) for leafy greens or herbs. Avoid drafts (like AC vents) or extreme heat, which stress plants. A rotating station on wheels lets you adjust based on seasonal sun shifts!
How often should I repot plants in my potting station?
Repot every 1–2 years or when roots circle the pot’s bottom (check by gently removing the plant). Signs it’s time:
- Water drains too fast (root-bound).
- Soil dries out in <24 hours.
- Stunted growth despite proper care.
Can I DIY a flower potting station instead of buying one?
Use a rolling cart, bookshelf, or vertical pallet with trays, pots, and drainage holes. Add shelves for tools (trowels, pruners) and a small shelf for seedlings. For a budget-friendly twist, repurpose an IKEA Kallax or wooden crates with casters. Just ensure stability and easy access to water!
How do I keep pests away from my potting station?
Prevent pests with these tricks:
- Cleanliness: Remove dead leaves/debris weekly.
- Neem oil: Spray foliage every 2 weeks (mixes with water + a drop of dish soap).
- Beneficial insects: Introduce ladybugs or lacewings to combat aphids.
- Quarantine: Isolate new plants for 2 weeks before adding them.
What should I do with my potting station in winter?
Most stations thrive indoors year-round, but adjust for winter:
- Move tender plants (like tomatoes) inside to a sunny spot.
- Reduce watering—soil stays damp longer in cold air.
- Check for dry air (from heaters) and mist leaves or use a pebble tray.
- Dormant plants (e.g., bulbs) need less light—store them in a cool, dark corner.
Wrapping up and next steps
Creating your own flower potting station is a game-changer for urban gardeners and plant lovers alike! 🌱 With a little creativity and the right setup, you can enjoy year-round greenery without sacrificing space.
Whether you’re a beginner or a seasoned gardener, this DIY project brings fresh air, beauty, and relaxation right to your doorstep.
Ready to take the next step? Start by sketching your design, gathering materials, and assembling your station—then watch your plants thrive! 💪 For extra inspiration, explore local gardening communities or online tutorials to customize your setup. Happy potting!