
Pruning
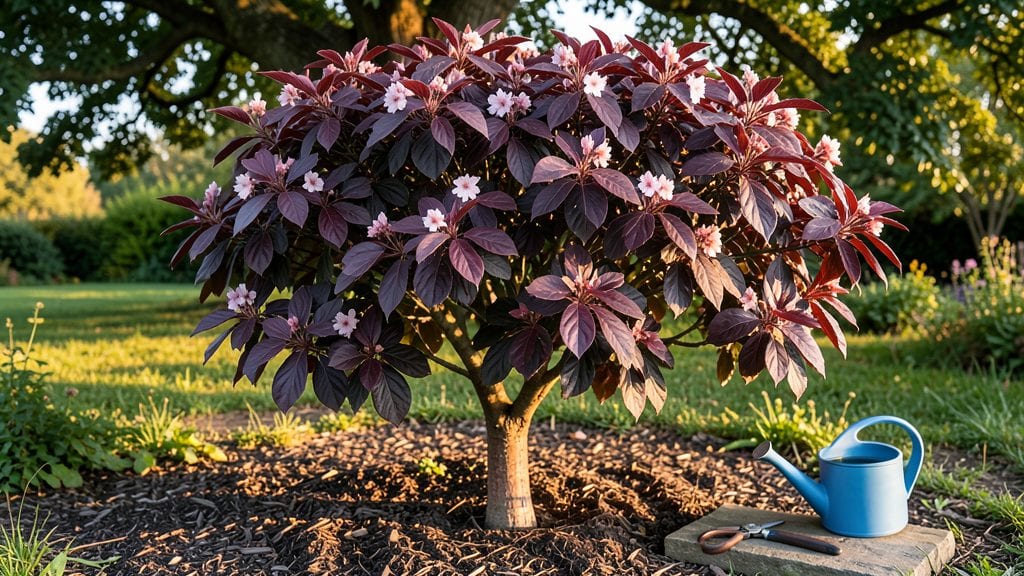
Your fruitless flowering plum tree isn’t failing—it’s doing exactly what you planted it for. 🌸 These trees are bred to dazzle with blossoms, not feed birds with fruit, but pruning still keeps them stunning.
The Pacific Northwest’s damp winters and mild summers actually make them thrive when you adjust your approach.
Most people prune once in late winter, but I’ve found year-round light trimming prevents congestion and keeps those branches strong. Start with 10-15 minutes every few months to remove dead wood, shape the canopy, and encourage fresh growth.
The key? Never cut more than 25% of the tree’s branches in one session—this keeps it healthy without shocking it.
What you’ll end up with is a tree that bursts with pink or white blossoms from late winter through spring, with minimal effort. The branches stay open for sunlight, the flowers multiply, and you avoid the mess of fallen fruit.
Plus, the tree lives longer—some of mine are now 15 years old and still going strong.
This method works for both newly planted trees and established ones, though mature trees need gentler adjustments. If your tree looks leggy or sparse, we’ll fix that too—just keep those pruners handy year-round. Let’s get started!
📚 In This Guide
- What you need
- Instructions
- Tips and common mistakes
- Wrapping up and next steps
What you need
- ● Pruning shears: Bypass pruners (sharp, clean, and rated for branches up to ½ inch in diameter). Example: Felco F-2 or Corona Tools 5280.
- ● Loppers: For thicker branches (¾–1½ inches). Example: Fiskars X27 or Bahco Forester.
- ● Pruning saw: For branches 2+ inches thick (avoid bolt-cutters—they crush wood!). Example: Felco F-3 or Fiskars X7.
- ● Disinfectant: 70% isopropyl alcohol or a 10% bleach solution (1 part bleach to 9 parts water) to sterilize tools between cuts.
- ● Gloves: Heavy-duty, cut-resistant gloves (e.g., Mechanix Wear or Felco pruning gloves).
- ● Safety glasses: Protect your eyes from debris (e.g., Oakley or generic gardening goggles).
- ○ 5-gallon bucket: For collecting pruned branches (optional: line with a trash bag for easy disposal).
- ● Rake or tarp: To clear fallen leaves/debris from the work area.
- ● Permanent marker: For labeling cuts if grafting or training new branches.
- ○ Pruning sealant: Optional but helpful for large cuts (>2 inches) to prevent disease (e.g., Tanglefoot Tree Wound Pruning Seal).
- ● Extension pole: For hard-to-reach branches (e.g., 6–10 ft telescoping pole with pruner attachment).
- ● Ladder: Sturdy, 3-sided aluminum ladder (e.g., Little Giant or Werner) for tall trees.
- ● Tree pruning rope: For stabilizing branches during heavy cuts (e.g., ¼-inch poly rope).
- ● Camera or sketchbook: To document your tree’s structure before/after pruning.
- ● Compost bin: To recycle small branches/leaves as mulch.
Step-by-Step year-round pruning for a thriving fruitless flowering plum tree
Here’s how I keep my Pacific Northwest plum trees blooming abundantly without the mess—through every season.
✂️ Step 1: Late Winter Cleanup (February)
Start by removing dead, diseased, or crossing branches—these compete with your tree’s energy and block airflow. I use sharp, clean pruning shears to make cuts just outside the branch collar, where the branch meets the trunk. This prevents unsightly stubs and reduces infection risks.
Next, thin out overcrowded branches to improve light penetration. Aim for an open center that lets sunlight reach the inner canopy. You’ll know you’ve done enough when you can see light filtering through the branches on a sunny day.
Here’s the thing—never remove more than 25% of the tree’s foliage in one session. Your plum tree’s blooms form on last year’s wood, so aggressive pruning now will rob it of next spring’s flowers. Think of this as a gentle reset, not a haircut.
☀️ Step 2: Post-Bloom Maintenance (May-June)
After the spring flowers fade, inspect for suckers—those aggressive shoots sprouting at the base or along the trunk. Snip them off immediately; left unchecked, they’ll drain energy from your tree’s main structure. I use a bypass pruner for clean cuts close to the ground.
Now’s also the time to shape the tree by shortening overly vigorous branches. Look for limbs growing at sharp angles—these are prone to breaking in storms. Reduce their length by one-third to strengthen the branch’s attachment point.
Watch for water sprouts (thin, vertical shoots) and remove them entirely. These rob the tree of nutrients and clutter the canopy. A quick once-over with your pruners keeps the tree’s energy focused on flowering, not vertical growth.
🌿 Step 3: Summer Light Trimming (July-August)
Summer pruning is all about corrective work—not heavy cuts. Remove any branches that rub together or cross, as these create wounds that invite disease. I make these cuts on a dry, overcast day to minimize stress on the tree.
Thin out overly dense foliage to improve airflow, which is critical in the Pacific Northwest’s humid summers. You’ll notice the tree’s leaves looking healthier and less prone to fungal spots after just one season of this practice.
Real talk: avoid heavy pruning now. Your tree is already stressed from flowering, and summer cuts can stimulate weak, late-season growth that won’t harden off before winter. Think of this as fine-tuning, not restructuring.
⏰ Step 4: Final Winter Prep (November-December)
Before the first frost, give your tree one last sanity check—remove any remaining deadwood or weak branches. I wrap pruning wounds larger than ½ inch with tree wound dressing to protect against winter pests and moisture loss.
Now’s also the time to thin the canopy if it’s still too dense. Focus on branches growing inward or downward, as these won’t contribute to next year’s blooms. A well-pruned tree in winter looks like a sculpture, not a tangled mess.
Don’t skip this step (I learned the hard way). Skipping winter prep leads to sucker proliferation and weak growth in spring. A little effort now means showstopping blooms come February.
Tips & tricks for perfect fruitless flowering plum tree pruning
A few strategic moves can transform your plum tree from a tangled mess into a showstopping floral masterpiece. Here's what I've learned after years of trial and error in our damp Pacific Northwest climate.
Tool Selection Matters: Invest in a quality bypass pruner for clean cuts—it makes all the difference when shaping branches. I've ruined several cuts with dull shears that crush rather than slice, creating jagged wounds that invite disease. For branches thicker than ½ inch, upgrade to a pruning saw with a fine-tooth blade to avoid tearing the bark. Always sterilize your tools between cuts using rubbing alcohol to prevent spreading fungal spores.
Seasonal Timing is Everything: The 25% foliage limit in Step 1 isn't arbitrary—it preserves the tree's energy reserves needed for next year's blooms. In our region, late winter's dormant season (February) is ideal because the tree's sap isn't flowing rapidly. If you must prune in summer (Step 3), do it on dry, overcast days to reduce stress. I've seen trees go into shock when pruned during heatwaves, so timing really is everything.
Visual Pruning Cues: When thinning overcrowded branches (Step 1), look for where sunlight creates natural patterns through the canopy. If you can see distinct light shafts filtering through on a sunny day, you've achieved the perfect balance. For shaping (Step 2), imagine your tree as a sculpture—each cut should contribute to the overall form rather than creating random choppy lines. The goal is to maintain that open center while preserving the tree's natural silhouette.
Wound Care is Critical: Any pruning wound larger than ½ inch in Step 4 needs immediate attention. I've seen many gardeners skip this step, only to watch their trees develop cankers or attract pests. Apply tree wound dressing to seal the cut and prevent moisture loss. For smaller wounds, let them heal naturally—they'll form a protective callus over time. This simple step can mean the difference between a healthy tree and one struggling with winter damage.
Pro Tips for Fruitless Flowering Plum Tree
- A few strategic moves can transform your plum tree from a tangled mess into a showstopping floral masterpiece.
- Tool Selection Matters: Invest in a quality bypass pruner for clean cuts—it makes all the difference when shaping branches.
- Seasonal Timing is Everything: The 25% foliage limit in Step 1 isn't arbitrary—it preserves the tree's energy reserves needed for next year's blooms.
Frequently asked questions
Got questions about keeping your fruitless flowering plum tree in top shape? Here are answers to some of the most common ones—so you can enjoy those stunning blooms year after year!
When is the best time to prune a fruitless flowering plum tree?
Prune your plum tree twice a year: late winter to early spring (before buds swell) for major shaping, and right after flowering (late spring) to remove spent blooms and encourage new growth. Avoid heavy pruning in fall—it can stimulate tender growth that may not survive PNW winters.
How much can I prune without harming the tree?
For a fruitless flowering plum, you can safely remove up to 25-30% of the canopy per year during late-winter pruning. Focus on dead, crossing, or overcrowded branches first. If you need to prune more, spread it over 2-3 years to avoid stressing the tree.
Will pruning affect next year’s flowers?
Not if done correctly! Pruning after flowering (late spring) won’t impact next year’s blooms, but heavy cuts in late winter can reduce flowers if overdone. Aim for open-centered pruning to maintain airflow—this actually enhances future blooms by reducing disease risk.
What if my plum tree isn’t blooming as much as it used to?
Fewer blooms often mean overcrowding, poor sunlight, or improper pruning. Check for:
- Shady spots (plums need 6+ hours of sun
- Waterlogged soil (improve drainage if needed)
- Old, dense growth (thin out branches to let light in)
- Nutrient deficiencies (feed with balanced fertilizer in early spring)
Can I replace my fruitless plum with another flowering tree?
If you love the early spring color but want alternatives, try:
- Kwanzan cherry (disease-resistant, pink blooms)
- Weeping cherry (elegant, low-maintenance)
- Japanese maple (stunning foliage + flowers)
- Magnolia stellata (fragrant white blooms)
Wrapping up and next steps
Transforming your fruitless flowering plum tree into a stunning, year-round showpiece is totally within reach—especially in the Pacific Northwest’s mild climate! 🌸 With the right tools, timing, and techniques, you’ll enjoy vibrant blooms and healthy growth for seasons to come.
Start small, stay consistent, and don’t forget to celebrate those pruning wins along the way.
Ready to take the next step? Grab your pruners, sketch a quick plan, and schedule your first session—whether it’s a light trim in early spring or a deeper shape-up in late winter. Your plum tree (and your garden!) will thank you. Happy pruning!