Container Gardens
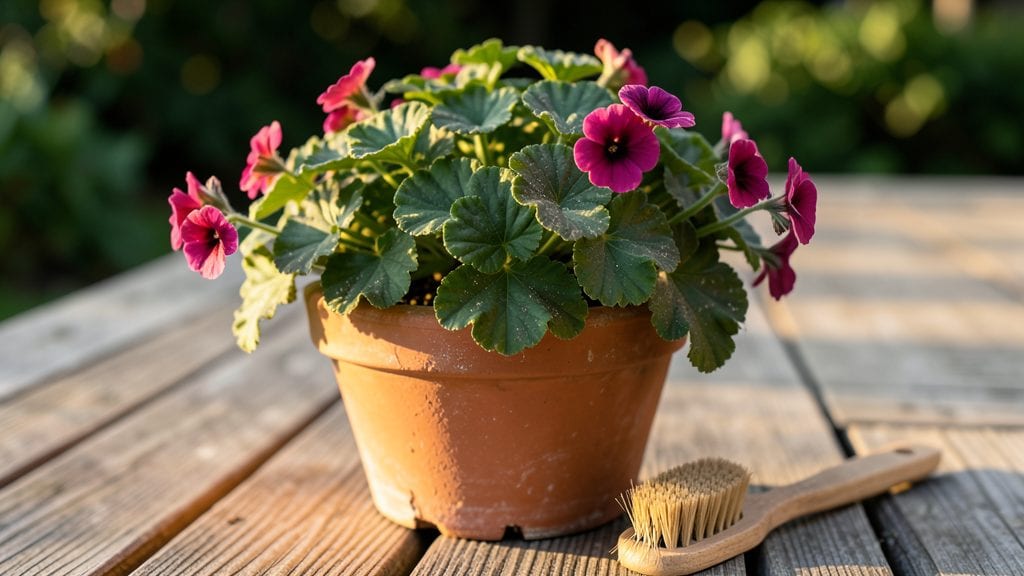
Cleaning terra cotta flower pots doesn’t have to mean scrubbing for hours—vinegar soak cuts through stubborn stains in minutes. I’ve spent too many afternoons chipping away at baked-on mineral deposits, only to realize a simple soak would’ve saved the effort.
The key is patience and the right mix of vinegar, water, and elbow grease.
You’ll need basic supplies: white vinegar, warm water, a stiff brush (or old toothbrush for crevices), rubber gloves, and a bucket or large container. Terra cotta absorbs everything, so safety first—vinegar fumes are mild but still best handled with gloves.
Let the pots soak for at least 30 minutes before scrubbing, and you’ll see the grime dissolve like magic.
After soaking, scrub the inside and out with your brush, then rinse thoroughly. Let them dry in the sun for 24 hours before reuse—this prevents mold and ensures they’re ready for your next batch of plants. The results? Pots that look brand new, with no lingering stains or odors.
For future maintenance, rinse pots after each use and store them upside down to keep pests out. A quick monthly soak keeps them fresh, and you’ll never dread pot day again. Ready to tackle that pile of grimy pots?
📚 In This Guide
- What you need
- Instructions
- Tips and common mistakes
- Wrapping up and next steps
What you need
- ● 1-2 buckets (5+ gallons each) – One for soaking, one for rinsing (or a large tub if space is tight).
- ● White vinegar – 1 gallon per bucket (or 3-4 cups for a smaller soak). Note: Use distilled white vinegar (5% acidity) for best results.
- ● Water – Enough to fill both buckets (or a hose for rinsing if outdoors).
- ● Soft-bristle brush – A new toothbrush, nylon scrub brush, or garden brush (avoid wire brushes—they can scratch terra cotta!).
- ● Microfiber cloths or old towels – 2-3 cloths for drying and wiping.
- ○ Rubber gloves – Optional but recommended to protect your hands from vinegar and grime.
- ● Plastic wrap or aluminum foil – To cover pots while soaking (keeps vinegar from evaporating too fast).
- ● Baking soda – ½ cup mixed with water for a paste to scrub tough stains.
- ● Hydrogen peroxide (3%) – 1 cup added to the soak for mold/mildew (test on a small area first!).
- ● Spray bottle – For targeted vinegar sprays on hard-to-reach spots.
- ● Pot scrubber or melamine sponge – For extra-stubborn algae or mineral deposits.
- ● Sunny outdoor space or sink – A dedicated area to work (terra cotta cleaning can get messy!).
Step-by-step instructions for reviving terra cotta pots with vinegar
Here's my foolproof method for restoring pots to their original earthy beauty—no harsh chemicals needed.
Scrape Off Loose Debris and Rinse Thoroughly
Start by emptying any remaining soil and turning the pots upside down to knock out stubborn bits. Use a plastic spoon or butter knife to gently scrape off dried-on residues from the inner walls. You don't need to scrub aggressively—just remove the obvious gunk that'll make the soak less effective later.
Rinse each pot under warm water until the water runs clear. Cold water can leave mineral deposits, while warm water helps dissolve old soil buildup more effectively. Pay extra attention to the drainage holes—these often collect the most grime. A toothbrush with stiff bristles works perfectly for scrubbing tight spots.
Prepare the Vinegar Soak Solution
Fill a large bucket or basin with enough warm water to fully submerge your pots. For every gallon of water, add 1 cup of white vinegar. The acidity in vinegar breaks down mineral deposits and organic stains without damaging the terra cotta. Stir gently to combine—you don't need to create a strong vortex, just ensure even distribution.
Here's the thing—if your pots have particularly stubborn stains (like rust or hard water marks), you can double the vinegar to 2 cups per gallon. But for most gardeners, the standard ratio works perfectly. Let the solution sit for 10-15 minutes before submerging the pots. This gives the vinegar time to activate fully against the toughest grime.
Soak and Scrub the Pots
Submerge each pot completely in the vinegar solution, making sure the drainage holes are fully covered. Let them soak for at least 30 minutes—longer if the stains are severe. You'll see the solution bubbling slightly as it works to dissolve mineral deposits and break down organic matter. This is normal and a good sign the process is working.
After soaking, remove the pots one at a time and use a soft-bristle brush or sponge to scrub away remaining stains. Focus on the inner surfaces and any textured areas where dirt tends to cling. Avoid metal brushes—they can scratch the terra cotta finish over time. If you encounter particularly stubborn spots, let them soak another 10 minutes before scrubbing again.
Rinse and Dry Completely
Rinse each pot thoroughly under warm running water until the vinegar smell is completely gone and the water runs clear. This step is crucial—leftover vinegar can affect soil pH and potentially harm plants. Pay special attention to the drainage holes, as they often trap residue. A quick final rinse with a spray bottle helps ensure no vinegar remains.
Allow the pots to air dry completely in a well-ventilated area. Placing them upside down on a drying rack prevents water from pooling inside. Terra cotta dries quickly, but don't rush this step. Damp pots can develop mold or mildew if stored improperly. Once fully dry, your pots will be ready for reuse—looking fresh and ready for your next planting.
Prevent Future Buildup (Optional)
To keep your terra cotta pots looking their best between cleanings, rinse them with water after each use and wipe out any remaining soil. A quick monthly soak in plain water helps prevent mineral deposits from forming. For extra protection, you can lightly coat the inside of the pots with a thin layer of food-grade mineral oil after cleaning. This creates a subtle barrier that makes future cleanings easier.
I know it seems like extra work, but trust me—this small effort saves time in the long run. Pots that are regularly maintained stay lighter and require less aggressive cleaning. Plus, your plants will thank you for the fresh, clean environment you're providing them.
Tips & tricks for perfect terra cotta pot revivals
These simple strategies will help you restore your pots to like-new condition without damaging their natural beauty.
Pre-Soak Prep: Before submerging your pots in the vinegar solution, give them a quick pre-rinse with plain warm water. This removes loose dirt and helps the vinegar work more efficiently. I've found that pots with heavy soil buildup benefit most from this extra step—it prevents clogging the drainage holes during the soak. The instructions mention rinsing thoroughly, but this pre-rinse is the secret to getting maximum cleaning power from your vinegar solution.
Vinegar Strength Strategy: For pots with particularly stubborn stains like rust or hard water marks, the instructions suggest doubling the vinegar to 2 cups per gallon of water. Here's what I've learned: if your water is very hard (common in many areas), you might need to go even further—try 2.5 cups per gallon for extreme cases. Just remember to let the solution sit for the full 10-15 minutes before soaking to maximize its effectiveness against tough stains.
Soaking Time Extension: The 30-minute soak time in the instructions is perfect for most situations, but I've found that pots with years of buildup often need an extra boost. If your pots aren't looking completely clean after the initial 30 minutes, don't be afraid to let them soak for another 15-20 minutes. The bubbling action you'll see is a great visual indicator that the vinegar is working—keep them submerged until the bubbles slow significantly.
Drying Hack: After rinsing, place your pots on a drying rack in a well-ventilated area with good airflow. For faster drying, I like to use a fan on low speed aimed at the pots. This prevents water from pooling inside and helps catch any stray vinegar droplets that might have missed the rinse. Terra cotta dries quickly, but this method cuts drying time nearly in half while preventing mold development.
Pro Tips for Clean Terra Cotta Flower Pots
- These simple strategies will help you restore your pots to like-new condition without damaging their natural beauty.
- Pre-Soak Prep: Before submerging your pots in the vinegar solution, give them a quick pre-rinse with plain warm water...
- Vinegar Strength Strategy: For pots with particularly stubborn stains like rust or hard water marks, the instructions...
Frequently asked questions
Got questions about keeping your terra cotta pots fresh and stain-free? Here are some of the most common concerns—and their simple solutions!
Can I reuse terra cotta pots after cleaning them?
Terra cotta is durable and reusable. Just ensure they’re completely dry before repotting to prevent mold or root rot. If cracks appear, seal them with a waterproofing spray for longevity. Pro tip: Store empty pots upside down to avoid dust buildup.
How often should I clean my terra cotta pots?
Clean them at least once a year or when you notice stains, mineral buildup, or mold. For heavy-use pots (like those in high-traffic areas), a quick wipe-down every few months keeps them looking fresh. Pro tip: Rinse pots after each watering to prevent salt deposits.
What if my terra cotta pot has cracks? Can I still use it?
Small cracks are normal and don’t ruin the pot’s function—they actually help with drainage! However, if cracks are large or spreading, seal them with waterproofing spray or replace the pot. Avoid submerging heavily cracked pots in water to prevent further damage.
Is vinegar safe for terra cotta pots with plants already in them?
No—vinegar can harm plants if used directly on soil. Always remove plants before cleaning. If you must clean pots with plants, use a damp cloth to wipe away surface dirt, then replant after the pot dries. Pro tip: Rinse vinegar-soaked pots thoroughly with water before repotting.
What’s the best alternative if I don’t have vinegar?
Try a mix of baking soda and water (1 tbsp per quart of water) for a gentle scrub, or use hydrogen peroxide (3%) for disinfecting. For tough stains, a steel wool pad works well. Always rinse thoroughly afterward!
Wrapping up and next steps
Cleaning your terra cotta flower pots doesn’t have to be a chore—with a little elbow grease and the right tricks, like your newfound vinegar soak method, you’ll keep them looking fresh and ready for your next gardening project! 🌿 Whether you’re tackling stubborn stains or just refreshing their natural charm, these steps make the process simple and effective.
Now that you’re armed with the know-how, grab those pots and get cleaning! And once they’re sparkling, why not explore creative ways to reuse or repurpose them? Happy gardening! 🌱✨