
Propagation
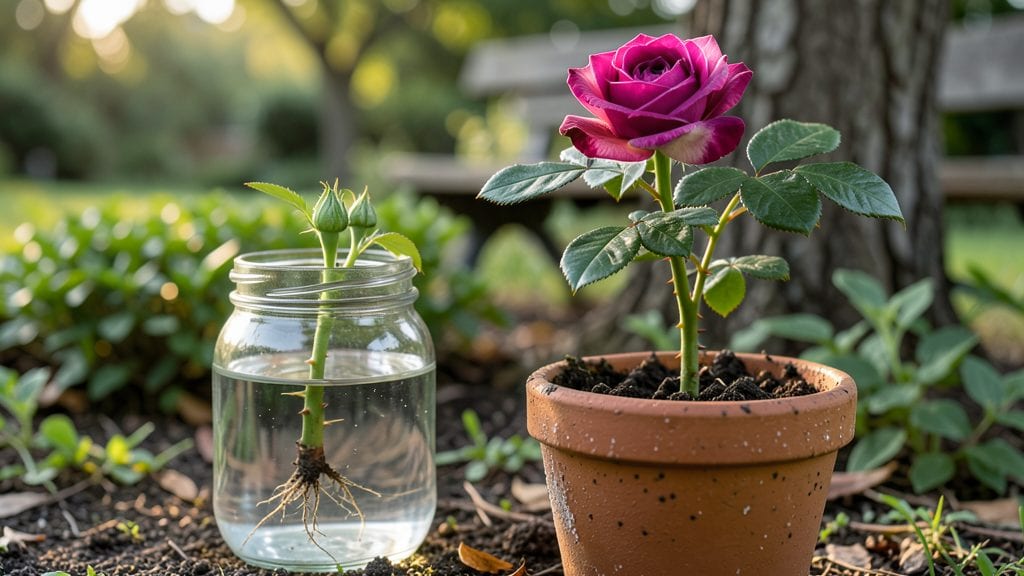
Growing a rose plant from a single flower feels like magic—especially when you see those first green shoots after just 3 months. 🌱 I’ve propagated roses this way for years, and the secret isn’t complicated: it’s all about timing, the right cut, and a little patience.
One wrong move and you’ll lose your cutting; get it right, and you’ll have a thriving rose bush that blooms like the one you started with.
The best part? You don’t need fancy tools or a greenhouse. A sharp pair of scissors, a glass of water, and a sunny windowsill are all it takes to turn a wilted bouquet into a living plant.
Most people give up after the first week, but stick with it—those roots will surprise you. My first attempt took 10 days to show signs of life, and now I’ve got a whole garden of roses grown from cuttings.
By the time you’re done, you’ll have a hardy rose plant ready to transplant, with glossy leaves and a sturdy stem. The blooms you’ll get next season will be even better than the original flower—fuller, fragrant, and uniquely yours.
This method works for hybrid teas, floribundas, and even climbing roses, so long as you pick healthy stems.
Fair warning: humidity and rot are the biggest hurdles, but I’ll show you how to avoid them. Whether you’re a beginner or a seasoned gardener, this is the foolproof way to multiply roses without spending a dime. Let’s get those cuttings growing!
📚 In This Guide
- What you need
- Instructions
- Tips and common mistakes
- Wrapping up and next steps
What you need
- ● 1 healthy rose flower (from a disease-free plant, with at least 3-4 leaves and a stem about 6 inches long)
- ● Sharp pruning shears or clean scissors (sterilized with rubbing alcohol to prevent infection)
- ○ Rooting hormone (optional but recommended—look for a gel or powder labeled for cuttings)
- ● Small pots or containers (4-6 inches wide, with drainage holes—yogurt cups or plastic containers work in a pinch!)
- ● Well-draining potting mix (a blend of perlite, vermiculite, and peat moss or coconut coir—avoid garden soil!)
- ● Clear plastic bag or plastic wrap (to create a humidity dome)
- ● Spray bottle with water (for misting—tap water is fine, but room-temperature works best)
- ● Rubbing alcohol or hydrogen peroxide (3% solution, for sterilizing tools)
- ● Heat mat (to keep roots warm, especially in cooler climates)
- ● Grow lights or bright, indirect sunlight spot (a sunny windowsill works too!)
- ● Fertilizer (diluted liquid rose fertilizer, used sparingly after roots form)
- ● Label markers (to track your rose varieties if experimenting with multiple types)
Step-by-Step instructions for propagating roses from cut flowers
Here's the foolproof method I use to turn cut roses into thriving plants.
🌱 Step 1: Select and Prepare the Perfect Stem
Choose a healthy stem with at least 3-4 buds and no signs of disease or damage. The thicker the stem, the better—it needs stored energy to root. Cut just below a leaf node at a 45-degree angle using clean shears. This angled cut increases surface area for water uptake and root formation.
Remove all but the top 2-3 leaves and any thorns along the lower half of the stem. Strip the leaves completely off the bottom 2 inches—this section will become your root zone. I like to make a small nick about ¼ inch deep below each remaining leaf node with a sterile knife. These tiny cuts encourage root growth without damaging the stem.
💧 Step 2: Root in Water with Hormone Boost
Place the prepared stem in a clean glass or jar filled with room-temperature water until it reaches the bottom 2 inches of the stem. Change the water every 2-3 days to prevent bacterial growth. You'll see the stem drink up water eagerly—this is a good sign the plant is alive and ready to root.
After 1-2 weeks, when you notice tiny white or yellowish nubs forming at the cut nodes, it's time to add rooting hormone. Dip the base of the stem in rooting hormone powder, tapping off excess. This step dramatically improves success rates by encouraging faster, stronger root development. Watch for roots to appear in 3-4 weeks—they'll look like tiny white threads growing from the cut nodes.
☀️ Step 3: Transition to Soil When Roots Develop
Once roots reach about 1-2 inches long, it's time to plant. Fill a small pot with well-draining potting mix and make a hole deep enough to bury the stem up to the first leaf node. Gently remove the stem from water, letting excess moisture drain, then place it in the hole. Firm the soil around the stem to eliminate air pockets.
Keep the newly planted stem in a spot with bright, indirect light for the first week. Avoid direct sun until you see new growth—this prevents transplant shock. Water lightly but consistently, keeping the soil evenly moist but not soggy. You'll know it's working when you see fresh leaves emerging within 2-3 weeks.
🌿 Step 4: Gradually Acclimate and Encourage Growth
After 4-6 weeks of steady growth, it's time to introduce the plant to more sunlight. Move it outdoors to a shaded area for 2-3 hours the first day, gradually increasing exposure over 7-10 days. This hardening-off process prepares the plant for full sun without shocking its system.
Once fully acclimated, provide 6+ hours of direct sunlight daily. Fertilize lightly with a balanced rose fertilizer every 4-6 weeks during the growing season. You'll see your first blooms in 3-4 months, proving your patience paid off. Prune spent blooms regularly to encourage more flowers and maintain a bushy shape.
Tips & tricks for perfect rose propagation
Here's what I've learned from years of turning cut roses into thriving plants—these little details make all the difference.
Stem Selection Secret: Look for stems that are pencil-thick or slightly thicker—they contain more stored energy for root development. I always check for green stems rather than woody ones, as green indicates the plant still has life. Avoid stems with mold, brown spots, or excessive thorns, as these can signal disease or stress. In Step 1, when making your angled cut, try to position it just below a bud—this is where roots will most likely form.
Water Quality Matters: Never use tap water straight from the faucet in Step 2—let it sit out for 24 hours first to allow chlorine to evaporate. I've had the best success using filtered or rainwater, as chlorine can inhibit root growth. Change the water every 2-3 days as instructed, but also give your jar a quick rinse before refilling to prevent bacterial buildup. The water should always reach the bottom 2 inches of the stem without submerging the leaves.
Rooting Hormone Hack: When you're ready to add rooting hormone after 1-2 weeks, don't just dip and go—tap off any excess powder. I find it helps to gently roll the base of the stem in the hormone rather than just dipping, which ensures even coverage. This step is especially important if you're working with particularly stubborn stems. Once applied, place the stem back in water immediately—delaying this can reduce effectiveness.
Light Transition Tip: In Step 3, when moving your newly planted stem to soil, place it in bright indirect light for that first week. I like to use a north-facing window or place it about 2 feet away from a south-facing window. The key is to avoid direct sun until new growth appears—this prevents what's called "transplant shock." You'll know you're doing it right when you see fresh leaves emerging within those 2-3 weeks mentioned in the instructions.
Pro Tips for Grow A Rose Plant From A Rose Flower
- Here's what I've learned from years of turning cut roses into thriving plants—these little details make all the difference.
- Stem Selection Secret: Look for stems that are pencil-thick or slightly thicker—they contain more stored energy for root development.
- Water Quality Matters: Never use tap water straight from the faucet in Step 2—let it sit out for 24 hours first to allow chlorine to evaporate.
Frequently asked questions
Got questions about growing roses from cuttings? Here are some common ones—and their answers!
Can I grow a rose from any flower I buy?
Not all roses can be propagated this way! Look for hybrid tea, grandiflora, or floribunda roses—they root best. Avoid spray-painted or heavily treated blooms (like grocery store roses), as chemicals can inhibit growth. Stick to organic, pesticide-free flowers for the best success!
How long does it take for roots to form?
Root formation usually takes 4–8 weeks, depending on conditions. Keep your cutting in a warm, humid spot (like a propagator or plastic bag) and change the water every 2–3 days. Patience is key—small white bumps at the base signal root growth! Transplant once roots reach 1–2 inches.
Why is my rose cutting turning yellow or mushy?
Yellowing or mushiness often means rot from overwatering or poor airflow. If the stem feels soft or smells foul, trim the affected part immediately and replant in fresh water or soil. Use a rooting hormone next time to speed up growth and prevent rot.
Can I grow roses from store-bought flowers?
Yes, but success depends on the rose type and care. Choose organic, untreated blooms (like from a local florist) and act fast—cuttings work best within 24 hours of picking. Avoid blooms treated with preservatives, as they won’t root well. For best results, opt for garden roses or cuttings from healthy plants.
What’s the best time of year to try this?
The ideal window is late spring to early summer (May–June) when days are long and warm. Avoid extreme heat or cold—aim for 65–75°F (18–24°C). If you miss this, try indoor propagation under grow lights in winter, but success rates drop slightly.
What if my cutting doesn’t root?
Don’t worry—even experienced gardeners face failures! Try again with a healthier cutting (thicker stems root better) or adjust conditions. If all else fails, buy a rooted rose cutting from a nursery and propagate it instead. Persistence pays off!
Wrapping up and next steps
Growing a rose plant from a single flower is a rewarding journey that blends patience with nature’s magic! 🌱 By following these steps—from selecting healthy cuttings to nurturing roots—you’ve unlocked the secret to multiplying your favorite blooms without spending a dime.
The key? Consistency in care, whether it’s keeping your cuttings hydrated or providing the right light.
Now that you’re armed with the know-how, take the next step: experiment with different rose varieties or share your newfound skills with fellow gardening enthusiasts. Every cutting you root is a promise of future beauty—so grab those shears and let your garden grow! 🌸