
Flowers
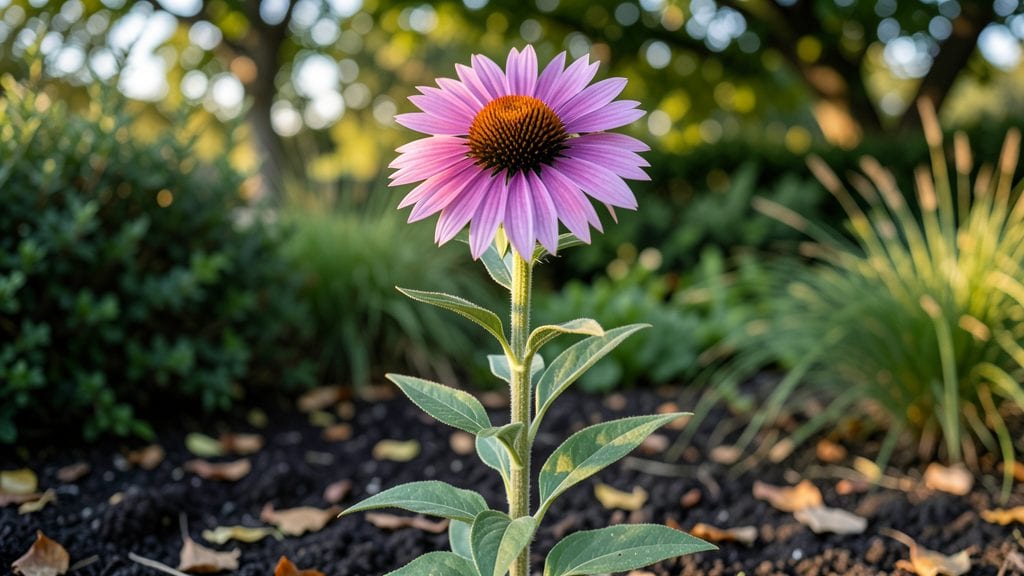
A perennial flower bed that blooms from spring to frost is the ultimate "plant once, enjoy forever" garden investment. 🌸 I spent years watching seasonal annuals fade after their first show—until I swapped them for hardy perennials that return stronger each year with almost no work.
The key isn't just picking pretty plants; it's layering them by height, color, and bloom time so you never have a bare spot.
Start with 3-5 core perennials that thrive in your zone, then fill gaps with fillers like creeping thyme or ajuga. My go-to combo mixes tall coneflowers at the back, mid-height black-eyed Susans, and low-growing sedum at the front—plus a few late-blooming asters for fall color.
The soil? Just amended with compost before planting, and that's it.
What you end up with is a garden that looks like it belongs in a magazine but requires 10 minutes a week of deadheading and occasional mulch. The colors shift seamlessly—purples give way to yellows, then whites—while bees and butterflies never stop visiting.
Even my black thumb keeps this bed looking effortless year after year.
Works for sun or shade, small spaces or large borders—just swap the plants to match your light. The real magic happens when you let it evolve naturally. Here's how to design yours without the overwhelm.
📚 In This Guide
- What you need
- Instructions
- Tips and common mistakes
- Wrapping up and next steps
What you need
- ● Perennial plants: Choose 3–5 varieties for layered blooms (e.g., coneflowers, black-eyed Susans, daylilies, hostas, and sedum). Aim for 5–10 plants per square foot for full coverage.
- ● High-quality soil: 2–3 cubic yards of native soil or compost-enriched topsoil (amend with 2–3 inches of compost for fertility).
- ● Mulch: 2–3 inches of organic mulch (e.g., shredded bark, straw, or pine needles) to retain moisture and suppress weeds.
- ● Garden hose or watering can (with a soaker hose attachment for efficient watering).
- ● Garden gloves (heavy-duty for digging).
- ● Hand trowel or transplant spade (for precise planting).
- ● Pruners or shears (for trimming and shaping).
- ● Measuring tape or ruler (to plan spacing).
- ○ String or stakes (optional, for marking plant layouts).
- ● Slow-release fertilizer (e.g., 10-10-10 or organic options like bone meal or fish emulsion).
- ● Edging material (e.g., bricks, stones, or metal to define the bed neatly).
- ● Drip irrigation system (for automated watering).
- ● Plant food or liquid fertilizer (for mid-season boosts).
- ● Knee pads or a small stool (for comfort during long planting sessions).
How to design a low-maintenance perennial flower bed
Here's the simple approach I've used for years—once planted, these beds thrive with almost no effort.
🪴 Step 1: Choose the Perfect Location and Sunlight
Scan your yard for a spot with at least 6 hours of sunlight daily. Most perennials need full sun to bloom reliably, but a few like asters and hostas tolerate partial shade. Avoid low-lying areas where water pools—perennials hate soggy roots. I always check the sunlight patterns throughout the day by observing where shadows fall at different times.
Mark the area with stakes and string to visualize your bed. A rectangular shape is easiest to maintain, but curves add visual interest. For a 4-foot-wide bed, I find that's the perfect width for reaching the center without stepping on plants. Measure twice before digging—you'll thank yourself later when the layout feels just right.
🌱 Step 2: Prepare Soil for Long-Term Success
Remove any grass or weeds by hand or with a sod cutter, then dig down 12 inches deep to loosen compacted soil. Perennials have deep roots, so breaking up hardpan now prevents future struggles. Mix in 3 inches of compost into the top 6 inches of soil—this feeds roots for years and improves drainage.
Test your soil's drainage by digging a hole, filling it with water, and timing how long it takes to drain. If water sits for more than 4 hours, amend with additional compost or sand. I like to add a 2-inch layer of coarse sand at the bottom of the hole first for extra drainage—this is especially helpful in clay-heavy soils.
✂️ Step 3: Select and Plant Perennials for Season-Long Color
Choose plants with staggered bloom times so your bed never looks bare. Start with 3-5 core perennials that thrive in your climate zone, like coneflowers, black-eyed Susans, and daylilies. These workhorses handle tough conditions and attract pollinators. Space them 18-24 inches apart—crowding leads to weak stems and poor airflow.
Dig holes twice as wide as the root ball but only as deep as the pot. Gently remove plants from containers, loosen tangled roots, and place them in the hole so the top of the root ball sits 1 inch below soil level. Backfill with native soil, firm gently, and water deeply to settle everything. I always plant on a cloudy day to reduce transplant shock.
💧 Step 4: Mulch and Water for Establishment
Spread 2-3 inches of mulch over the bed, keeping it 6 inches away from plant stems to prevent rot. I prefer shredded bark mulch because it breaks down slowly and improves soil as it decomposes. This layer locks in moisture, suppresses weeds, and regulates soil temperature—critical for perennials in their first year.
Water deeply 2-3 times per week for the first month, then taper to 1 inch per week once established. Let the top 2 inches of soil dry out between waterings to encourage deep root growth. Overwatering is the fastest way to kill perennials, so I always check with my finger before watering again.
☀️ Step 5: Maintain with Seasonal Care
In early spring, remove dead foliage but leave seed heads on some plants for winter interest. Cut back perennials like coneflowers and black-eyed Susans in late winter to encourage fresh growth. I always wait until new shoots appear before pruning—this ensures I don't accidentally cut off next year's blooms.
Fertilize lightly in early spring with a balanced, slow-release fertilizer (10-10-10). Too much nitrogen makes perennials grow leafy but flowerless. Deadhead spent blooms regularly to prolong flowering and prevent self-seeding where you don't want it. With minimal effort, your bed will reward you with color from spring through fall.
Tips & tricks for perfect perennial flower beds
These little details make all the difference between a bed that fades after one season and one that thrives for years.
Sunlight Secret: I can't stress enough how critical those 6 hours of sunlight are—especially in cooler climates. If your spot only gets partial sun, opt for shade-tolerant perennials like asters or hostas, but don't compromise on the minimum light requirement for sun-loving varieties. I've seen coneflowers struggle after just one season in shadier spots, so always test your location before committing to plants.
Soil Prep Game-Changer: That 12-inch deep dig might seem tedious, but it's the single most important step for long-term success. I've learned this the hard way after seeing perennials fail because their roots couldn't penetrate compacted soil. For clay-heavy soils, mix in that 2-inch sand layer at the bottom—it creates instant drainage channels that roots can use. Think of it as building a foundation for your plants.
Planting Precision: When you're placing those 3-5 core perennials, pay attention to their mature size. I always arrange taller plants at the back and shorter ones at the front, but also consider how they'll look when fully grown. The 18-24 inch spacing gives plants room to breathe, but don't be afraid to tuck in smaller perennials between the main plants for extra color. Just remember—crowding leads to competition for nutrients and water.
Watering Wisdom: Those first 2-3 weeks are critical for establishment. I set a timer on my phone to remind me to water deeply—perennials need consistent moisture to develop strong root systems. The 1 inch per week rule is perfect for most climates, but check with your finger: if the top 2 inches of soil are dry, it's time to water. Overwatering is just as damaging as underwatering, so let the soil dry slightly between waterings.
Pro Tips for Perennial Flower Bed
- These little details make all the difference between a bed that fades after one season and one that thrives for years.
- Sunlight Secret: I can't stress enough how critical those 6 hours of sunlight are—especially in cooler climates.
- Soil Prep Game-Changer: That 12-inch deep dig might seem tedious, but it's the single most important step for long-term success.
Frequently asked questions
Got questions about creating and maintaining a perennial flower bed? You’re not alone! Here are some of the most common concerns—and their solutions—to help you design a low-maintenance, high-reward garden that blooms year after year.
What’s the best time of year to plant a perennial flower bed?
The ideal window is early spring or early fall when soil is workable but not extreme (avoid summer heat or winter frost). This gives roots time to establish before harsh weather. Pro tip: If planting in fall, choose cold-hardy perennials like coneflowers or sedum for a head start!
How long does it take for a perennial flower bed to look full and lush?
Patience is key! Most perennials take 2–3 years to reach their full potential, though some (like daylilies or black-eyed Susans) may surprise you with early blooms. First-year focus: Prioritize soil health and mulch—this jumpstarts growth for seasons to come.
Are there budget-friendly ways to start a perennial flower bed?
Swap pricey nursery plants for seed packets (great for coreopsis or bee balm) or divide existing perennials from friends’ gardens. Thrift tip: Check local plant swaps or Facebook Marketplace for discounted clumps—just ensure they’re disease-free!
How do I keep pests and diseases out of my perennial bed?
Prevention is easier than cure! Start with:
- Healthy soil (rich in compost) to boost plant resilience.
- Proper spacing (6–12 inches apart) for airflow.
- Neem oil or soapy water sprays for early pest signs.
Do perennials need winter care?
Most perennials are hardy, but a little TLC helps. Do this:
- Leave foliage until spring—it insulates roots!
- Add mulch (2–3 inches) after the first frost.
- Protect tender perennials (like lavender) with burlap wraps in harsh climates.
Can I mix perennials with annuals in the same bed?
Yes! Annuals (like marigolds or zinnias) fill gaps and attract pollinators, but plan strategically. Key rules:
Annuals
Perennials
Use as filler plants in early/late seasons.
Choose slow-spreading perennials to avoid crowding.
Remove spent annuals before perennials go dormant.
Pick perennials with similar sunlight/water needs.
Wrapping up and next steps
Creating a perennial flower bed is a rewarding way to enjoy year-round beauty with minimal upkeep—once established, these plants thrive on their own! 🌸 By choosing the right mix of hardy perennials, planning for seasonal interest, and tending to soil health, you’ll transform your garden into a vibrant, low-maintenance oasis.
The key? Patience and preparation—your efforts will pay off in lush blooms for seasons to come.
Ready to dive in? Start small with a single bed or section, experiment with colors, and let your garden evolve naturally. Happy gardening! 🌿