
Flowers
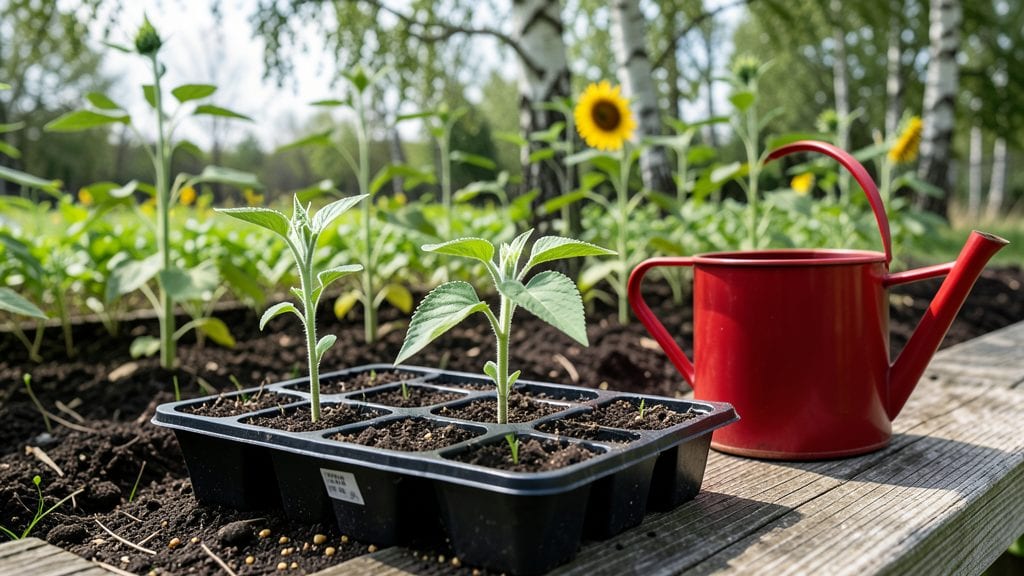
Sunflower sprouts burst from soil in 48 hours—faster than most greens—when you nail the germination secret: soaking seeds overnight in warm water. I learned this after struggling with dry, stubborn seeds that took a week to crack open. The trick isn’t magic; it’s science.
Sunflower seeds need moisture and warmth to wake up, and skipping that step means waiting twice as long for those first bright green shoots. Once you see them, you’ll be hooked on how quickly they grow.
You only need three things to start: sunflower seeds (raw or shelled), a shallow container with drainage, and a cozy spot near a sunny window or under a grow light. No fancy soil required—just a damp paper towel or a tray of moistened potting mix.
The seeds should stay warm (around 70°F) and consistently damp, not soggy. Within days, you’ll have nutrient-packed greens ready to harvest, and the process is foolproof once you know the rhythm.
Those first sprouts unfurl with shockingly lush speed—tiny leaves unfurling into vibrant green shoots that taste mild and nutty. You can harvest them in just 7-10 days, long before they turn woody.
The key is keeping them moist but not drowned, and giving them 6+ hours of light daily. No black thumb needed here; even my forgetful watering habits still produce a bounty. Once you taste homegrown sunflower sprouts, store-bought greens won’t compare.
This method works year-round, whether you’re growing on a sunny windowsill in winter or a balcony in summer. The same principles apply—just adjust your light setup. No need for a greenhouse or expensive tools. Let’s get those seeds sprouting fast and keep them thriving!
📚 In This Guide
- What you need
- Instructions
- Tips and common mistakes
- Wrapping up and next steps
What you need
- ● Sunflower seeds: 1 cup (organic, non-GMO, and preferably raw or sprouting-grade—avoid roasted or salted seeds).
- ● Sprouting jar or container: A 16–32 oz mason jar (wide-mouth preferred) or a dedicated sprouting pod with a mesh lid.
- ● Cheesecloth, sprouting lid, or fine mesh: To cover the jar and allow drainage.
- ● Rubber band or jar ring: To secure the lid/cloth in place.
- ● Strainer or colander: For rinsing (if not using a jar with a built-in strainer).
- ● Water: Filtered or tap water (chlorine-free if possible).
- ● Small bowl or plate (for draining excess water).
- ● Spray bottle (for gentle rinsing).
- ● Grow light or sunny windowsill (if extending growth beyond 3–5 days).
- ● Paper towels or clean kitchen towel (for drying sprouts before storage).
- ○ Food dehydrator (optional, for making sunflower sprout powder).
Step-by-step instructions for growing sunflower sprouts indoors
Here’s how to get those first crisp, nutrient-rich shoots in just days—not weeks.
Soak and Prepare the Seeds
Start with ¼ cup sunflower seeds (raw, unsalted) and soak them in 2 cups lukewarm water for 8–12 hours. I use a wide, shallow bowl to ensure seeds stay submerged but not packed. The longer they soak, the faster they’ll germinate—just don’t let them dry out or they’ll lose their energy reserve.
After soaking, drain the seeds through a fine-mesh strainer and rinse them under cool water. This removes excess water and prepares them for planting. Pat them dry gently with a clean kitchen towel—just enough to remove surface moisture, not to dry them completely. You’ll know they’re ready when they feel slightly damp but not wet.
Set Up the Sprouting Container
Use a wide-mouth quart jar with a breathable lid (like a sprouting lid or a piece of fine mesh secured with a rubber band). Place a 1-inch layer of sprouting screen or cheesecloth at the bottom to allow water to drain while keeping seeds contained. Add the soaked seeds to the jar, spreading them evenly so they don’t clump—this ensures even air circulation and prevents mold.
Cover the jar with the lid or mesh and rinse the seeds 2–3 times daily with cool water. Each rinse should last 30–60 seconds, enough to wet the seeds thoroughly but not soak the jar. After rinsing, drain excess water completely—standing water turns anaerobic and stunts growth. You’ll see tiny white sprouts emerge within 24–48 hours, signaling it’s time to adjust your care routine.
Transition to Light for Greening
Once the radicles (tiny rootlets) reach about ½ inch long, move the jar to a bright, indirect light source—like a south-facing window or under a grow light set 6–12 inches away. Sunflower sprouts need light to develop chlorophyll, which turns them from pale white to vibrant green. If you notice the sprouts stretching toward the light (a sign of etiolation), lower the light source or rotate the jar daily to encourage even growth.
Continue rinsing the sprouts once daily after this stage, but reduce the frequency to every 12–24 hours once they’ve greened. Over-rinsing can weaken the delicate stems. Aim for 5–7 days total from soaking to harvest—your goal is crisp, tender sprouts with 1–2 inch-long greens and roots. If left too long, they’ll become bitter and woody.
Harvest and Store for Maximum Freshness
Harvest the sprouts by cutting them just above the screen or cloth with clean scissors. Shake them gently into a colander to remove any debris, then rinse briefly under cold water to remove any residual sprouting screen fibers. Pat them dry with a paper towel—this step is crucial to prevent mold during storage. You’ll have about 1–2 cups of fresh sprouts, ready to use immediately or store.
For storage, place the sprouts in an airtight container and refrigerate. They’ll stay fresh for 4–5 days if kept dry. To extend shelf life, wrap them in a damp paper towel inside the container—this mimics their humid growing conditions. If you notice any slimy spots or off smells, discard them immediately, as these are signs of spoilage. Freshness is key to that crisp texture and peak nutrient content.
Tips & tricks for perfect sunflower sprouts
A few simple strategies can transform your sprouting game from hit-or-miss to consistently crisp, vibrant greens every time.
Soak Smart: The 8–12 hour soak window is your best friend for fast germination. I like to set a timer for the 8-hour mark first—if you're impatient, you can check at 8 hours and extend to 12 if needed. The key is maintaining lukewarm water temperature (around 75°F) throughout the soak. Too cold slows germination, while hot water can damage the delicate seed coats. After draining, give those seeds a thorough rinse to remove any residual seed oils that could inhibit sprouting.
Container Selection Matters: That wide-mouth quart jar isn't just about size—it's about airflow. If you don't have a sprouting lid, use a piece of fine mesh secured tightly with a rubber band. The mesh should be snug enough to prevent seeds from escaping but loose enough to allow proper drainage. I've found that a slightly wider jar (like a half-gallon mason jar) works better for larger batches, as it prevents overcrowding that can lead to mold. Just remember to spread those seeds evenly in a single layer.
Light Transition Technique: When moving your sprouts to light in Step 3, don't rush it. Wait until those radicles reach exactly ½ inch—any shorter and they won't develop properly in light. For indoor growing, I position my jar on a windowsill facing east or west to avoid harsh midday sun that can scorch delicate sprouts. If using a grow light, maintain that 6–12 inch distance and rotate the jar daily to prevent uneven growth. The color change from white to vibrant green happens fastest in bright, indirect light—you'll notice the difference within 24 hours.
Harvesting Precision: That final drying step before storage is where many people go wrong. After your brief rinse to remove screen fibers, pat the sprouts dry with a paper towel but don't press too hard—you want to remove surface moisture without crushing the delicate stems. For maximum freshness, I like to spread them out on a clean kitchen towel in a single layer for 5–10 minutes before storing. This extra step prevents condensation in your container, which is the #1 cause of premature spoilage.
Pro Tips for Sun Flower Sprouts
- A few simple strategies can transform your sprouting game from hit-or-miss to consistently crisp, vibrant greens every time.
- Soak Smart: The 8–12 hour soak window is your best friend for fast germination.
- Container Selection Matters: That wide-mouth quart jar isn't just about size—it's about airflow.
Frequently asked questions
Got questions about growing sunflower sprouts? You’re not alone—here are answers to the most common ones to help you sprout success!
How long do sunflower sprouts take to germinate?
Sunflower sprouts typically sprout in 3–7 days with the right conditions—warmth (70–75°F), moisture, and darkness. Soak seeds overnight first, then rinse twice daily for fastest results. Patience pays off—thin, tender sprouts emerge quickly!
Can I grow sunflower sprouts indoors without sunlight?
Sunflower sprouts thrive in total darkness during germination. Use a seed tray or jar with a lid (leave it cracked for airflow), and place it near a warm spot like your kitchen counter. Once they’re 1–2 inches tall, move them to indirect light for greening.
Are sunflower sprouts expensive to grow? What’s the cost?
Not at all! A $5 bag of sunflower seeds yields hundreds of sprouts. Compare that to store-bought microgreens ($8–$15/container). With just water, a jar, and 10 minutes daily, you’ll save money while enjoying fresh, nutrient-rich greens year-round.
Why aren’t my sunflower sprouts growing? Troubleshooting tips.
Check these common issues:
No sprouts? Seeds may be old or not soaked long enough (try 8+ hours).
Moldy or slimy? Overwatering or poor airflow—rinse thoroughly and increase ventilation.
Leggy or weak? Needs light! Move them to a sunny windowsill or grow light after germination.
Bitter taste? Overcooked or left too long—harvest when sprouts are 1–3 inches tall.
Can I eat sunflower sprouts raw, or do I need to cook them?
Sunflower sprouts are best raw—they’re packed with vitamin E, magnesium, and healthy fats. Toss them into salads, sandwiches, or smoothies for a nutty crunch. If cooking, lightly sauté (2–3 mins max) to preserve nutrients—overcooking kills enzymes and flavor!
Wrapping up and next steps
Growing sunflower sprouts is a rewarding journey that brings fast, nutrient-packed greens to your table with minimal effort! Whether you’re a beginner or a seasoned gardener, these vibrant sprouts are packed with vitamins, minerals, and a delightful crunch—perfect for salads, sandwiches, or snacks. 🌱✨
Now that you’re armed with the secrets to speedy germination and troubleshooting tips, it’s time to roll up your sleeves and start sprouting. Try experimenting with different varieties or even growing them in a sunny windowsill—your taste buds (and plants!) will thank you. Happy growing! 🌿💚