
Planting
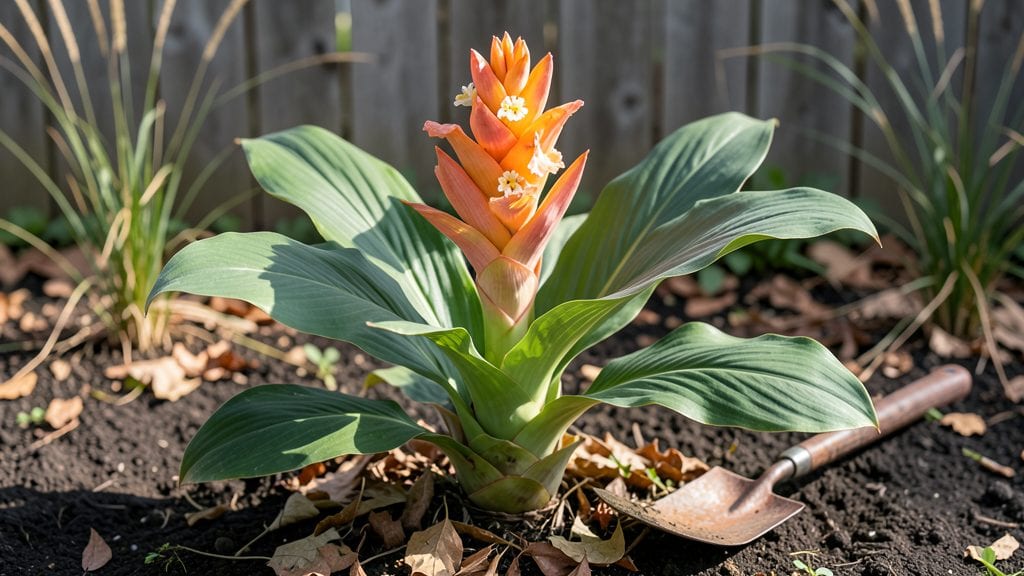
This turmeric flower plant is a game-changer—those edible golden blooms transform teas, garnishes, and even natural dyes, all while thriving in your garden. 🌿 I’ve grown it for years, and the secret lies in mimicking its tropical roots while keeping care simple.
The key? Warm soil, bright light, and patience—because those vibrant flowers take time to unfurl.
You’ll need a spot with at least 6 hours of sun daily, well-draining soil, and a climate that stays above 60°F—turmeric hates cold snaps. Propagate from rhizomes in spring, plant them shallowly, and keep the soil consistently moist but never soggy.
The first year focuses on establishing roots; flowers may not appear until the second season, but the wait is worth it.
Once established, your turmeric plant rewards you with bright yellow-orange blooms that last for weeks, followed by seed pods that dry into decorative ornaments. The petals taste slightly peppery and pair beautifully with honey or citrus in teas. Even the leaves are edible—add them to stir-fries like you would ginger.
Turmeric thrives in containers if you live in cooler climates, making it perfect for patios or greenhouses. Just bring pots indoors before frost. The biggest challenge?
Pests like aphids or fungal issues if humidity drops too low. With the right care, though, your plant will flourish—and so will your kitchen experiments.
📚 In This Guide
- What you need
- Instructions
- Tips and common mistakes
- Wrapping up and next steps
What you need
- ● Turmeric rhizomes (1–3 large, healthy rhizomes with "eyes" or buds) – organic, non-treated preferred
- ● Well-draining potting mix (5–10 gallons, depending on pot size) – blend of coconut coir, perlite, and compost (60:20:20 ratio)
- ● Pot or garden bed: Container: 12–18" diameter pot with drainage holes (for indoor/patio growing)
- ● Outdoor: Partial shade spot with loose, fertile soil (pH 6.0–7.5)
- ● Organic fertilizer (balanced 10-10-10 or compost tea) – 1 tbsp per gallon of water, applied monthly
- ● Pruning shears (for trimming dead leaves or harvesting flowers)
- ● Watering can with a rose nozzle (for gentle watering)
- ● Mulch (straw or bark chips) – to retain moisture and regulate soil temp
- ○ Humidity dome or tray (optional, for indoor seedlings)
- ○ pH testing kit (optional, to monitor soil acidity)
Step-by-step guide to growing turmeric flower plants
Here's how to cultivate these vibrant, edible blooms from start to showy harvest.
🌱 Step 1: Start with Healthy Turmeric Rhizomes
Turmeric flower plants begin with rhizomes—those knobby, orange-fleshed roots you'd normally use in cooking. Choose firm, disease-free rhizomes with multiple eyes (the little buds that will sprout). Soak them in warm water for 24 hours to soften the outer skin and encourage faster germination. This step is crucial because old, dry rhizomes take forever—or never—sprout.
After soaking, let them dry slightly for 1-2 hours until they're damp but not dripping. Plant each rhizome 2 inches deep in well-draining soil (a mix of potting soil and perlite works well). Space them 6 inches apart in rows. The top of the rhizome should peek just above the soil line—burying it too deep smothers the sprouts, while leaving it exposed dries it out.
☀️ Step 2: Provide Warmth and Bright Light
Turmeric thrives in warmth—ideal temperatures range from 70-85°F. If you're starting indoors, place the pot near a south-facing window or under a grow light for 12-14 hours daily. Without enough light, stems stretch weakly and leaves turn pale. You'll know it's working when new leaves unfurl bright green and upright within 3-4 weeks.
Once sprouts reach 4-6 inches tall, transplant them outdoors after the last frost in a spot with full sun (at least 6+ hours daily). Turmeric loves heat, so if your climate dips below 60°F at night, wait until soil temperatures warm up. Cold soil shocks the roots and stunts growth. A simple trick: press your finger into the soil—if it feels cool to the touch, hold off on planting.
💧 Step 3: Water and Fertilize for Strong Growth
Water deeply once a week, letting the soil dry out 2-3 inches below the surface between waterings. Overwatering causes rhizomes to rot, while underwatering makes leaves curl and yellow. Stick your finger in the soil—if it's dry past your first knuckle, it's time to water. Mulch around the base with 2 inches of organic mulch to retain moisture and keep roots cool.
Feed every 4-6 weeks with a balanced, water-soluble fertilizer (like 10-10-10) diluted to half strength. Stop fertilizing 2 months before harvest—too much nitrogen makes leaves lush but weakens the rhizomes you're growing for. You'll notice stronger stems and deeper green leaves after the first feeding, signaling the plant is thriving.
✂️ Step 4: Encourage Blooms and Harvest Edible Petals
Turmeric flowers appear 6-9 months after planting, but you can speed things up by pinching back the tallest stems when they reach 12 inches. This redirects energy to side shoots, producing more blooms. The flowers are edible—harvest petals in the morning when they're fully open but still tender. Use them fresh in teas, garnishes, or as a natural dye (they stain fabrics yellow!).
After flowering, let the plant mature for another 3-4 months before digging up the rhizomes. The soil should be dry, and leaves should yellow naturally. Dig carefully with a fork, then rinse off the dirt. Store in a cool, dark place for up to 6 months—these are your future plants and spices! If you miss the harvest window, the rhizomes will still sprout next season, though they may be smaller.
Tips & tricks for perfect turmeric flower plant growth
Real talk: Growing turmeric plants with edible flowers isn't rocket science, but these small tweaks make all the difference between a struggling plant and one that thrives.
Rhizome Selection Tip: Look for rhizomes with at least 3-4 visible eyes—the more eyes, the more potential sprouts. I've learned the hard way that wrinkled or shriveled rhizomes rarely sprout, no matter how long you soak them. Confession: I skipped this step for years and wondered why my plants kept failing.
Temperature Matters: That 70-85°F range is non-negotiable for consistent growth. If your home stays cooler than 65°F, use a heating mat under your pots during the 24-hour soak and first 3-4 weeks of growth. I've seen plants double their growth rate when kept in this ideal zone during their critical early stages.
Lighting Hack: For indoor starters, position your grow light just 6-8 inches above the plants and adjust the height as they grow. Too far away and they'll stretch weakly; too close and you'll burn the leaves. The 12-14 hours of light should be consistent—set a timer if you forget!
Pinching Technique: When you pinch back those 12-inch stems, make your cut just above a leaf node where new growth will emerge. This redirecting of energy is what triggers those beautiful side shoots with flowers. I've found that doing this twice—once at 12 inches and again when side shoots reach 6 inches—maximizes bloom production.
Pro Tips for Turmeric Flower Plant
- Real talk: Growing turmeric plants with edible flowers isn't rocket science, but these small tweaks make all the difference between a struggling plant and one that thrives.
- Rhizome Selection Tip: Look for rhizomes with at least 3-4 visible eyes—the more eyes, the more potential sprouts.
- Temperature Matters: That 70-85°F range is non-negotiable for consistent growth.
Frequently asked questions
Got questions about growing and using turmeric flower plants? You’re not alone! Here are some of the most common queries—plus quick, actionable answers to keep your edible blooms thriving.
Can I grow turmeric flowers from grocery-store turmeric root?
Yes! The same root used for curry powder can sprout into a flowering plant. Simply slice a 2-inch piece, let it dry for a day, then plant it in moist soil (about 1 inch deep). Keep it warm (70–80°F) and in bright, indirect light. Roots are tough—just be patient! Pro tip: Use a clear container to track root growth before transplanting.
How long does it take for turmeric flowers to bloom?
Turmeric flowers are slow but rewarding! Under ideal conditions (warmth, partial shade, and consistent moisture), you can expect blooms 6–12 months after planting the root. Some varieties (like Curcuma longa) may take longer—patience is key. Troubleshoot: Yellowing leaves? Check for overwatering or cold drafts.
Are turmeric petals safe to eat raw, or do I need to cook them?
Absolutely safe raw! Their mild, peppery flavor pairs well with teas, salads, or desserts. For a deeper flavor, lightly sauté them in ghee or honey. Dye tip: Steep petals in hot water for 10 mins to create a golden-yellow natural dye—perfect for fabrics or Easter eggs!
Are turmeric flowers toxic to pets if ingested?
Turmeric is generally non-toxic in small amounts, but large quantities (or the root) can upset pets’ stomachs. Petals are low-risk, but monitor your furry friends if they nibble. Safety note: Avoid using commercial dyes or pesticides near pets—stick to organic growing methods.
What can I do if my turmeric plant isn’t flowering?
No blooms? Try these fixes:
- Light: Move it to bright, indirect sunlight (e.g., east-facing window).
- Temperature: Keep it above 65°F—cold stalls growth.
- Food: Feed with a balanced liquid fertilizer (diluted to half-strength) every 4–6 weeks.
- Patience: Some varieties need 2+ years to flower.
Wrapping up and next steps
Growing a turmeric flower plant is a rewarding journey—whether you're drawn to its vibrant blooms, edible petals, or natural dye potential! 🌺 From selecting the right soil to harvesting those stunning orange flowers, every step unlocks a world of culinary and creative possibilities.
Now that you’re armed with tips and answers, why not take the next step? Start your own patch today and enjoy the beauty—and flavor—of turmeric flowers in teas, garnishes, or homemade dyes!