Flowers
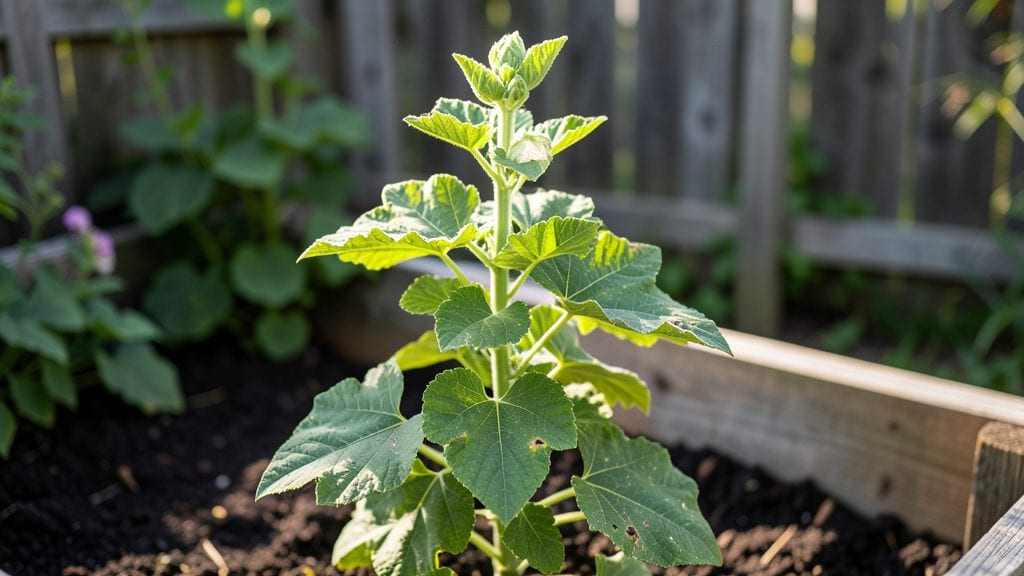
Black hollyhocks flowers turn your garden into a moody masterpiece with their deep, velvety petals that catch the light like midnight silk. 🌿 I fell in love with them after seeing how they transformed a dull corner of my cottage garden into a focal point that neighbors stopped to admire.
Their striking height and bold color make them the perfect centerpiece for vertical drama, especially when paired with lighter blooms that make them pop.
The secret to their impact lies in their versatility—plant them against a white picket fence for a classic cottage look, or let them tower over a mixed border to create layers of texture. They thrive in full sun and well-drained soil, which means they’re surprisingly low-maintenance for their dramatic presence.
Once established, they’ll come back year after year, rewarding you with more of that jaw-dropping height and rich color.
Imagine the contrast when you tuck them beside lavender or silver foliage plants—their dark petals will make everything around them glow. In late summer, when most gardens are winding down, these hollyhocks will still be standing tall, their blooms drawing in bees and adding structure to your space.
They’re the kind of plant that makes your garden feel like a storybook setting, where every corner has something to discover.
For best results, give them plenty of space to spread and deadhead spent blooms to encourage more flowers. They’re perfect for cutting too—just snip a few stems for a striking, long-lasting bouquet that’ll make your home feel like a garden escape.
Whether you’re designing a new bed or refreshing an old one, black hollyhocks are the unexpected star that’ll elevate everything around them.
📚 In This Guide
- What you need
- Instructions
- Tips and common mistakes
- Wrapping up and next steps
What you need
- ● Black hollyhock seeds: 10–20 seeds (or 3–5 young plants if buying starts). Opt for Alcea rosea 'Nigra' for true dark blooms.
- ● Well-draining potting mix: 2–3 gallons (sterilized to prevent disease). Add perlite or sand for extra drainage.
- ● Garden soil (for transplanting): Rich, loamy soil with a pH of 6.0–7.0. Amend with compost for fertility.
- ○ Containers (optional for seedlings): 4–6 inch pots (biodegradable preferred) or seed trays.
- ● Hand trowel or transplant spade (for digging and moving seedlings).
- ● Watering can or hose with gentle spray nozzle (avoid soaking seeds).
- ● Garden gloves (to protect hands from prickly stems).
- ● Pruning shears (for deadheading or shaping plants).
- ○ Stakes or plant supports (optional)—hollyhocks grow tall (4–6 ft) and may need light support.
- ● Sunlight: Full sun (6+ hours daily). Partial shade may reduce bloom intensity.
- ● Watering routine: Keep soil consistently moist but not waterlogged (especially for seedlings).
- ● Spacing: Plant seeds 12–18 inches apart or seedlings 18–24 inches apart.
- ● Climate: Hardy in USDA zones 3–9. Start seeds indoors 6–8 weeks before last frost if in cooler zones.
- ● Slow-release fertilizer (e.g., 10-10-10) for nutrient boosts.
- ● Mulch (straw or shredded leaves) to retain moisture and suppress weeds.
- ● Black or dark-colored containers to enhance the dramatic foliage contrast.
- ● Companion plants like salvias or coreopsis for texture and color harmony.
Step-by-step guide for planting and caring for black hollyhocks
Here's how to grow these striking vertical beauties with bold presence.
🌱 Step 1: Choose the Perfect Planting Location
Black hollyhocks thrive in full sun—at least 6 hours daily. I always pick the sunniest spot in my garden, even if it means sacrificing a less dramatic plant. The more sun, the taller and fuller they'll grow, with those iconic spiky blooms reaching 5-6 feet tall.
Check your soil's drainage first. Hollyhocks hate soggy roots. If your garden soil stays wet for more than a few hours after rain, amend with 2-3 inches of compost mixed into the top 12 inches of soil. You'll know it's right when water drains through in 1-2 hours rather than pooling.
🌿 Step 2: Plant Seeds or Transplants at the Right Time
For direct sowing, plant seeds 2-3 weeks before your last frost date in spring. I like to start them indoors 6-8 weeks earlier if my winters are harsh. Press seeds just ¼ inch deep—they need light to germinate, so don't bury them too deep. Space them 12-18 inches apart to give roots room to spread.
If using transplants, wait until after the last frost when soil reaches 60°F. You'll see the difference immediately—transplants bloom 2-3 weeks earlier than seedlings. Water deeply right after planting to settle the soil around roots, then let the top inch dry out before watering again.
☀️ Step 3: Provide Consistent Care for Strong Growth
Water hollyhocks deeply once a week—they're drought-tolerant once established but need steady moisture while roots grow. You'll know they're thirsty when the leaves start to droop slightly in the afternoon. A soaker hose works best, delivering water at the base without wetting the foliage (which can cause fungal issues).
Feed with a balanced fertilizer (10-10-10) when new growth appears in spring. I mix it into the soil around the base rather than top-dressing, which helps prevent leaf burn. Stop fertilizing 6-8 weeks before first frost to encourage blooms for next season.
✂️ Step 4: Deadhead and Prune for Continuous Blooms
Deadhead spent blooms regularly to encourage more flowers. I snip off faded blooms with clean pruners, cutting just above a set of leaves. This prevents seed formation and redirects energy to new growth. You'll notice a surge of fresh buds within 2-3 weeks of consistent deadheading.
In early spring, cut back last year's stems to 6 inches tall. This removes dead growth and makes room for new shoots. Hollyhocks are surprisingly resilient—even if you miss a season, they'll bounce back with vigorous growth the next spring.
⏰ Step 5: Prepare for Winter and Next Season
Hollyhocks are hardy perennials in zones 3-9, but they benefit from a little winter protection. After the first hard frost, cut back stems to 4-6 inches tall and mulch with 2-3 inches of straw or shredded leaves. This insulates the crown and prevents heaving during freeze-thaw cycles.
In early spring, remove old mulch and check for any remaining dead stems. You'll often find new shoots emerging from the base—these are your plants' way of telling you they're ready for another season of dramatic vertical beauty.
Tips & tricks for perfect black hollyhocks
These game-changing insights will help you coax those dramatic spires into your garden with confidence!
The Sunlight Secret: While 6 hours of sun is the minimum, I've found hollyhocks really shine with 8+ hours of direct sunlight. The more sun they get, the taller and more robust their stems become. If your garden has partial shade, choose the sunniest spot available—even if it means moving them from their original location. The payoff of those towering black blooms is worth the effort!
Soil Drainage Test: Before planting, do this quick test: Dig a hole about 12 inches deep, fill it with water, and time how long it takes to drain. If it takes longer than 2 hours, your soil needs amending. Mix in 2-3 inches of compost and let it settle for a week before planting. Proper drainage prevents root rot, which is the #1 killer of hollyhocks. I've lost plants to soggy soil, and trust me—you don't want that dramatic failure!
Planting Depth Matters: Those tiny seeds need just ¼ inch of coverage—any deeper and they won't germinate. I like to use a seed starter mix in small pots for indoor starts, pressing seeds just barely under the surface. For direct sowing, lightly rake the soil to create a fine seedbed rather than pressing seeds into hard ground. This ensures consistent moisture contact without burying them too deep.
Deadheading Payoff: The 2-3 week bloom surge after deadheading is real! I've timed it myself—when you remove spent blooms consistently, you'll see fresh buds forming within that exact window. Use clean pruners and cut just above a leaf node to encourage new growth from that spot. This technique keeps your hollyhocks flowering continuously from early summer through fall.
Pro Tips for Black Hollyhocks Flowers
- These game-changing insights will help you coax those dramatic spires into your garden with confidence!
- The Sunlight Secret: While 6 hours of sun is the minimum, I've found hollyhocks really shine with 8+ hours of direct sunlight.
- Soil Drainage Test: Before planting, do this quick test: Dig a hole about 12 inches deep, fill it with water, and time how long it takes to drain.
Frequently asked questions
Are black hollyhocks easy to grow for beginners?
These hardy annuals (or biennials) thrive in full sun to partial shade and tolerate almost any soil—even poor or rocky ground. Just ensure good drainage and water moderately. Pro tip: Deadhead spent blooms to encourage more flowers and prevent self-seeding where you don’t want it.
How long do black hollyhocks take to bloom?
If planted from seeds, expect blooms 60–90 days after sowing (or the following summer if biennial). Transplants may flower 4–6 weeks earlier. For instant drama, opt for potted hollyhocks—they’ll reward you faster!
Can I use black hollyhocks in containers or small gardens?
Yes! While they’re known for their towering height (4–6 feet), dwarf varieties like ‘Black Prince’ stay under 3 feet—perfect for containers or narrow beds. Pair them with salvias, lavender, or ornamental grasses to balance their bold silhouette. Container tip: Use a 12-inch pot with drainage holes and rich potting mix.
Are black hollyhocks toxic to pets or wildlife?
Hollyhocks are non-toxic to dogs, cats, and humans, making them a pet-friendly choice! However, they attract bees and butterflies, so avoid planting near hives if you’re allergic. Deer and rabbits usually ignore them, too—great for low-maintenance gardens.
Why aren’t my black hollyhocks blooming?
Common culprits include:
- Too much shade: Hollyhocks need at least 4–6 hours of sun daily.
- Overcrowding: Thin seedlings to 12–18 inches apart for airflow.
- Poor soil: Amend with compost if your soil is clay-heavy or sandy.
- No deadheading: Remove faded blooms to redirect energy to new flowers.
If they’re leafy but no blooms, they might need more sunlight or fertilizer (use a balanced 10-10-10 formula).
Wrapping up and next steps
Black hollyhocks aren’t just stunning—they’re a bold statement for any cottage garden, bringing height, texture, and drama with minimal fuss. Whether you’re drawn to their moody elegance or their easy-care charm, these flowers prove that dark blooms can steal the show without the high-maintenance hype.
Ready to transform your garden? Start small—plant a few this season, experiment with companion plants, and let their vertical allure inspire your next gardening adventure! 🌿✨
Next step: Sketch a quick layout of your garden space and mark where black hollyhocks could shine—near pathways, against fences, or as a focal point in a mixed border. Happy planting!