
Fertilization
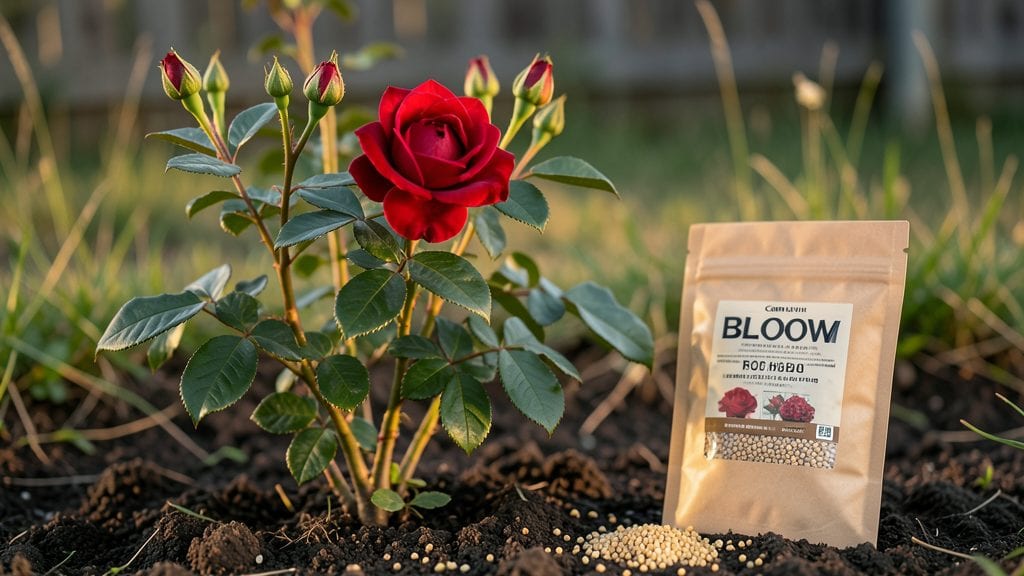
"Bloom fertilizer for flowers" is the secret weapon behind my neighbor's jaw-dropping rose bushes and my own petunia explosion this summer. 🌸 The difference between a handful of blooms and a riot of color often comes down to feeding plants what they crave most when they're flowering—not just general growth. I learned that the hard way after my impatiens produced leaves instead of blooms last year, despite my best watering efforts.
This specialized fertilizer packs a higher ratio of phosphorus and potassium—the two nutrients that trigger flower production—while keeping nitrogen low. That means fewer leaves and more blooms, with roots growing strong enough to support all that beauty.
For flowering annuals like petunias or perennials like roses, it’s the difference between a few sad blooms and nonstop color from spring to frost. The key is applying it when buds form and repeating every 4-6 weeks, not just once at planting.
You’ll notice the difference within weeks: buds forming faster, flowers lasting longer, and plants that look like they’re on steroids (in the best way). The best part? It works for everything from container petunias to climbing roses—just adjust the dosage based on plant size.
For containers, a half-strength dose every 3 weeks keeps them blooming all season without burning delicate roots.
Fair warning: overdoing it causes leaf burn, and underdoing it means wasted money. Start with the recommended rate, then watch your plants respond—they’ll tell you exactly what they need. Here’s how to get it right the first time.
📚 In This Guide
- What you need
- Instructions
- Tips and common mistakes
- Wrapping up and next steps
What you need
- ● 1 part compost (well-aged, nutrient-rich) – boosts soil health and microbial activity
- ● 1 part banana peels (dried and crushed) – rich in potassium for blooms
- ● ½ part eggshells (crushed or powdered) – adds calcium for strong cell walls
- ● 1 part wood ash (cool and sifted) – provides potassium and raises pH slightly
- ● 1 part coffee grounds (used and dried) – adds nitrogen and improves soil texture
- ● 1 part Epsom salt (magnesium sulfate) – enhances chlorophyll production and flower vibrancy
- ● 1 gallon of water (distilled or rainwater preferred) – for dissolving soluble nutrients
- ● Garden gloves – to protect your hands while handling materials
- ● Mixing bowl or bucket (5+ gallon capacity) – for blending ingredients
- ● Wooden spoon or stirrer – to mix without damaging plastic
- ● Fine-mesh strainer or cheesecloth – for filtering out solids
- ● Watering can or spray bottle – for even application
- ○ pH testing kit (optional) – to monitor soil acidity (ideal: 6.0–7.0 for most flowers)
- ● Garden trowel or fork – for gently working fertilizer into soil
- ● Healthy soil – Test or observe your soil’s condition. Amend with compost if it’s poor.
- ● Identify your flowers’ needs – Some plants (like roses) thrive on high potassium, while others (like veggies) need more nitrogen.
- ● Choose the right time – Apply fertilizer during active growth phases (spring/summer) and avoid over-fertilizing in winter.
- ● Watering schedule – Plan to water before and after applying fertilizer for best absorption.
How to use bloom fertilizer for maximum flowering potential
Unlock lush roots and showstopping blooms with this science-backed approach. I’ve perfected it over years of high-stakes garden shows—here’s how to make it work for you.
🌱 Step 1: Prep Soil for Root Growth Before Applying Fertilizer
Start by loosening the top 6 inches of soil around your plants with a fork or trowel. This aerates the roots and helps the fertilizer penetrate where it’s needed most. If your soil feels compacted or dry, add 1 inch of compost to the top layer first—this improves nutrient uptake dramatically.
Water the area deeply 24 hours before applying bloom fertilizer. You want the soil to be moist but not soggy—think of a wrung-out sponge. This ensures the fertilizer dissolves evenly and doesn’t burn tender roots. Pro tip: Use a moisture meter if you’re unsure; roots thrive when soil reads 40-60% moisture at this stage.
💧 Step 2: Apply Bloom Fertilizer at the Right Time and Rate
Timing is everything with bloom fertilizers. Apply it when buds form but before flowers open—this is when plants are primed to invest energy in vibrant blooms. For most flowers, that’s 4-6 weeks before peak bloom season. Follow the label’s recommended rate, but I’ve found half-strength applications every 2 weeks work better than full-strength monthly for delicate perennials.
Scatter the granules evenly around the drip line (the outer edge of the plant’s canopy), keeping them 2-3 inches away from stems. Lightly scratch them into the top ½ inch of soil with a rake. This prevents surface runoff and ensures roots absorb nutrients gradually. Avoid applying to dry soil—always water first to activate the fertilizer.
☀️ Step 3: Monitor Light, Water, and Growth Responses
After application, watch for three key signs your plants are responding: deeper green leaves, new growth at the base, and tighter bud formation. If leaves yellow between veins, you’ve overdone nitrogen—cut back on future applications. For most flowering plants, 6-8 hours of direct sun and 1 inch of water per week (more in heat) will maximize results.
Here’s the thing—bloom fertilizers work best when paired with consistent moisture. Use a soaker hose or drip irrigation to deliver water slowly at the base, avoiding wetting foliage. You’ll see the biggest difference in petunias, roses, and dahlias—these thirsty bloomers reward precision care with nonstop color.
✂️ Step 4: Deadhead and Repeat for Continuous Blooms
Deadhead spent blooms immediately after they fade to redirect the plant’s energy into new flowers. Use clean, sharp pruners and cut just above a set of leaves or bud. This isn’t just about looks—it’s a signal to the plant to keep producing. I deadhead every 3-5 days during peak bloom season to extend flowering by 3-4 weeks.
After the first flush of blooms, apply a second round of bloom fertilizer at half-strength. This keeps roots active without overwhelming the plant. For annuals like zinnias or marigolds, this strategy can stretch their bloom time into fall. For perennials, a final application in early summer sets them up for a second wave of color.
Tips & tricks for perfect bloom fertilizer application
Here's what nobody tells you about maximizing those showstopping blooms—these tricks make all the difference between decent flowers and garden centerpieces.
Soil Prep Secret: In Step 1, when loosening that top 6 inches of soil, focus on breaking up any dense layers near the surface. I’ve seen roots struggle to penetrate compacted soil even after fertilizing—this is where most nutrient uptake happens. If your soil feels like concrete, add that 1 inch of compost and mix it in thoroughly. The goal is to create a sponge-like texture where roots can spread easily. Think of it as giving your plants a five-star hotel to grow in rather than a cramped apartment!
Timing is Everything: The 4-6 week window before peak bloom season is non-negotiable for most flowers, but here's the thing: different plants have different needs. For example, roses respond beautifully to early applications, while impatiens can handle later timing. Always check your specific plant's bloom cycle—this is when they're primed to invest energy in those vibrant flowers rather than just foliage. And remember, that half-strength application every 2 weeks prevents nutrient burn while keeping roots actively growing.
Application Technique: When scattering those granules around the drip line in Step 2, here's my pro move: use a small hand rake to create shallow trenches about ½ inch deep. Place the granules in these trenches, then gently cover with soil. This creates a nutrient reservoir that releases gradually rather than washing away with watering. For container plants, mix half the recommended dose into the top inch of soil—roots in pots have less room to forage for nutrients.
Monitoring Like a Pro: Those three key signs after application—deeper green leaves, new growth at the base, and tighter bud formation—are your plant's way of saying "thank you!" But here's what I watch for next: if new leaves appear smaller than mature ones, you're likely over-fertilizing. And if buds form but then drop off, your plants might be thirsty or getting too much direct sun. That 6-8 hours of sunlight is ideal, but afternoon shade during heatwaves can make all the difference for heat-sensitive varieties like petunias.
Pro Tips for Bloom Fertilizer For Flowers
- Here's what nobody tells you about maximizing those showstopping blooms—these tricks make all the difference between decent flowers and garden centerpieces.
- Soil Prep Secret: In Step 1, when loosening that top 6 inches of soil, focus on breaking up any dense layers near the surface.
- Timing is Everything: The 4-6 week window before peak bloom season is non-negotiable for most flowers, but here's the thing: different plants have different needs.
Frequently asked questions
Got questions about bloom fertilizer? You’re not alone!
Here are answers to the most common ones—so you can grow show-stopping flowers with confidence.
How often should I apply bloom fertilizer to my flowers?
For most flowering plants, apply bloom fertilizer every 2–4 weeks during the growing season (spring to fall). Over-fertilizing can burn roots, so always follow the product’s instructions. Container plants may need more frequent feeding, while perennials often thrive with less.
How long does it take to see results after using bloom fertilizer?
With the right bloom fertilizer, you’ll notice healthier foliage in 1–2 weeks and more vibrant blooms in 4–6 weeks. Fast-acting formulas (like liquid fertilizers) show quicker results, while slow-release granules provide steady nourishment over time. Patience pays off—consistency is key!
Can I use bloom fertilizer on all types of flowers, or are some better left alone?
Bloom fertilizers work for most flowering plants—annuals, perennials, roses, and even some veggies like tomatoes. However, avoid using it on bulbs (like tulips or daffodils) or succulents/cacti, as they prefer low-nitrogen, low-phosphorus feeds. Always check plant tags for specific needs!
What if my flowers aren’t blooming even after using bloom fertilizer?
If blooms are still scarce, check these fixes:
- Light: Ensure your plants get 6+ hours of sunlight daily (most bloomers need full sun).
- Water: Overwatering or underwatering can stress plants. Keep soil consistently moist but not soggy.
- Deadheading: Remove spent blooms to encourage new growth.
- Fertilizer balance: If blooms are sparse but leaves are lush, switch to a higher-phosphorus formula (look for a 5-10-5 or 10-20-10 ratio).
Is organic bloom fertilizer worth the extra cost compared to synthetic?
It depends on your priorities! Synthetic fertilizers deliver fast, predictable results and are often cheaper. Organic options (like compost tea or fish emulsion) improve soil health long-term, reduce chemical runoff, and are safer for pets/kids. For container plants or quick blooms, synthetic may win. For gardens or eco-conscious growing, organic is a great investment.
Wrapping up and next steps
Choosing the right bloom fertilizer for flowers can transform your garden into a vibrant paradise—faster root growth, healthier foliage, and stunning blooms are absolutely within reach! 🌸 Whether you’re a seasoned gardener or just starting, the key is consistency, proper application, and a little patience.
Now that you’re armed with the know-how, it’s time to get your hands dirty and watch your flowers thrive!
🌱 Your Next Step:
- Pick your favorite bloom-boosting fertilizer (organic or synthetic) and start feeding your plants today!
- Keep a gardening journal to track progress—you’ll be amazed at the difference!
- Share your blooming success with fellow gardeners for extra motivation!