Flowers
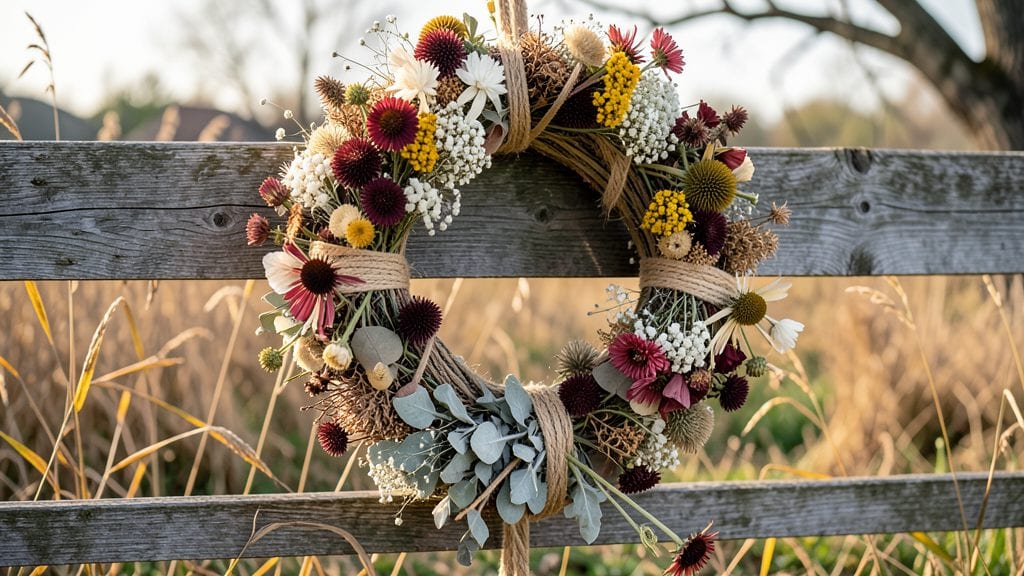
Creating a dried flower wreath transforms your garden’s leftover blooms into timeless decor that smells like summer all year. 🌿 I still remember the first time I strung dried roses and lavender into a wreath—it hung on my porch for months, fading beautifully with each season.
The best part? You don’t need fancy supplies or perfect flowers; just what’s left after harvest.
Start with dried lavender, roses, or eucalyptus—these hold their shape and scent longest. Grab a grapevine or foam wreath base, floral wire, and scissors, and you’re ready. The process takes under an hour, and the results look like they came from a boutique.
No glue, no mess, just wire and imagination. Even dried baby’s breath adds a dreamy texture that lasts.
Your finished wreath will bring rustic charm to doorways, walls, or tables—fragile-looking but built to last. The dried petals will keep their color for months, and the subtle scent lingers like a garden memory.
Hang it outside to weather the seasons or bring it indoors for a cozy touch. Once you try it, you’ll never toss dried blooms again.
This project pairs perfectly with other garden crafts, like pressed-flower bookmarks or dried citrus centerpieces. The possibilities are endless, and the best part? Every wreath tells a story—yours. Let’s get started turning those wilting stems into something beautiful.
📚 In This Guide
- What you need
- Instructions
- Tips and common mistakes
- Wrapping up and next steps
What you need
- ● Dried flowers (1–2 cups, mixed varieties like lavender, baby’s breath, statice, or dried roses)
- ● Floral wire (18–22 gauge, 1–2 yards) – for securing stems and shaping
- ● Wire cutters – for precise trimming
- ○ Gravel or floral foam (optional but helpful for base stability)
- ● Scissors – for trimming stems and foliage
- ● Base structure – a foam wreath frame, grapevine wreath, or even a sturdy cardboard ring (10–12 inches in diameter)
- ● Hot glue gun & glue sticks – for securing the base (if using foam or lightweight materials)
- ○ Twine, ribbon, or raffia (optional, for a finished look)
- ● Dried eucalyptus or pine sprigs – for texture and fragrance
- ● Small wooden beads or charms – for a boho touch
- ● Spray adhesive – for lightweight flowers that need extra hold
- ● Paint or stain – to refresh a wooden or metal base
- ● Fake greenery – if you want a fuller, lush look
Step-by-step instructions for crafting a dried flower wreath
Here’s how to create a timeless, rustic wreath that brings nature’s beauty indoors all year long.
🌿 Step 1: Gather and Prepare Your Dried Flowers
Start by selecting a variety of dried flowers—think baby’s breath, dried lavender, eucalyptus, or even preserved roses. I like to mix textures for depth, so I’ll include some larger blooms like dried hydrangeas alongside delicate sprigs. Spread them out on a clean surface to inspect for any stray leaves, stems, or debris that might detract from the finished look.
If your flowers aren’t fully dried yet, place them in a single layer on a wire rack for 2-3 days in a warm, dry spot. You’ll know they’re ready when the petals are crisp and the stems snap easily. Avoid using flowers that still feel damp—they’ll mold inside the wreath.
🪴 Step 2: Choose and Prepare Your Base
For this project, I’m using a 12-inch grapevine wreath base—it’s sturdy, rustic, and perfect for holding dried flowers. If you’re using a foam base instead, spray it lightly with water to dampen it slightly, then roll it in floral wire to create a textured surface for better flower adhesion. For grapevine, no prep is needed—just give it a quick shake to remove any dust.
Place your base on a flat surface and arrange the dried flowers in a loose circle around it. This is your "dry run"—play with placement until you’re happy with the balance of colors and textures. Step back occasionally to check for gaps or overcrowded spots. You’ll want a mix of full blooms and foliage to create visual interest.
💧 Step 3: Secure the Flowers to the Base
Using hot glue (for a quick, secure hold) or floral wire (for a more natural look), start attaching the flowers to the base. I like to begin with larger blooms first, placing them at even intervals around the wreath. Press them gently into the grapevine or foam, then secure with a dab of glue or a twist of wire. Work your way inward with smaller flowers and foliage, filling in any empty spaces.
For a rustic touch, leave some stems visible—this adds texture and makes the wreath feel more organic. If using wire, trim excess stems with wire cutters and bend them gently around the base. Avoid over-gluing; a little goes a long way, and too much can make the wreath look heavy or unnatural.
✂️ Step 4: Add Finishing Touches and Seal
Once all the flowers are secured, step back and assess the wreath from all angles. Fill in any sparse areas with extra foliage or small blooms. If you’re using a foam base, spray it lightly with floral preservative to extend its life. For grapevine, no extra treatment is needed—it’s naturally durable.
To protect your wreath from dust and moisture, lightly mist it with a hairspray or clear sealant designed for dried flowers. Hold the can 12 inches away and spray in short bursts, avoiding direct contact with the blooms. Let it dry completely before displaying. This step is optional but helps preserve the wreath’s freshness for months.
☀️ Step 5: Display and Enjoy Your Creation
Hang your wreath on a door, above a mantel, or as a centerpiece for instant rustic charm. If you’re using it outdoors, place it in a covered area to protect it from rain and direct sunlight, which can fade the colors over time. Indoor wreaths can last 6-12 months with minimal care—just dust them occasionally and avoid placing them near heat sources.
Here’s the thing—this wreath isn’t just decor. It’s a conversation starter, a piece of nature preserved in time, and a reminder that beauty doesn’t have to fade. You’ve got this, and your home will thank you for it!
Tips & tricks for perfect dried flower wreaths
Here’s what nobody tells you about creating show-stopping floral arrangements that last all season.
Flower Selection Tip: When picking dried flowers, look for ones with petals that still hold their shape but aren’t brittle. Baby’s breath and dried lavender are my go-tos—they hold color beautifully and add texture. For a more dramatic look, mix in dried hydrangeas or preserved roses, but avoid anything with loose petals that might fall off during handling. The key is variety in both color and texture, so don’t be afraid to experiment with different shapes!
Base Prep Secret: If you’re using a foam base, dampen it slightly before rolling in floral wire—this creates tiny grooves where stems can nestle securely. For grapevine bases, a quick shake removes dust that could dull your flowers’ vibrant colors. Pro tip: Place your base on a flat surface and arrange flowers around it in a loose circle first. This "dry run" helps you visualize the final balance before committing to any glue or wire. Trust me on this—it saves time and frustration!
Attachment Technique: Start with larger blooms placed at even intervals around the wreath—this creates a natural framework. Press them gently into the base before securing with glue or wire. For a rustic touch, leave some stems visible, but trim excess wire or stems with wire cutters to keep things tidy. Remember, a little glue goes a long way—too much can make your wreath look heavy and unnatural. Think of it like frosting a cake: just enough to hold everything together!
Preservation Hack: That optional hairspray sealant isn’t just for hair—it’s a game-changer for dried flowers! Hold the can 12 inches away and spray in short bursts to avoid direct contact with the blooms. This creates a protective barrier that keeps your wreath looking fresh for months. For extra longevity, store it in a cool, dry place away from direct sunlight, which can fade colors over time.
Pro Tips for Dried Flower Wreath
- Here’s what nobody tells you about creating show-stopping floral arrangements that last all season.
- Flower Selection Tip: When picking dried flowers, look for ones with petals that still hold their shape but aren’t brittle.
- Base Prep Secret: If you’re using a foam base, dampen it slightly before rolling in floral wire—this creates tiny grooves where stems can nestle securely.
Frequently asked questions
Got questions about creating or caring for your dried flower wreath?
You’re not alone! Here are answers to the most common queries to help you craft the perfect rustic centerpiece with ease.
How long does it take to dry flowers for a wreath?
Drying time varies by flower type and method. Air-drying (hanging upside down) takes 2–4 weeks, while silica gel or microwave methods can speed it up to 24–72 hours. Test a few blooms first to gauge timing—patience pays off for vibrant, lasting color!
Can I make a dried flower wreath in a day?
Skip the drying process by using pre-dried flowers (available at craft stores or online). For a same-day project, opt for faux dried flowers or press flowers quickly with a heavy book (1–2 days). Just ensure stems are trimmed for a seamless look.
What’s the best base for a sturdy wreath?
A grapevine or foam wreath base is ideal for beginners. For a fully natural look, use a wire or willow ring wrapped with twine or raffia. Pro tip: Spray the base with Mod Podge or a light mist of water before adding flowers to help them adhere better.
How do I keep bugs out of my dried flower wreath?
Store your wreath in a cool, dry place (like a closet) and avoid humidity. If pests appear, freeze the wreath for 24 hours or lightly spray with rubbing alcohol (test on a hidden area first). Cedar blocks or lavender sachets can also repel insects naturally.
Can I use real flowers from my garden?
Yes! Just choose thick-stemmed, low-moisture flowers like roses, hydrangeas, or baby’s breath. Avoid delicate blooms (e.g., tulips) that crumble when dried. Harvest on a sunny morning after dew dries for the best results.
Wrapping up and next steps
Creating a dried flower wreath is more than just a craft—it’s a celebration of nature’s beauty in every season! With just a few simple materials and a little patience, you can craft a stunning, long-lasting centerpiece that adds rustic charm to any space.
Whether you’re a beginner or a seasoned DIYer, this project is the perfect way to bring a touch of handmade elegance into your home.
Ready to elevate your decor? Gather your flowers, follow the steps, and let your creativity bloom! 🌸 For extra inspiration, explore seasonal color palettes or experiment with textures—your wreath will be uniquely yours. Happy crafting!