
Landscaping
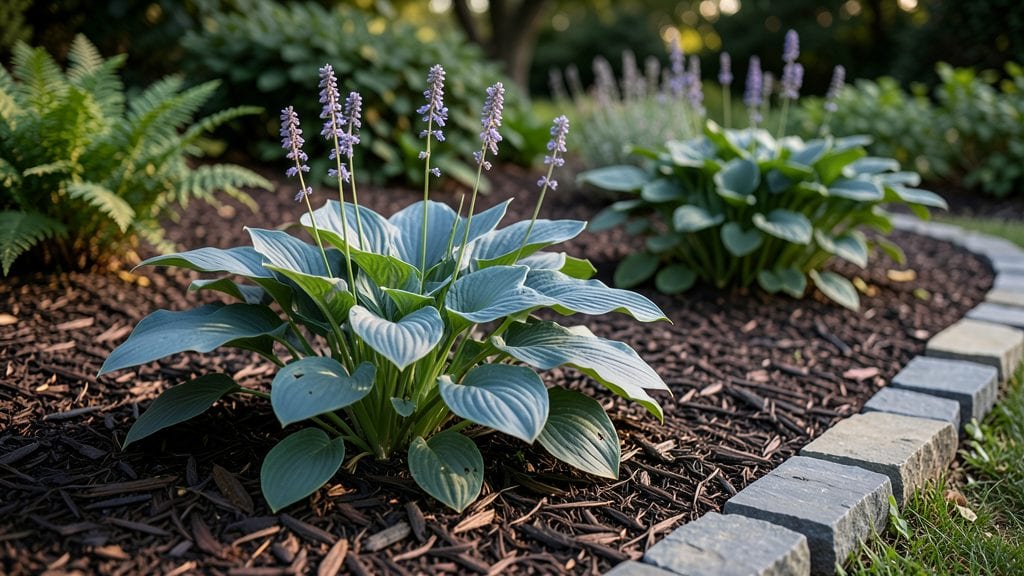
A flower bed against your house foundation isn’t just landscaping—it’s a chance to protect your home’s structural integrity while creating a stunning first impression. 🌿 I’ve learned the hard way that skipping proper drainage or plant selection can lead to foundation headaches (and siding stains), but the right approach turns this space into a low-maintenance showstopper.
The key starts with prepping the site: slope the soil away from the foundation, use gravel for drainage, and amend heavy clay with compost. Then, choose plants that won’t outgrow their space—think evergreen shrubs for structure, drought-tolerant perennials for color, and mulch to keep roots cool.
My go-to combo? Boxwoods, ornamental grasses, and shade-loving impatiens near north-facing walls.
Within a season, you’ll see a clean, defined border that frames your home elegantly while keeping maintenance minimal. The right plants suppress weeds naturally, and proper layering creates depth—no more patchy, high-maintenance messes. Plus, your curb appeal gets a 20% boost just from this strategic upgrade.
Works for any home style, from modern minimalist to cottage charm. Whether you’re dealing with partial shade or full sun, we’ll cover the plant pairings and design tricks that make this project foolproof—no green thumb required.
📚 In This Guide
- What you need
- Instructions
- Tips and common mistakes
- Wrapping up and next steps
What you need
- ● Soil & Amendments: Topsoil (2–4 cubic yards, depending on bed size)
- ● Compost or aged manure (1–2 bags, for nutrient-rich soil)
- ○ Perlite or vermiculite (optional, for drainage)
- ● Plants & Mulch: Perennials (e.g., hostas, daylilies, or coneflowers—5–10 plants)
- ● Shrubs (e.g., boxwood or hydrangeas—2–4 plants, if desired)
- ● Mulch (2–3 bags, shredded bark or pine straw)
- ● Edging & Barriers: Landscape fabric (1 roll, to suppress weeds)
- ● Flexible edging (e.g., metal or plastic—10–20 ft, depending on bed shape)
- ● Gravel or decorative stones (1–2 bags, for drainage or path accents)
- ● Shovel & spade (for digging and soil prep)
- ● Garden rake (to level the bed)
- ● Wheelbarrow (for hauling soil and mulch)
- ● Measuring tape & string line (to mark layout)
- ● Garden gloves & knee pads (for comfort)
- ● Hose with spray nozzle (for watering)
- ○ Optional: Soil pH tester (to check plant compatibility)
- ● Check for foundation drainage—ensure water flows away from the house (slope bed slightly).
- ● Measure your foundation length and depth for precise material estimates.
- ● Call 811 (USA) to check for underground utilities before digging.
- ● Pro tip: If your foundation is close to the surface, use root barriers to protect pipes.
Step-by-Step guide for designing a foundation flower bed that combines beauty and function
Here's how to create a flower bed that protects your foundation while making your home's exterior shine.
🪴 Step 1: Assess and Prepare the Foundation Area
The first critical step is evaluating your foundation's condition and drainage. Walk the perimeter of your house and look for signs of moisture damage like cracks, peeling paint, or efflorescence (white mineral deposits). These indicate poor drainage or water pooling near the foundation. Measure the width of the area you want to cover—typically 12-24 inches from the house is ideal for both aesthetics and functionality.
Use a shovel to carefully scrape away any existing mulch, weeds, or grass within your chosen area. Be extra cautious near the foundation—avoid damaging the siding or any utility lines. Once cleared, mark the bed's edges with landscape paint or stakes to visualize the design before digging. This prevents over-excavation, which can destabilize the foundation soil.
🌱 Step 2: Create Proper Drainage with Layered Soil
Foundation flower beds need excellent drainage to prevent water from pooling against your house. Start by laying down 2-3 inches of coarse gravel (like crushed stone) along the base of the bed. This creates a drainage layer that redirects water away from the foundation. Next, add 4-6 inches of amended topsoil mixed with 20-30% compost to improve fertility and structure.
Here's the thing—don't use garden soil directly from your yard. It's often too dense and compacted. Instead, blend your topsoil with perlite or sand to maintain loose, well-aerated soil that allows water to drain freely. Level the soil with a rake, creating a gentle slope (about 1 inch per foot) away from the house to encourage water runoff.
☀️ Step 3: Choose Foundation-Friendly Plants
Select plants that thrive in the specific conditions of a foundation bed: partial shade, reflected heat from the house, and well-drained soil. Perennials like heuchera (coral bells), hostas, and foamflower combine well with ornamental grasses for texture. For color, add bleeding heart or astilbe—both tolerate shade and spread gradually without becoming invasive.
I like to create depth by layering plants: taller varieties like ligularia or ferns at the back (closest to the house), mid-height perennials in the middle, and low-growing ground covers like ajuga or sweet woodruff at the front. This arrangement prevents erosion and creates visual interest. Space plants according to their mature size—typically 12-18 inches apart for perennials.
✂️ Step 4: Install Mulch and Edging for Long-Term Maintenance
Once plants are established, apply 3-4 inches of organic mulch (like shredded bark or pine straw) to suppress weeds, retain moisture, and regulate soil temperature. Keep mulch 2-3 inches away from plant stems to prevent rot. For a polished look, install edging made of metal, stone, or plastic along the outer perimeter of the bed—this keeps mulch contained and defines the space neatly.
Don't skip the edging. Without it, mulch spreads into lawn areas, and weeds creep in from the sides. I've seen foundation beds look unkempt after just one season when homeowners skipped this step. After mulching, water deeply to settle everything in place. You'll see the difference in how clean and intentional the space looks compared to a wild, overgrown foundation area.
Tips & tricks for perfect foundation flower bed design
Between us, the details in Step 1 can make or break your foundation bed's long-term success. Here's what I've learned the hard way after seeing too many beautiful designs fail from poor preparation.
Drainage is Non-Negotiable: That 2-3 inches of coarse gravel in Step 2 isn't just about looks—it's your first line of defense against moisture damage. I've seen foundation cracks develop within months when homeowners skipped this layer. For extra protection, especially in rainy climates, consider adding a French drain along the house side of your bed before laying the gravel. The gentle 1-inch-per-foot slope you create isn't just for aesthetics; it's what actually moves water away from your foundation during heavy rains.
Soil Science Matters: That 20-30% compost recommendation in Step 2 is your sweet spot for fertility without compacting the soil. Too much compost can create a soggy mess, while too little won't give your plants the nutrients they need. I always test my amended soil by squeezing a handful—it should hold shape but crumble easily when touched. If it sticks together like wet clay, you've got too much compost; if it falls apart like sand, add more organic matter.
Plant Placement Strategy: The 12-18 inch spacing in Step 3 is crucial for mature plant sizes, but don't just measure from the center of each plant. Measure from the outer edge of their mature foliage—this prevents overcrowding and makes future maintenance much easier. For the back row against your house, I like to use evergreens like boxwood or holly to create a living privacy screen that also protects against moisture. These plants handle the reflected heat from the house better than most.
Edging is Your Best Friend: That 3-4 inches of mulch in Step 4 is fantastic, but the edging is what actually makes it work. I've seen homeowners spend hours creating beautiful beds only to have them look like a disaster zone after one season because they skipped edging. For a clean, professional look, use metal or stone edging that extends 1-2 inches above the soil line. This prevents mulch from spreading into lawn areas and keeps weeds from encroaching from the sides.
Pro Tips for Flower Bed Against House Foundation
- Between us, the details in Step 1 can make or break your foundation bed's long-term success.
- Drainage is Non-Negotiable: That 2-3 inches of coarse gravel in Step 2 isn't just about looks—it's your first line of defense against moisture damage.
- Soil Science Matters: That 20-30% compost recommendation in Step 2 is your sweet spot for fertility without compacting the soil.
Frequently asked questions
Got questions about creating a stunning flower bed against your house foundation? You’re not alone! Here are some of the most common concerns—and their practical solutions—to help you design with confidence.
Can a flower bed near the foundation damage my home?
A well-planned flower bed won’t harm your home, but poor drainage or overwatering can cause moisture issues. Use gravel or sand for drainage, keep mulch 6 inches away from the siding, and slope the bed away from the house. This ensures water flows correctly and protects your foundation.
When is the best time to plant a flower bed against the foundation?
The ideal time is early spring or fall when temperatures are mild. This gives plants time to establish roots before extreme heat or cold. For perennials, spring planting is best; annuals can go in after the last frost. Avoid planting in summer’s peak heat or winter’s freeze.
What’s a budget-friendly alternative to a traditional flower bed?
Consider ground cover plants like creeping thyme or sedum for low-maintenance coverage. Rock gardens with native stones and drought-resistant plants also reduce upkeep. For a pop of color, try mulch with wildflower seeds—they’re affordable and attract pollinators!
How do I keep pests and weeds out of my foundation flower bed?
Use landscape fabric under mulch to block weeds, and choose pest-resistant plants like lavender or marigolds. Regularly inspect for aphids or slugs—remove them by hand or use organic sprays like neem oil. A 3-inch layer of mulch also deters weeds naturally.
Can I add lighting to highlight my foundation flower bed?
Solar-powered path lights
or low-voltage LED spotlights add drama and safety. Place lights along the bed’s edges or focus them on focal plants. For a cozy vibe, try battery-operated fairy lights woven through taller plants. Just ensure wires are buried or hidden.
Wrapping up and next steps
A flower bed against your house foundation isn’t just a decorative touch—it’s a smart investment in both aesthetics and structural harmony. By carefully selecting plants, managing drainage, and blending design with functionality, you create a space that’s as practical as it is beautiful. 🌸
Ready to transform your curb appeal? Start by sketching your design, gathering supplies, and taking the first step—your future garden awaits! For extra inspiration, explore local plant nurseries or consult a landscaping pro to refine your vision.