
Flowers
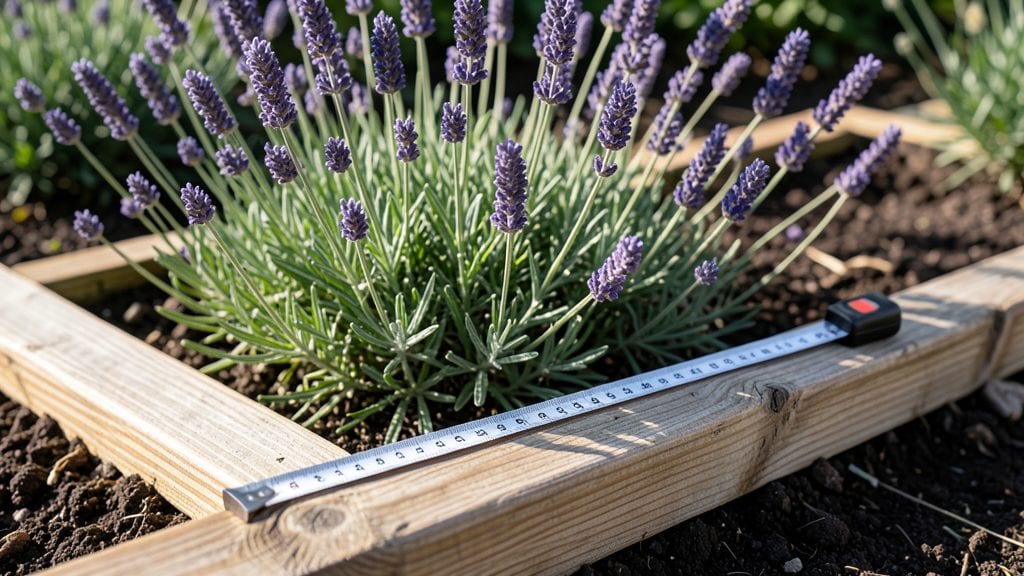
Perfect flower bed dimensions start with understanding how plants behave—not just how they look. 🌸 I’ve designed beds that flow with the seasons, where spring bulbs fade into summer perennials and fall mums carry the show into winter.
The secret isn’t just width or length, but how those measurements interact with plant spacing, sunlight angles, and even your morning coffee route.
Most gardeners overlook how dimensions affect maintenance—too narrow and you can’t reach the center, too wide and weeds take over. My go-to rule? A minimum 3-foot width for easy access, with lengths that match your garden’s natural lines (like fence edges or tree canopies).
For small yards, think rectangular to save space; for large landscapes, curved beds add softness without sacrificing function.
You’ll end up with beds that feel intentional, not random—where every plant has room to thrive, and you can stroll through without tripping over edges. The payoff? A garden that looks polished all year, with less work and more joy. Let’s break down the math that makes it happen.
Whether you’re working with a postage-stamp patio or an acre of land, these principles scale. We’ll tackle tools, common mistakes (like ignoring mature plant sizes), and how to align beds with pathways so your garden feels like a designed space, not a patchwork of chaos.
📚 In This Guide
- What you need
- Instructions
- Tips and common mistakes
- Wrapping up and next steps
What you need
- ● Measuring tape – A 25-foot tape measure for accuracy in marking dimensions.
- ● Stakes & twine – 6–10 wooden or plastic stakes (1–2 feet long) and balloon twine to outline the flower bed shape.
- ● Shovel or spade – A heavy-duty garden shovel for digging and soil prep.
- ○ Garden hose or spray nozzle – For wetting soil before digging (optional but helpful).
- ● Garden gloves – A durable pair to protect your hands from thorns and rough soil.
- ● Soil amendments (if needed) – Compost, peat moss, or aged manure (1–2 bags, depending on bed size) to enrich poor soil.
- ● Mulch – 2–3 cubic feet of shredded bark, pine straw, or landscape fabric to retain moisture and suppress weeds.
- ● String line or laser level – For perfectly straight edges, especially for geometric designs.
- ● Knee pads or gardening stool – To make digging and planting more comfortable.
- ● Edging tools – Metal or plastic edgers to create clean, defined borders.
- ● Plant markers or labels – Small stakes or tags to track flower varieties and spacing.
- ● Wheelbarrow – For hauling soil, mulch, or tools around your garden.
Step-by-step guide to designing flower bed dimensions
Here's how I plan flower beds that look stunning from spring through fall.
🪴 Step 1: Determine Your Space and Scale
Start by measuring your available area—most flower beds perform best between 3-6 feet wide for easy maintenance. I like to sketch a rough outline with chalk or string to visualize proportions before digging. Consider the mature size of your plants: a 4-foot-tall shrub needs at least 4 feet of clearance on all sides to avoid crowding.
For pathways, aim for 2-3 feet wide between beds—this allows comfortable access without trampling plants. If your space is narrow, opt for vertical layers with tall plants at the back and shorter ones in front. Here's the thing—proportions matter more than perfect symmetry. A slightly irregular shape often looks more natural and inviting.
📏 Step 2: Establish Clear Dimensions and Layout
Divide your bed into 3-5 distinct sections based on plant height and bloom times. For example, a 6-foot-long bed might have:
- 2 feet for tall perennials (like coneflowers)
- 2 feet for mid-height bloomers (like daylilies)
- 2 feet for ground covers or annuals (like creeping thyme)
This creates visual depth and prevents overwhelming one area with too much height.
Use a tape measure and stakes to mark exact dimensions before digging. I always double-check diagonals to ensure the shape is true—nothing ruins a bed faster than a wonky corner. For curved beds, use a flexible hose to trace the outline before marking with spray paint. Remember, curves soften the look but require more plants to fill the space.
☀️ Step 3: Plan for Sun Exposure and Plant Placement
Divide your bed into sun and shade zones—most flowering plants need at least 6 hours of sunlight daily. I sketch these zones on my layout, noting where morning sun fades to afternoon shade. Place sun-loving annuals (like marigolds) in the brightest spots, while shade-tolerant perennials (like hostas) go in protected areas.
Here's where it gets fun—arrange plants in odd-numbered groupings (3, 5, or 7) for a natural look. A 3-foot-wide section might hold 3 coneflowers spaced 18 inches apart, surrounded by 5 salvia plants at 12-inch intervals. This creates visual balance without looking too uniform. Always leave 6-12 inches between plants at maturity to prevent competition.
✂️ Step 4: Add Finishing Touches for Long-Term Beauty
Install edging materials (like brick or metal) to define your bed cleanly. I prefer flexible steel edging for curves because it lasts longer than wood and won't rot. Bury it 4-6 inches deep to hold back soil while allowing roots to spread naturally. For a softer look, use mulch (like shredded bark) to suppress weeds and retain moisture.
Finally, add 3-5 focal points—like a striking ornamental grass or a small statue—to draw the eye. In a 6-foot bed, I might place a 2-foot-tall fountain grass at one end and a 1-foot-tall ceramic sculpture near the center. These anchors prevent the bed from looking too flat. Water deeply after planting to settle the soil, and you're ready for year-round color.
Tips & tricks for perfect flower bed dimensions
Here's what nobody tells you about creating flower beds that look professional without the guesswork.
The Proportion Secret: When planning your 3-6 foot wide beds, remember that the first foot from the front edge is prime real estate. This is where you'll place your showiest plants—like coneflowers or daylilies—since it's what people see first. I always dedicate at least 18 inches to focal plants in this zone to create instant impact. The remaining space can then be filled with supporting plants that trail or spill over the edges.
Layout Technique That Changed Everything: For that perfect 6-foot bed layout, I've found the golden ratio works best: divide your length into thirds. Place your tallest plants in the center third, mid-height plants in one side third, and ground covers in the remaining third. This creates a balanced visual pyramid that draws the eye naturally. When arranging your 3-5 sections, always leave the widest space in the center—it becomes the natural focal point.
Sun Exposure Shortcut: Instead of guessing sunlight zones, use your shadow as a guide. On a sunny day, stand where you want your bed and note where your shadow falls at noon. That's your brightest zone—perfect for sun-lovers like marigolds. The areas where your shadow lingers longer get partial shade, ideal for hostas or ferns. This simple trick eliminates the need for complicated sun calculators.
Edging Hack for Curves: For those beautiful curved beds, I've stopped using spray paint entirely. Instead, I use a garden hose filled with water—it's flexible, reusable, and gives you a perfect curve every time. Lay it along your desired edge, then use stakes to hold it in place. Walk around the hose to visualize the shape before marking. This method also helps you spot any awkward angles before digging begins.
Pro Tips for Flower Bed Dimensions
- Here's what nobody tells you about creating flower beds that look professional without the guesswork.
- The Proportion Secret: When planning your 3-6 foot wide beds, remember that the first foot from the front edge is prime real estate.
- Layout Technique That Changed Everything: For that perfect 6-foot bed layout, I've found the golden ratio works best: divide your length into thirds.
Frequently asked questions
Got questions about flower bed dimensions? You’re not alone! Here are some of the most common concerns—and their answers—to help you design a stunning, functional space with confidence.
What’s the ideal flower bed size for a small backyard?
Aim for 3’ x 3’ to 4’ x 4’ for a compact yet impactful bed. This size allows room for 3–5 plants (including perennials and annuals) while keeping maintenance manageable. For narrow spaces, opt for a long, shallow bed (e.g., 2’ x 6’) with layered heights for visual interest.
When is the best time to install a flower bed?
Spring or early fall are ideal! In spring, soil warms up, and plants establish roots before summer heat. Fall planting (6–8 weeks before frost) gives roots time to settle before winter. Avoid installing in extreme heat or freezing temps—plants stress easily in these conditions.
Can I use mulch to adjust flower bed dimensions?
Mulch won’t change your bed’s dimensions, but it can enhance them! Apply a 2–3” layer to suppress weeds, retain moisture, and define edges. For a polished look, use landscape fabric under mulch to prevent soil from mixing in. Pro tip: Dark mulch absorbs heat—great for tender plants, but light mulch keeps roots cooler.
How do I fix an uneven or poorly shaped flower bed?
Start by marking the new edges with stakes and string, then dig out excess soil or add topsoil to level the area. For a curved bed, use a flexible edging material (like flexible metal or plastic) to create clean lines. If the bed is too small, expand it gradually by adding 1–2 feet per season to avoid overwhelming existing plants.
Are raised flower beds better for small spaces?
Raised beds save space (they appear larger visually) and improve drainage. Standard dimensions are 4’ x 4’ x 12” deep, but for tight areas, try 2’ x 3’. They’re also great for containers or window boxes if ground space is limited. Just ensure they’re well-draining and filled with quality soil.
Wrapping up and next steps
Perfecting your flower bed dimensions is the secret to a stunning, low-maintenance garden that blooms with joy year-round! Whether you’re a beginner or a seasoned gardener, the right proportions—like scaling for plant maturity or balancing focal points—ensure harmony and ease.
Now that you’ve got the know-how, it’s time to grab your tools and turn your vision into reality!
🌱 Next step: Sketch your design, measure twice, and plant with confidence—your garden’s new masterpiece awaits! 🌸