
Flowers
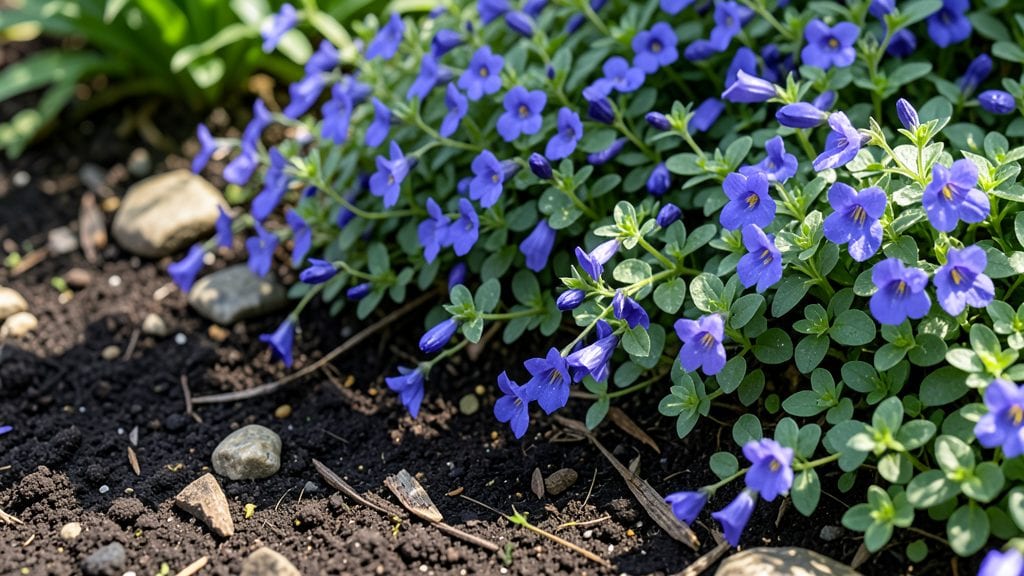
The right flower bed dirt makes the difference between wilting petunias and a riot of color that lasts all summer. I remember my first garden—plants struggling in dense, rocky soil that never seemed to hold moisture.
After adding compost and sand, the difference was shocking: roots spread easily, blooms stayed vibrant, and I stopped watering every other day.
Good flower bed dirt isn’t just dirt—it’s a mix of loam, sand, and organic matter that drains well but holds enough moisture to keep roots happy.
Most garden centers sell pre-mixed flower soil, but I’ve had better results blending my own: 60% topsoil, 30% compost, and 10% perlite or coarse sand for aeration. A simple soil test (just a few dollars at garden centers) tells you what’s missing—whether it’s organic matter, nitrogen, or better drainage.
Once you’ve got the right mix, your flower bed becomes a thriving ecosystem. Peonies and hostas love rich, moist soil, while lavender and sedum thrive in fast-draining, sandy mixes. The key is amending over time—adding compost every spring keeps nutrients up and prevents compaction.
By next season, you’ll notice blooms lasting longer, fewer wilting leaves, and plants that look like they’re putting all their energy into flowers instead of fighting the soil.
This works for raised beds, in-ground gardens, or even large containers—just adjust the proportions based on what’s already in your space. The first year might require more work, but after that, your flower bed will practically take care of itself. Let’s get those roots growing!
📚 In This Guide
- What you need
- Instructions
- Tips and common mistakes
- Wrapping up and next steps
What you need
- ● Topsoil: 1–2 cubic yards (depending on flower bed size; opt for organic, well-draining topsoil with a pH of 6.0–7.0).
- ● Compost: 1–2 bags (or 1–2 cubic feet of homemade compost) to enrich soil with nutrients.
- ● Perlite or Vermiculite: 1–2 bags (5–10 lbs) to improve aeration and moisture retention.
- ● Sand (coarse): 1–2 bags (5–10 lbs) for drainage, especially in clay-heavy soils.
- ● Slow-release fertilizer: 1–2 lbs (e.g., 10-10-10 or organic options like fish emulsion).
- ● Garden fork or tiller: To loosen compacted soil (rent or borrow if needed!).
- ● Garden gloves: Heavy-duty to protect hands from rough soil.
- ● Wheelbarrow or bucket: For mixing materials efficiently.
- ○ Soil pH test kit: Optional but helpful to adjust acidity/alkalinity.
- ● Rake: For leveling and smoothing the flower bed.
- ● Mulch (straw or shredded bark): 2–3 inches to retain moisture and suppress weeds.
- ● Biochar or coconut coir: For extra aeration and microbial activity.
- ● Mycorrhizal fungi: A sprinkle (1–2 lbs) to boost root health.
- ● Landscape fabric: If weeds are a persistent issue.
How to prepare loose, aerated soil for a thriving flower bed
Ready to transform dense, compacted earth into a blooming paradise? Here's how I create the perfect foundation for vibrant flowers.
Clear and Loosen Existing Soil
Remove all weeds, rocks, and debris from your flower bed area. Use a garden fork to break up the top 6-8 inches of soil. The goal is to shatter any compacted layers without turning the soil into powder. I work in small sections—about 2 feet by 2 feet—so I don't overwork the area and create a muddy mess.
Pay attention to how the soil feels as you work. It should crumble easily between your fingers when moist but not stick together like wet clay. If it's still too compacted, add some of your prepared mix to help break it up. This is where you'll see the biggest difference in drainage and root growth later.
Amend with Organic Matter
Spread a 2-3 inch layer of compost over the loosened soil. This adds vital nutrients and helps improve soil structure. I like to use a mix of well-aged compost and leaf mold for extra moisture retention. Work it into the top 4-6 inches of soil using a garden fork or tiller.
For clay-heavy soils, mix in 1 part perlite or coarse sand to 3 parts soil. This helps create air pockets that roots need to breathe. You'll notice the soil becomes lighter and fluffier as you work—this is your sign that you're on the right track. Avoid over-amending with sand, though; too much can create a gritty texture that repels water.
Top with Finishing Layer
Add a final 1-2 inch layer of high-quality topsoil or a specialized flower bed mix. This creates a clean planting surface and ensures your flowers have immediate access to nutrients. I like to sift this layer to remove any remaining clumps or debris before spreading it evenly.
Gently rake the surface to create a fine, even texture. You want it smooth enough for seeds or transplants to settle comfortably, but not so fine that it compacts again when watered. This top layer is where you'll see the most immediate difference in how your flowers establish themselves—it's like putting on fresh, fluffy bedding for your plants.
Water and Settle
Give the bed a thorough watering to help settle the soil and eliminate air pockets. Water until it's moist 6 inches deep. You'll know it's right when water runs freely through the soil without pooling on the surface. This step is crucial for helping the amended soil bind together and create stable root zones.
Wait 24-48 hours before planting to allow the soil to settle completely. You might see slight sinking after watering—that's normal. This final settling ensures your plants won't experience root shock from shifting soil. The result should be soil that holds moisture well but doesn't stay soggy, with just the right balance of air and nutrients for vibrant blooms.
Tips & tricks for perfect flower bed soil
Transforming compacted earth into ideal planting soil takes the right approach—here's how to avoid common pitfalls and create the perfect foundation for your garden.
Soil Texture Test: Before breaking up the top 6-8 inches in Step 1, squeeze a handful of moist soil. If it forms a tight ball that doesn't crumble, you're dealing with heavy clay that needs extra attention. For these stubborn soils, work in a 1-inch layer of coarse sand or perlite as you loosen, mixing it in thoroughly. This creates instant air pockets that roots will love, and you'll notice the difference immediately when the soil starts to break apart more easily.
Layering Strategy: When amending with the 2-3 inch compost layer in Step 2, don't just spread it on top—work it into the loosened soil using a garden fork. Think of it like making a lasagna: alternating layers of compost and native soil creates a perfect balance. For clay soils specifically, mix in the 1 part perlite or sand right into the top 4-6 inches as you work. This prevents the gritty texture that comes from surface-only additions.
Top Layer Technique: The final 1-2 inch layer in Step 3 deserves special attention. After sifting your topsoil, sprinkle a thin layer of vermiculite over the surface before raking. This adds extra moisture retention while keeping the texture light. When you rake, use a bow rake with wide teeth to create a fine, even surface—this prevents compaction when you plant. The goal is soil that feels like a soft cloud, not packed dirt.
Watering Wisdom: For the 6-inch deep watering in Step 4, use a garden hose with a gentle spray nozzle rather than a heavy stream. This allows water to penetrate evenly without eroding your carefully prepared layers. You'll know it's right when water appears at the bottom of your bed after 10-15 minutes of watering. This thorough saturation is what helps the amended soil bind together properly during the 24-48 hour settling period.
Pro Tips for Flower Bed Dirt
- Transforming compacted earth into ideal planting soil takes the right approach—here's how to avoid common pitfalls and create the perfect foundation for your garden.
- Soil Texture Test: Before breaking up the top 6-8 inches in Step 1, squeeze a handful of moist soil.
- Layering Strategy: When amending with the 2-3 inch compost layer in Step 2, don't just spread it on top—work it into the loosened soil using a garden fork.
Frequently asked questions
What’s the difference between regular dirt and flower bed dirt?
Regular dirt (or garden soil) can be too dense, clay-heavy, or nutrient-poor for flowers. Flower bed dirt is specifically amended with compost, sand, or peat moss to improve drainage, aeration, and nutrient retention. Think of it as premium soil designed to keep roots happy and blooms thriving!
When is the best time to prepare flower bed dirt?
Fall is ideal for prepping flower beds—it gives soil time to settle and break down over winter. However, you can also work on it in early spring before planting. Avoid heavy rain or freezing temperatures, as they can compact the soil or make it too muddy to handle.
Can I make my own flower bed dirt instead of buying it?
Mix 60% topsoil, 30% compost, and 10% perlite or coarse sand for a DIY blend. Adjust ratios based on your soil’s texture—sandy soil? Add more compost. Clay-heavy? Boost perlite for aeration. Pro tip: Test your soil’s pH (most flowers prefer 6.0–7.0) and amend with lime or sulfur if needed.
Why does my flower bed dirt smell bad after watering?
A funky odor usually means too much organic matter decomposing too quickly or poor drainage. Fluff the soil, add a layer of coarse sand or gravel for better airflow, and avoid overwatering. If the smell persists, mix in dry, aged compost to balance moisture and reduce anaerobic bacteria.
How often should I refresh or replace flower bed dirt?
Every 1–2 years, top-dress with 1–2 inches of fresh compost to replenish nutrients. For heavily planted beds, consider a full refresh every 3–4 years. Signs it’s time? Stunted growth, weeds overtaking flowers, or soil that’s rock-hard when dry. Rotate plants annually to prevent nutrient depletion!
Wrapping up and next steps
Transforming your flower bed dirt into a loose, aerated haven for vibrant blooms is simpler than you think!
The key lies in understanding your soil’s needs—whether it’s boosting organic matter, improving drainage, or balancing pH. With the right tools, patience, and a little elbow grease, you’ll create a thriving garden that keeps flowers blooming year-round. 🌸
Ready to take the next step? Start small—pick one section of your flower bed and apply what you’ve learned. Before you know it, your garden will be the envy of the neighborhood! Happy gardening!