
Landscaping
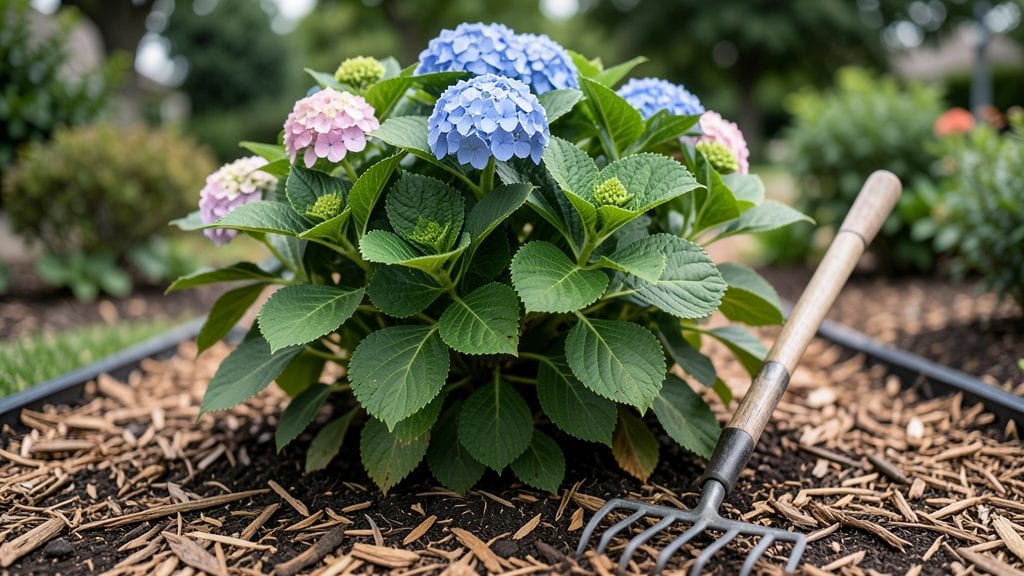
Mulching flower beds transforms your garden from a chore-filled patch to a thriving, low-maintenance oasis. 🌿 I learned the hard way—before mulch, my flower beds were a battleground against weeds, soil erosion, and temperature swings. Now, they stay lush with minimal effort, and the soil stays perfectly balanced year-round.
The right mulch makes all the difference—organic options like shredded bark or straw break down over time, enriching the soil, while inorganic choices like gravel or rubber mulch last longer but don’t improve soil quality.
For most flower beds, a 3-4 inch layer of organic mulch works best, keeping weeds at bay while locking in moisture. The key is applying it evenly, avoiding piles around plant stems to prevent rot.
You’ll notice the difference almost immediately: fewer weeds, less watering, and plants that look healthier with vibrant blooms all season. Mulch also protects delicate roots from extreme temperatures, so your flowers thrive even in scorching summers or freezing winters.
Plus, it keeps soil from compacting, giving roots the space they need to grow strong.
Whether you’re working with perennials that return every year or annuals that need seasonal care, mulching adapts to your garden’s needs. The only rule? Refresh the layer every spring—it’s the secret to keeping your flower beds looking effortlessly beautiful with almost no work. Ready to see the change?
📚 In This Guide
- What you need
- Instructions
- Tips and common mistakes
- Wrapping up and next steps
What you need
- ● Mulch: Organic mulch (recommended): Shredded hardwood, pine straw, or composted leaves (2–4 inches deep for best results).
- ○ Inorganic mulch (optional alternative): Rubber mulch, gravel, or landscape fabric (if suppressing weeds is the top priority).
- ● Garden tools: Rake (with fine or medium teeth for spreading mulch evenly).
- ● Garden hoe or hand fork (to remove existing weeds or debris).
- ● Garden gloves (to protect your hands from sharp edges or debris).
- ● Watering supplies: Garden hose with a spray nozzle (or a watering can for smaller beds).
- ● Edging tools: Metal or plastic edging to keep mulch in place and define flower bed borders.
- ● Soil tester: To check pH or nutrient levels before mulching (especially useful if your mulch is organic).
- ● Compost or fertilizer: A light layer (½ inch) of compost or slow-release fertilizer mixed into the soil before adding mulch for extra nutrients.
- ● Mulch spreader: For larger flower beds (saves time and ensures even coverage!).
- ● Clear the flower bed of weeds, debris, and dead plants (pull weeds by the root if possible!).
- ● Water the soil 1–2 days before mulching to settle it and reduce moisture loss.
- ● Check for pests or diseases in plants—mulch can trap moisture and encourage fungal growth if the bed is unhealthy.
Step-by-step guide for mulching flower beds
Here's how I keep my flower beds looking pristine with minimal weeding—no fancy tools, just smart technique.
🪴 Step 1: Clear and Prepare the Flower Bed Surface
Start by removing any existing mulch and debris from the bed. I like to pull up weeds first, especially those with deep roots—anything that's already sprouting will compete with your flowers. Use a hand fork or garden rake to loosen the top inch of soil, breaking up any crust that might prevent water from penetrating.
Smooth the surface with the back of your rake, creating gentle mounds around plant stems. This helps water flow toward the roots instead of pooling around the base. If you notice bare spots between plants, lightly scratch the soil with your fingers to create tiny grooves—this gives mulch a place to settle and prevents it from washing away during watering.
🌱 Step 2: Apply Mulch Evenly in a Thick Layer
Spread the mulch over the entire bed, working from the center outward. I aim for a 3-4 inch thick layer—this depth suppresses weeds effectively while allowing moisture to reach plant roots. Avoid piling mulch directly against plant stems; instead, create a small 1-2 inch gap around each stem to prevent rot and pests.
Use a rake to spread evenly, especially around edges where mulch tends to clump. For flower beds with different plant heights, adjust the thickness slightly—taller plants can handle a slightly thicker layer, while low-growing varieties might need just 2 inches to avoid smothering. Watch for gaps between plants; these are prime spots for weeds to sneak through.
💧 Step 3: Settle and Maintain for Long-Term Benefits
After spreading, gently press the mulch down with your hands or a rake to eliminate air pockets. This ensures even contact with the soil, which helps regulate temperature and retain moisture. Water the bed lightly afterward—this allows the mulch to settle into place and prevents it from blowing away during your first watering.
Check the mulch after a week, especially in windy areas. If it looks uneven, redistribute it to maintain that 3-4 inch depth. Over time, mulch breaks down, so plan to refresh it annually in spring. This is also a good time to top off any low spots and remove any weeds that managed to poke through—your reward will be less weeding and healthier flowers.
Tips & tricks for perfect mulching in flower beds
Between us, these little details make all the difference between a mulched bed that looks like an afterthought and one that's the star of your garden.
Timing Secret: The best time to mulch is right after a good rain or thorough watering. This helps the mulch settle evenly and prevents it from washing away during your first watering session. I've learned this the hard way after seeing mulch pile up in gutters during spring storms—always water first, then mulch.
Material Matters: Not all mulches are created equal. For flower beds, I recommend organic options like shredded bark, straw, or composted leaves. These break down over time, enriching the soil, while also providing that perfect weed-suppressing blanket. Avoid using grass clippings—they can mat down and block water from reaching plant roots.
Edge Control: Pay special attention to the edges of your flower bed where mulch tends to clump. Use a rake to create a neat border that follows the shape of your bed. This not only looks more polished but also prevents mulch from spilling into walkways or lawn areas. I like to use a small garden edging tool for this step—it makes a world of difference in the final appearance.
Seasonal Strategy: Spring is the ideal time to refresh your mulch, but don't forget to check it after winter storms. A good rule of thumb is to maintain that 3-4 inch depth throughout the year. In hot climates, you might need to add a bit more mulch to help retain moisture, while in cooler areas, a slightly thinner layer can be sufficient. The key is to monitor and adjust as needed.
Pro Tips for Mulch Flower Beds
- Between us, these little details make all the difference between a mulched bed that looks like an afterthought and one that's the star of your garden.
- Timing Secret: The best time to mulch is right after a good rain or thorough watering.
- Material Matters: Not all mulches are created equal.
Frequently asked questions
Got questions about mulching your flower beds? You’re not alone! Here are some of the most common queries—and their straightforward answers—to help you mulch like a pro.
What’s the best time of year to mulch flower beds?
Spring and fall are the ideal times to mulch, but you can add a light layer anytime (except in extreme heat or drought). In spring, mulch after the soil warms up to retain moisture; in fall, apply it before the first hard frost to protect roots. Avoid piling mulch against plant stems to prevent rot or pests.
How thick should mulch be for flower beds?
Aim for 2–4 inches of mulch for optimal weed suppression and moisture retention. Too thin (under 2 inches) won’t block weeds, while layers over 4 inches can suffocate plants and trap excess moisture, leading to rot. Adjust for your climate—drier areas may need slightly more.
Can I use grass clippings or yard waste as mulch?
Fresh grass clippings or thick layers of yard waste can mat down and smother plants, while also attracting pests. Instead, let grass clippings dry for 1–2 days or use them as a very thin top layer (under ½ inch). Composted yard waste or shredded leaves are better long-term options.
Will mulch attract pests like slugs or termites?
Mulch itself doesn’t attract pests, but moist, decaying organic matter can. To deter slugs, keep mulch dry and avoid piling it against plants. For termites, use inorganic mulches (like gravel or rubber) in high-risk areas or keep wood-based mulch 6+ inches away from your home’s foundation.
How often should I refresh or replace mulch?
Most mulches break down over time—organic types (like straw or wood chips) may need replenishing once a year, while inorganic mulches (like rocks) last longer. Check for decomposition or thinning layers in spring. A quick top-up (1–2 inches) keeps your flower beds protected and looking fresh!
Does mulch work in rainy climates?
Yes! Mulch helps regulate soil temperature and reduces erosion from heavy rain. In wet climates, opt for well-draining mulches like cedar chips or pine straw. Avoid compacting mulch after rain to prevent waterlogging. If your soil stays soggy, consider raised beds or amending soil with compost.
Wrapping up and next steps
Mulching your flower beds isn’t just about keeping weeds at bay—it’s a game-changer for soil health, moisture retention, and even winter protection! 🌱 With the right materials and techniques, you’ll transform your garden into a thriving, low-maintenance oasis.
Whether you’re a seasoned gardener or just starting out, every shovel-full of mulch brings you closer to lush, vibrant blooms.
Ready to take the next step? Grab your gloves and start mulching today! For extra inspiration, explore seasonal mulching tips or dive into creative garden designs to make your flower beds shine. Happy gardening! 🌸