
Tools
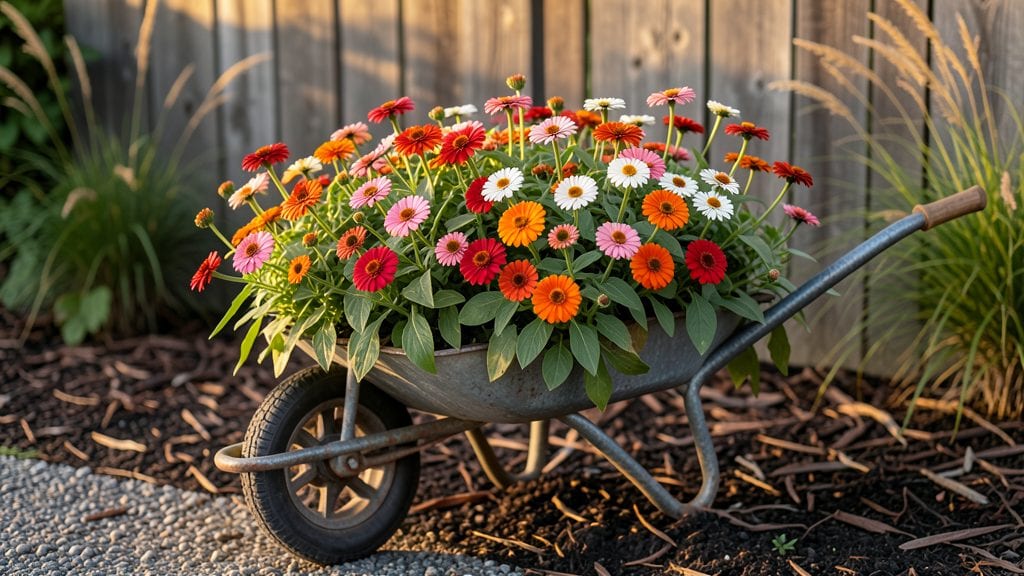
Transform a rusty wheelbarrow into a vertical garden overflowing with flowers in wheelbarrow—it’s the perfect way to turn tight spaces into lush, eye-catching displays. 🌸 I stumbled on this idea after filling my first one with trailing nasturtiums and compact geraniums—what started as a whimsical experiment became my go-to for adding height and color without sacrificing square footage.
The best part? You don’t need a green thumb to make it work.
Start with a sturdy wheelbarrow (or repurpose one you already own) and fill it with well-draining potting mix. Mix in slow-release fertilizer for a head start, then choose plants that thrive in containers—think petunias, pansies, or even herbs like thyme.
For a cottage-core vibe, layer in annuals with varying heights; for modern flair, stick to bold foliage like heucheras or ornamental grasses. Rustic metal or painted finishes let you match any garden aesthetic.
By summer’s end, you’ll have a living centerpiece that attracts pollinators and turns heads. The trailing flowers spill over the sides like a waterfall, while upright varieties add structure.
Maintenance is minimal: water when the top inch feels dry, deadhead spent blooms, and fertilize monthly. Place it near a patio or walkway to maximize impact—no extra space needed.
This trick works for balconies, courtyard borders, or even as a statement piece in front of a fence. Swap out plants seasonally for year-round interest, or use it as a temporary planter for seedlings. The only limit is your creativity—so grab that wheelbarrow and let’s get growing!
📚 In This Guide
- What you need
- Instructions
- Tips and common mistakes
- Wrapping up and next steps
What you need
- ● Wheelbarrow: A sturdy, lightweight metal or plastic wheelbarrow (1–2 cubic feet capacity). Avoid rusted or overly heavy models for easy maneuvering.
- ● Potting soil: High-quality, well-draining potting mix (2–3 cubic feet, depending on wheelbarrow size). Look for blends labeled "for containers" or "all-purpose."
- ● Flowers & foliage: Trailing plants (e.g., Sweet Potato Vine, String of Hearts, or Ivy) – 3–5 plants for full coverage.
- ● Upright flowers (e.g., Petunias, Marigolds, or Geraniums) – 4–6 plants for height and texture.
- ● Filler plants (e.g., Bacopa or Lobelia) – 2–3 plants for density.
- ● Drainage layer: Small pebbles, perlite, or broken pottery shards (1–2 inches deep) to prevent root rot.
- ● Garden shears or scissors: For trimming plants to fit the wheelbarrow.
- ● Watering can or hose with a gentle spray nozzle: For even hydration without disturbing the soil.
- ● Slow-release fertilizer: Granular or spike form (e.g., Osmocote) to nourish plants for 2–3 months.
- ● Decorative elements: Paint (for a rustic or colorful wheelbarrow), faux rocks, or solar-powered fairy lights for ambiance.
- ● Moss or ground cover: To fill gaps between plants and add a lush, natural look.
- ● Plant supports: Small stakes or wire mesh for trailing vines to climb.
- ● Wheelbarrow liner: A plastic bag or landscape fabric to protect the wheelbarrow from soil and roots.
- ● Mulch: Pine bark or coconut coir to retain moisture and suppress weeds.
Step-by-step guide for creating a wheelbarrow vertical flower garden
Transform that empty wheelbarrow into a lush, space-saving flower display with these simple steps.
🪴 Step 1: Prepare the Wheelbarrow for Planting
Start by cleaning the wheelbarrow thoroughly with warm, soapy water to remove any debris or old plant residue. A quick rinse with a 1:10 bleach-water solution (1 part bleach to 10 parts water) ensures no lingering pathogens. Let it dry completely in the sun before proceeding—this prevents mold and gives you a clean base for your flowers.
Line the bottom with landscape fabric to prevent soil from spilling through the gaps. Cut the fabric to fit snugly, leaving about 2 inches of extra material to tuck along the edges. This also helps with drainage while keeping your soil contained. If your wheelbarrow has drainage holes, add a 1-inch layer of small gravel or pebbles on top of the fabric to improve airflow at the base.
🌱 Step 2: Layer Soil and Add Drainage Material
Fill the wheelbarrow halfway with a lightweight, well-draining potting mix designed for containers. I like to mix in a handful of perlite or vermiculite to improve aeration—this prevents compaction and keeps roots healthy. Moisten the soil lightly with water until it feels like a damp sponge but doesn’t drip. Overwatering now will lead to soggy soil and root rot later.
Create small planting pockets by pressing your fingers into the soil to form shallow wells. Space them about 6 inches apart to give each plant room to grow. For trailing flowers like petunias or nasturtiums, place them near the edges so their vines can spill over dramatically. Add a slow-release fertilizer to the soil mix to give your flowers a nutrient boost without frequent feeding.
☀️ Step 3: Plant Flowers Strategically for Height and Spill
Start by planting tall flowers in the back of the wheelbarrow, like snapdragons or salvia, so they don’t get shaded by shorter varieties. These should go in the center or deeper sections. Next, add medium-height plants like marigolds or zinnias around them. Finally, fill the front and edges with trailing or bushy flowers like sweet alyssum or geraniums to create a cascading effect.
Water each plant gently after placing it in the soil to help settle the roots. Avoid burying the stems too deeply—plant at the same depth they were in their nursery pots. This ensures the crown stays above soil level, preventing rot. Once all plants are in place, give the entire wheelbarrow a thorough watering to encourage root establishment.
💧 Step 4: Maintain Water and Light for Thriving Blooms
Check the soil moisture daily during the first week, watering whenever the top inch feels dry to the touch. Wheelbarrows dry out faster than ground-level planters, so consistent moisture is key. Use a watering can with a narrow spout to target the soil directly without disturbing the plants. In hot weather, you may need to water twice daily—morning and late afternoon—to keep flowers hydrated.
Position your wheelbarrow in a spot that gets at least 6 hours of sunlight daily, ideally in the morning or late afternoon to avoid scorching delicate petals. If your space is shady, opt for shade-tolerant flowers like impatiens or fuchsias. Rotate the wheelbarrow every few days so all plants get even light exposure. This prevents leaning and ensures uniform growth.
Tips & tricks for perfect wheelbarrow vertical gardens
Here's what I've learned after transforming my own wheelbarrow into a thriving vertical garden—these tricks make all the difference between a struggling display and a showstopper.
Drainage is Everything: That 1-inch layer of gravel under the landscape fabric isn't just about drainage—it's about creating an oxygen-rich zone at the base. I've seen roots rot when this step gets skipped, especially in wheelbarrows with drainage holes. If your wheelbarrow lacks holes, add a second layer of fabric above the gravel to prevent soil from mixing with the stones. The goal is to mimic natural soil layers where roots can breathe.
Soil Science Matters: Don't just grab any potting mix—look for one labeled "container mix" with perlite or vermiculite already included. I've found that mixing in an extra handful of perlite (about 1/4 cup) per wheelbarrow prevents compaction and keeps moisture levels just right. The soil should crumble easily when squeezed—if it sticks together, add more perlite. This prevents the classic wheelbarrow soil crisis where roots suffocate from overpacking.
Light Strategy for Small Spaces: That 6-hour sunlight requirement is non-negotiable, but here's the secret: position your wheelbarrow to catch morning sun first. The cooler morning light prevents scorching while still giving your plants the energy boost they need. I rotate mine every 3 days to ensure even growth—this prevents the plants from leaning toward the light source, which creates that lopsided look we all want to avoid.
Watering Wisdom: The top inch test is your best friend, but here's the pro move: use a moisture meter for the first week. Wheelbarrows dry out faster than garden beds, and overwatering is just as deadly as underwatering. I've found that in hot weather, giving plants a light misting in the early evening helps maintain humidity without drowning the roots. This mimics natural dew cycles and keeps flowers blooming longer.
Pro Tips for Flowers In Wheelbarrow
- Here's what I've learned after transforming my own wheelbarrow into a thriving vertical garden—these tricks make all the difference between a struggling display and a showstopper.
- Drainage is Everything: That 1-inch layer of gravel under the landscape fabric isn't just about drainage—it's about creating an oxygen-rich zone at the base.
- Soil Science Matters: Don't just grab any potting mix—look for one labeled "container mix" with perlite or vermiculite already included.
Frequently asked questions
Got questions about creating a stunning flowers in wheelbarrow vertical garden? You’re not alone! Here are some of the most common queries—and their simple, practical answers—to help you get started confidently.
What types of flowers work best in a wheelbarrow garden?
Opt for compact, lightweight varieties like petunias, geraniums, marigolds, or trailing nasturtiums. Avoid heavy blooms (e.g., sunflowers) or vining plants (like morning glories), as they can tip the wheelbarrow or outgrow the space. Herbs like basil or thyme also thrive in this setup!
How often should I water flowers in a wheelbarrow?
Check soil moisture daily in hot weather—wheelbarrow gardens dry out fast due to their shallow depth. Water in the early morning to reduce evaporation, and use a self-watering tray or drip irrigation if you’re away often. Overwatering is worse than underwatering, so stick your finger 1 inch into the soil first!
Can I use a regular wheelbarrow, or do I need a special one?
A standard metal or plastic wheelbarrow works, but add these tweaks:
- Drill drainage holes in the bottom (if none exist).
- Line with a waterproof liner (like pond liner) to prevent rust or leaks.
- Use a lightweight model (avoid heavy-duty ones) for easy moving.
What if my flowers look wilted or unhealthy?
Wilting often signals overwatering, underwatering, or poor drainage. Troubleshoot with this quick checklist:
Yellow leaves? Likely overwatered—let soil dry slightly between waterings.
Brown edges? Could be underwatering or salt buildup (rinse soil occasionally).
Pests? Spray with neem oil or introduce ladybugs for natural control.
Rotate the wheelbarrow occasionally to ensure even sunlight exposure.Are there alternatives to a wheelbarrow for vertical gardening?
Try these space-saving swaps:
- Pallet gardens (upcycled wood pallets with fabric liners).
- Hanging gutters (DIY with PVC pipes or store-bought kits).
- Stacked crates (lashed together with bungee cords).
- Wall-mounted pockets (fabric or felt grow bags).
Wrapping up and next steps
Transforming a simple wheelbarrow into a stunning vertical garden isn’t just creative—it’s a game-changer for small spaces! With just a few materials and a little imagination, you’ve unlocked a world of greenery that’s functional, space-saving, and oh-so-charming.
Whether you’re a seasoned gardener or a beginner, this project proves that big ideas don’t need big yards—just a little ingenuity.
Ready to take it further? Experiment with different flowers, add hanging planters, or even turn it into a mobile garden you can move around your patio or balcony. Your green thumb (and your space) will thank you! 🌸✨